
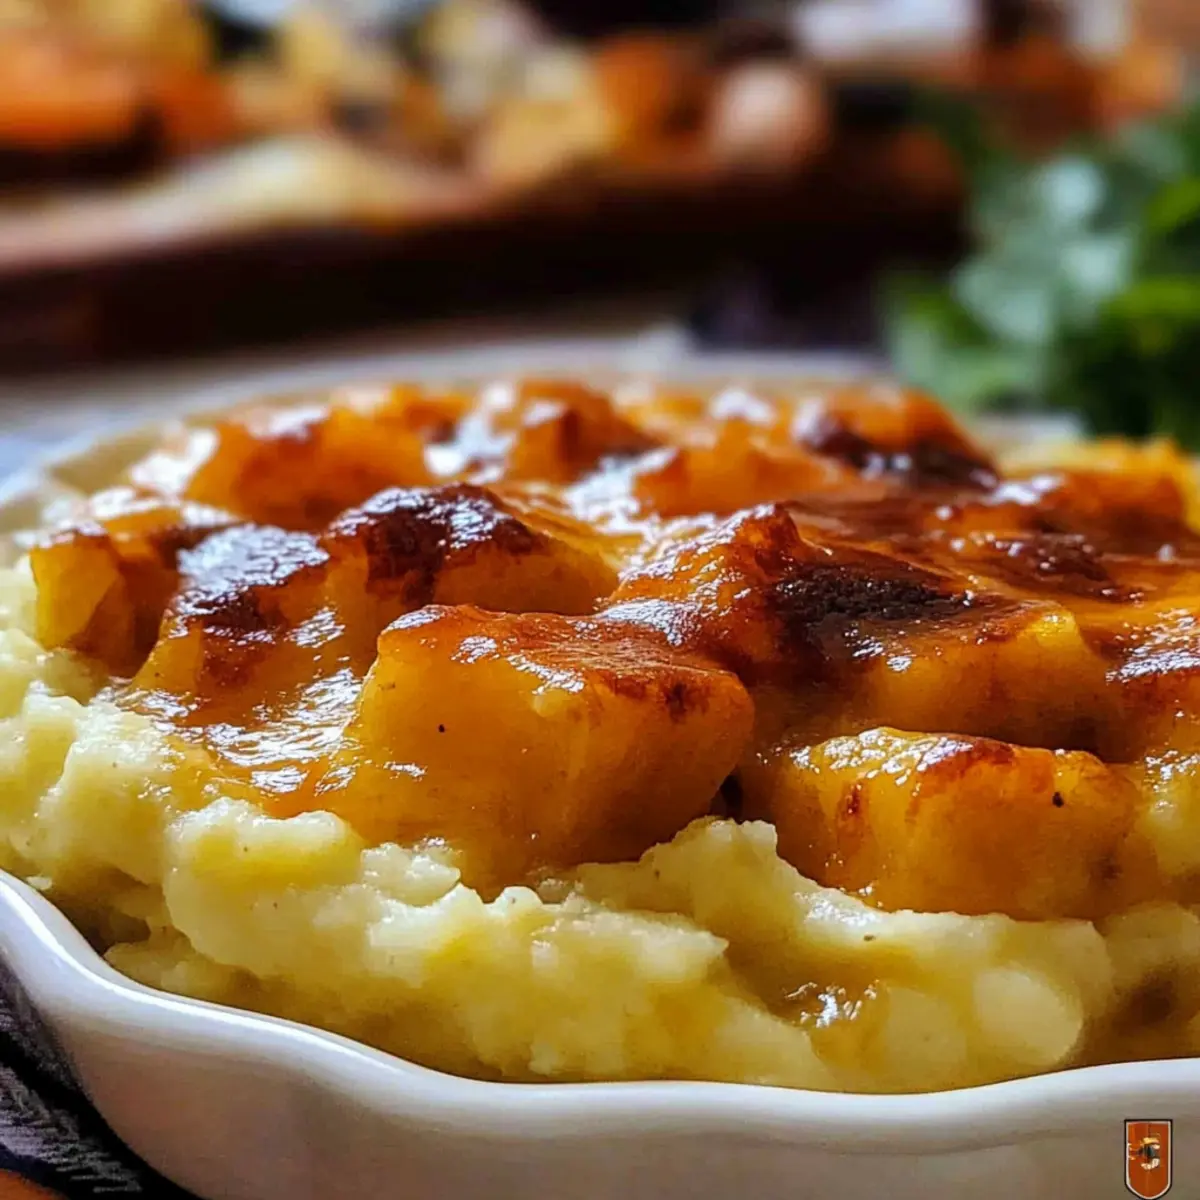
As I stood in the kitchen, contemplating dinner on a chilly evening, I stumbled upon an old family favorite—Scottish Rumbledethumps. This humble casserole combines the sweet earthiness of mashed turnips with creamy, comforting potatoes, all crowned with crispy cabbage and melty cheddar. What makes this dish even more appealing? It’s the perfect way to use up those leftover vegetables cluttering your fridge. Plus, it’s incredibly easy to prepare, making it a weeknight winner for my busy family. With every bite, you’ll feel the warmth of home-cooked comfort food that satisfies both the belly and the soul. Ready to transform your leftovers into something delightful? Let’s dive into the comforting world of rumbledethumps!
Why Choose Scottish Rumbledethumps?
Comforting, Hearty Dish: This casserole is the epitome of cozy comfort food, perfect for chilly nights. Nutritious and Wholesome: Packed with root vegetables, it’s a delightful way to sneak in extra fiber and nutrients. Easy to Customize: Mix in your favorite leftover veggies for a unique twist every time. Time-Saving Winner: Quick to prepare and bake, it’s ideal for a busy weeknight meal. Family-Friendly Appeal: Even picky eaters will love this cheesy, savory dish! Try serving it alongside a hearty stew or some crusty bread for a complete meal.
Scottish Rumbledethumps Ingredients
• The perfect blend of wholesome ingredients awaits!
For the Casserole
- Boiled and Mashed Russet Potatoes – These provide a creamy base and sturdy structure for the dish; plan for about 3 medium potatoes.
- Boiled and Mashed Turnips – Adding a sweet, earthy flavor, you’ll need about 2 medium turnips; feel free to swap for parsnips or carrots if desired.
- Unsalted Butter – Enhances richness and flavor; use a total of 3 oz, divided for best results.
- Green Cabbage – Offering a delightful crunch, about 9 oz thinly sliced (approximately half a head) will do; you can try kale or other greens for variety.
- Sharp Cheddar Cheese – A great topping for savory goodness, add about 1 oz grated (¼ cup); substitute with your favorite cheese for a change!
- Kosher Salt – A key flavor enhancer, use ½ teaspoon to elevate the dish.
- Black Pepper – Just ¼ teaspoon adds a nice touch of seasoning for balanced flavor.
For Serving
- Crusty Bread – Perfect for soaking up any sauce left on your plate; a great addition to complete your meal!
- Fried Egg (optional) – Topping this casserole with a fried egg turns it into a delightful brunch option.
Scottish Rumbledethumps is not just a meal—it’s a cherished tradition that sparks feelings of home and warmth!
Step‑by‑Step Instructions for Scottish Rumbledethumps
Step 1: Preheat and Prepare
Begin by preheating your oven to 350°F (175°C). While the oven warms up, generously grease a 9×9 inch baking dish with about 1 oz of unsalted butter. This will help the rumbledethumps develop a beautifully golden crust without sticking to the dish.
Step 2: Sauté the Cabbage
In a skillet set over medium heat, melt 2 oz of butter. Once melted, add the thinly sliced green cabbage and sauté for approximately 5 minutes. Stir occasionally until the cabbage softens and turns a vibrant green, providing a lovely crunch in your Scottish rumbledethumps.
Step 3: Combine the Mash
In a large mixing bowl, combine your boiled and mashed russet potatoes and mashed turnips. Add the sautéed cabbage, remaining 1 oz of butter, kosher salt, and black pepper to the mix. Mash everything well until fully combined and smooth, ensuring the flavors meld seamlessly for a comforting casserole.
Step 4: Transfer to Baking Dish
Spread the potato and turnip mixture evenly into the prepared baking dish. Be sure to press it down slightly to eliminate air pockets — this helps create a hearty texture in the Scottish rumbledethumps.
Step 5: Add Cheese and Bake
Sprinkle the grated sharp cheddar cheese generously over the top of the casserole. Cover the dish with aluminum foil and place it in the preheated oven to bake for 30 minutes. This will allow the flavors to blend beautifully before getting that irresistible cheesy crust.
Step 6: Final Bake and Serve
After 30 minutes, carefully remove the foil and continue baking for an additional 5 minutes. Keep an eye on it for the last few minutes until the top becomes lightly browned and bubbly. Let the rumbledethumps sit for about 5 minutes before serving to enhance the flavors and texture.
What to Serve with Scottish Rumbledethumps?
To create a perfectly balanced meal that elevates your comforting rumbledethumps, consider these delightful pairings.
-
Hearty Beef Stew: A rich, flavorful stew adds depth and heartiness, complementing the earthy flavors of the casserole beautifully.
-
Crusty Multigrain Bread: This rustic bread is ideal for soaking up any delicious juices from the rumbledethumps, making each bite even more satisfying.
-
Seasonal Roasted Vegetables: A colorful array of roasted seasonal vegetables enhances the dish’s freshness and adds a lovely textural contrast.
-
Simple Green Salad: A crisp salad with a light vinaigrette balances the rich, creamy casserole, providing a refreshing finish to your meal.
-
Creamy Coleslaw: Adding a tangy coleslaw creates a crunchy contrast that lightens up the heaviness of the rumbledethumps.
-
Fried Egg (Optional): Topping your casserole with a perfectly fried egg brings a delightful richness that takes this comfort food to the next level; perfect for brunch!
-
Warm Apple Crisp: For a sweet ending, serve a warm apple crisp that captures the essence of home and complements the savory casserole with its warmth.
-
Pint of Lager: A light lager adds a refreshing touch that cuts through the richness, making it a delightful drink choice to round off your dinner.
Storage Tips for Scottish Rumbledethumps
Room Temperature: Store any remaining Scottish rumbledethumps at room temperature for no more than 2 hours after cooking, to prevent foodborne illness.
Fridge: Keep leftovers in an airtight container in the refrigerator for up to 3 days. This ensures freshness and helps maintain the dish’s delightful flavors.
Freezer: If you want to save it for later, freeze portions of the rumbledethumps in airtight freezer bags or containers for up to 2 months. Thaw in the fridge before reheating.
Reheating: For best results, reheat the rumbledethumps in the oven until warmed through, about 15-20 minutes at 350°F (175°C). This method keeps the top crispy while warming the creamy filling.
Expert Tips for Scottish Rumbledethumps
-
Perfectly Mashed: Ensure your potatoes and turnips are well-mashed to create a creamy texture that binds everything together beautifully. Avoid lumps for a smoother casserole!
-
Customize the Cheese: Feel free to adjust the cheese amount to suit your taste—more cheese for cheesy goodness or skip it entirely for a lighter meal.
-
Watch the Baking Time: Keep an eye on the casserole towards the end of baking to prevent the top from becoming overly browned. A perfect golden crust is what you want for your Scottish rumbledethumps!
-
Experiment with Veggies: Don’t hesitate to mix in leftover veggies like carrots or sweet potatoes for added flavor and nutrients. Each batch can be a delightful surprise!
-
Rest Before Serving: Allow the dish to sit for 5 minutes after baking; this helps the flavors settle and makes it easier to serve. Your family will appreciate the improved taste!
Scottish Rumbledethumps Variations
Feel free to explore these creative spins on the classic Scottish rumbledethumps to make it your own!
-
Dairy-Free: Use olive oil instead of butter and cashew or nutritional yeast for a cheesy flavor without dairy.
-
Vegetable Medley: Swap in your favorite leftover vegetables like carrots or zucchini to add different textures and colors while minimizing waste.
-
Spicy Kick: Toss in a pinch of cayenne pepper or crushed red pepper flakes for those who enjoy a touch of heat, brightening each bite.
-
Herb-Infused: Add fresh herbs like rosemary or thyme to the mash for an aromatic twist that elevates the flavor profile. Just a sprinkle can transport your dish!
-
Meaty Addition: For meat lovers, mix in some cooked bacon or crumbled sausage with the mashed vegetables for an earthy, savory depth.
-
Cheese Variety: Experiment with different cheeses such as gouda or mozzarella for a variety of delicious flavors. Each cheese brings a unique character to the dish!
-
Smoky Flavor: Incorporate smoked paprika into the mash for an extra layer of rich flavor that will leave your taste buds dancing.
-
Gluten-Free Option: Ensure that any cheese or toppings are certified gluten-free to enjoy this casserole without worry, delighting everyone at the table with a safe option.
With these variations, you can tailor the dish to fit your family’s tastes or dietary needs, making each preparation of Scottish rumbledethumps a delightful adventure! If you’re looking for more inspiration, you could also explore hearty vegetarian dishes or check out ideas for using leftovers in creative ways. Happy cooking!
Make Ahead Options
Scottish Rumbledethumps is perfect for meal prep enthusiasts! You can prepare the mashed potatoes and turnips mixture up to 24 hours in advance, storing it in an airtight container in the refrigerator to maintain freshness. Additionally, sauté the cabbage ahead of time and store it separately to keep its crunch. When you’re ready to enjoy this comforting dish, simply layer the prepared mash in the baking dish, add the sautéed cabbage and cheese, and bake straight from the fridge. This allows for a quick and delicious meal on busy weeknights, ensuring your rumbledethumps remain just as delightful as if you made them fresh!
Scottish Rumbledethumps Recipe FAQs
How do I choose the right turnips for my rumbledethumps?
Absolutely! When selecting turnips, look for firm ones with smooth skin and without dark spots. They should feel heavy for their size; about 2 medium turnips should work perfectly. Avoid any turnips that are soft or have blemishes, as these can affect the flavor and texture of your casserole.
Can I store leftover rumbledethumps, and how long will it last?
Very much so! You can store your leftover Scottish rumbledethumps in an airtight container in the refrigerator for up to 3 days. Just make sure to allow it to cool to room temperature before sealing to prevent condensation.
What’s the best way to freeze rumbledethumps?
I often make large batches and freeze them! To freeze, first let the rumbledethumps cool completely, then portion it out into airtight freezer bags or containers. Make sure to label them with the date; they’ll stay good in the freezer for up to 2 months. When you’re ready to enjoy, thaw in the fridge overnight and reheat in the oven at 350°F (175°C) for about 15-20 minutes.
What if my rumbledethumps are too watery or dry?
Don’t worry, I’ve been there too! If your casserole turns out too watery, it could be due to extra moisture in the vegetables. To fix this, you can add a bit more mashed potato or a handful of breadcrumbs to absorb the excess. On the flip side, if it’s too dry, try incorporating a splash of milk or cream to bring back some moisture.
Can I use different vegetables in my rumbledethumps?
Absolutely! Rumbledethumps is quite forgiving and a wonderful way to repurpose leftovers. You can mix in any root vegetables like sweet potatoes or carrots. Just ensure that they are cooked and mashed to maintain the casserole’s creamy texture. This flexibility makes it such a fun dish to experiment with!
Is Scottish rumbledethumps safe for gluten-sensitive diets?
Yes! The core ingredients of rumbledethumps are naturally gluten-free. However, when adding cheese, make sure to select varieties that are certified gluten-free. This way, you can enjoy this comforting dish without any worries!
Scottish Rumbledethumps: Cozy Casserole to Warm Your Soul
Ingredients
Equipment
Method
- Preheat your oven to 350°F (175°C) and grease the baking dish with about 1 oz of unsalted butter.
- Melt 2 oz of butter in a skillet over medium heat and sauté the cabbage for approximately 5 minutes until soft.
- In a large mixing bowl, mix the boiled and mashed potatoes with turnips, sautéed cabbage, remaining butter, salt, and pepper. Mash until smooth.
- Spread the mixture into the prepared baking dish, pressing down slightly to eliminate air pockets.
- Sprinkle the grated cheddar cheese on top, cover with aluminum foil, and bake for 30 minutes.
- Remove the foil and bake for an additional 5 minutes until the top is lightly browned and bubbly. Let sit for 5 minutes before serving.
Leave a Reply