
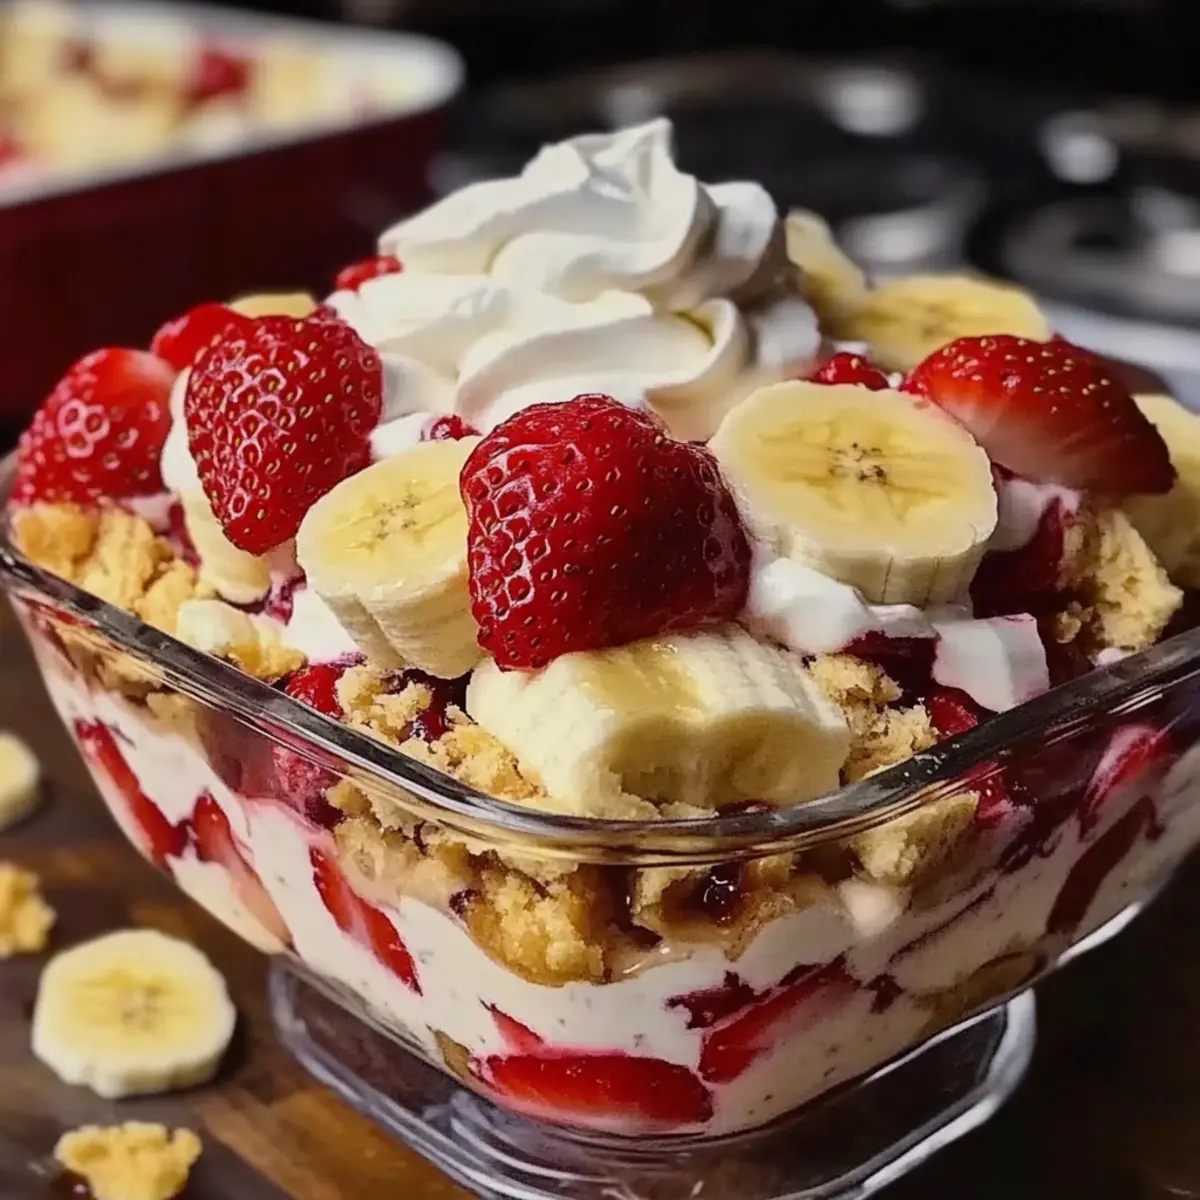
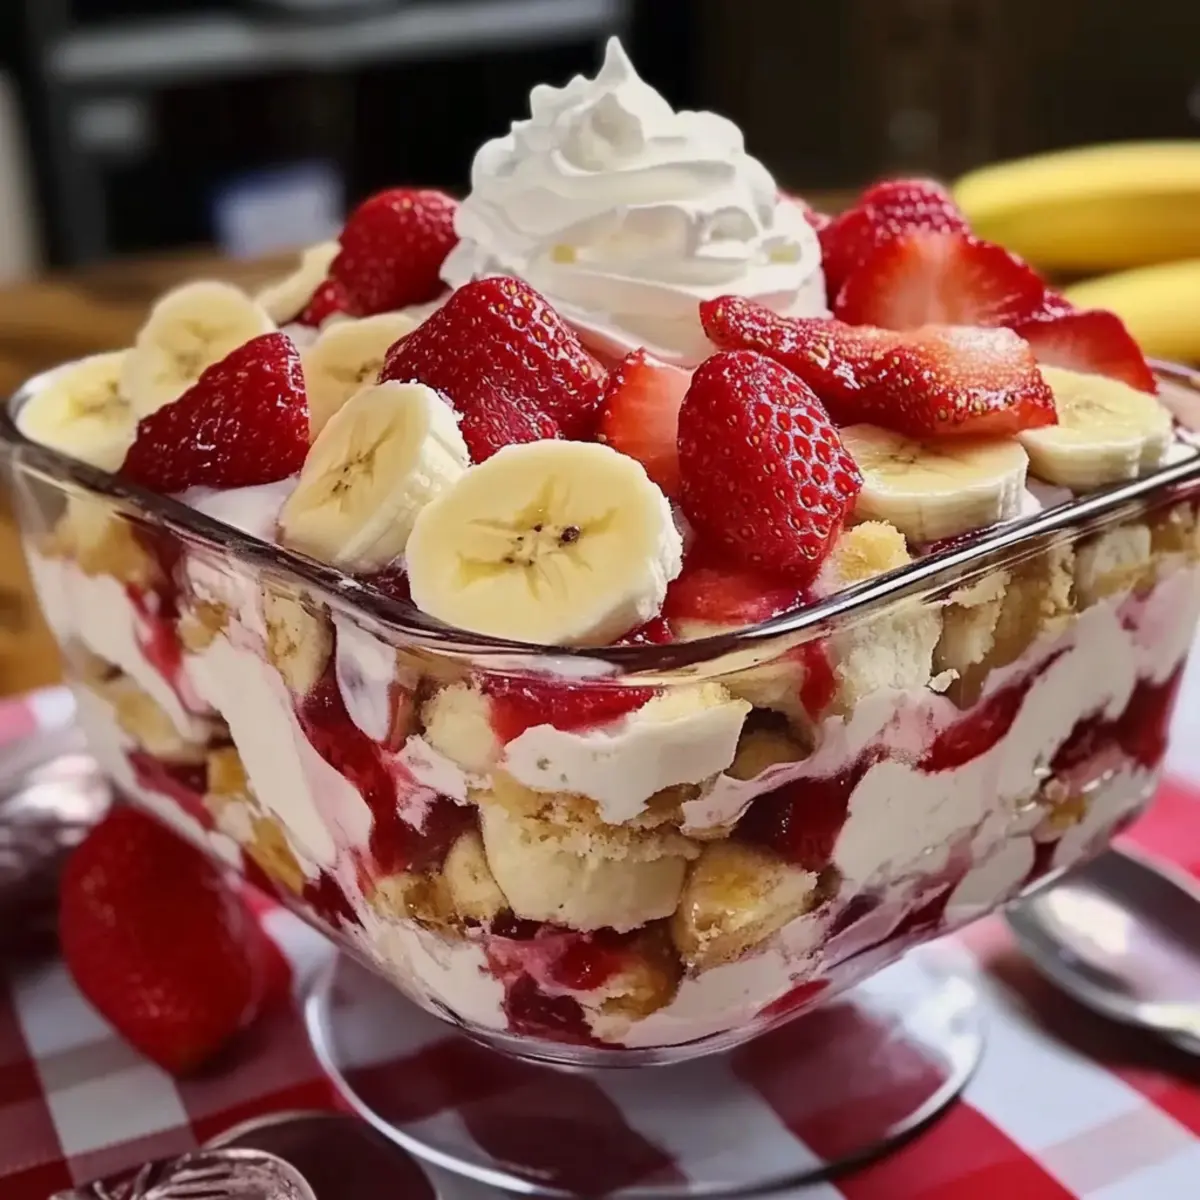
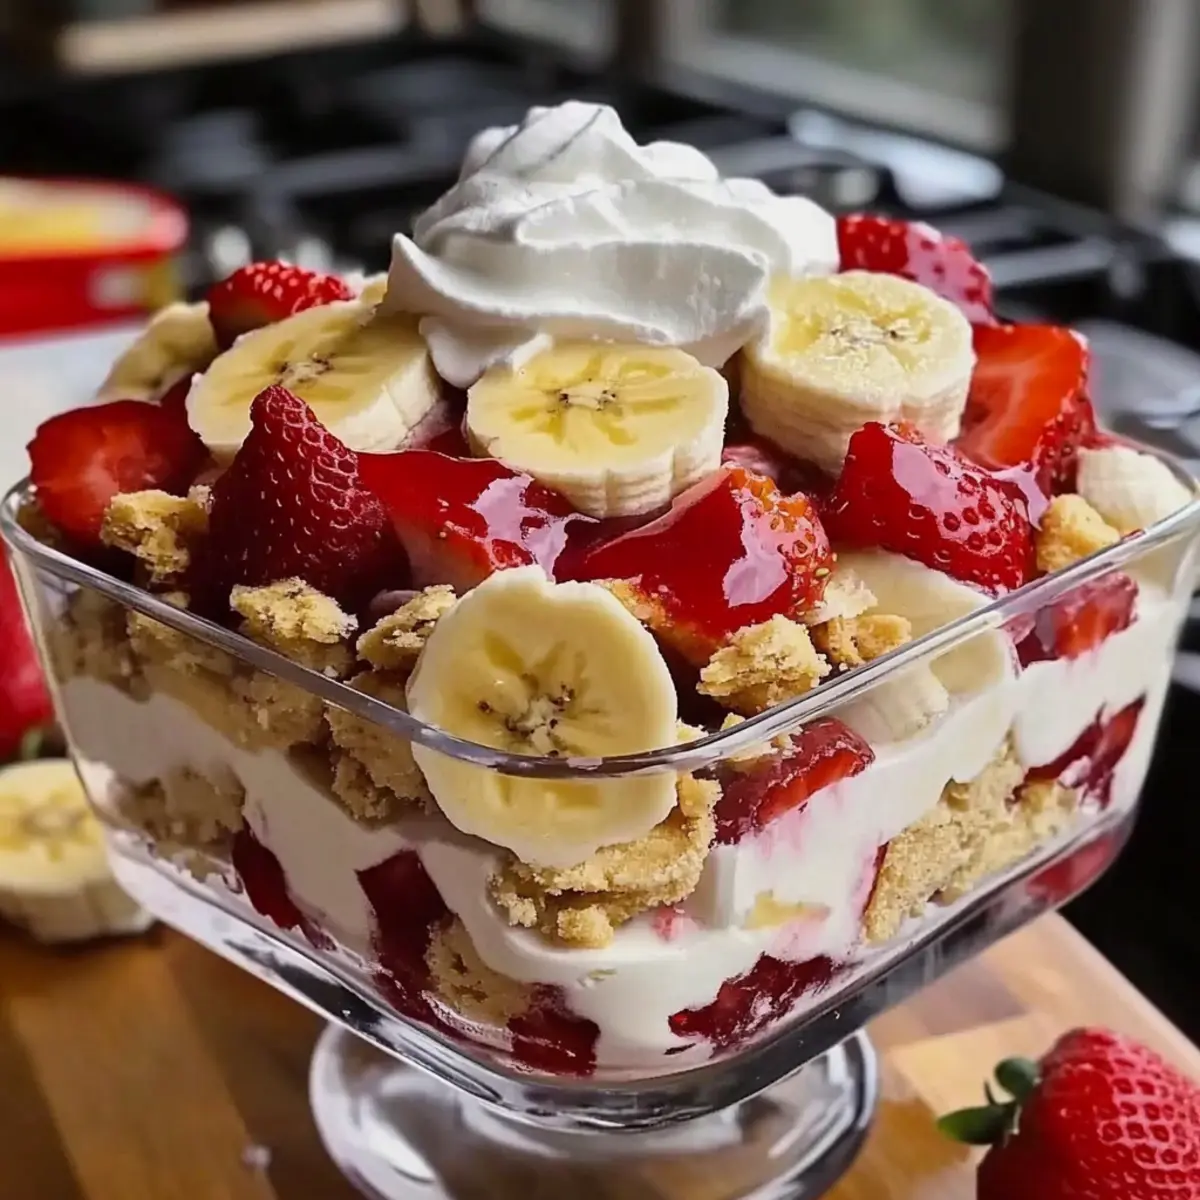
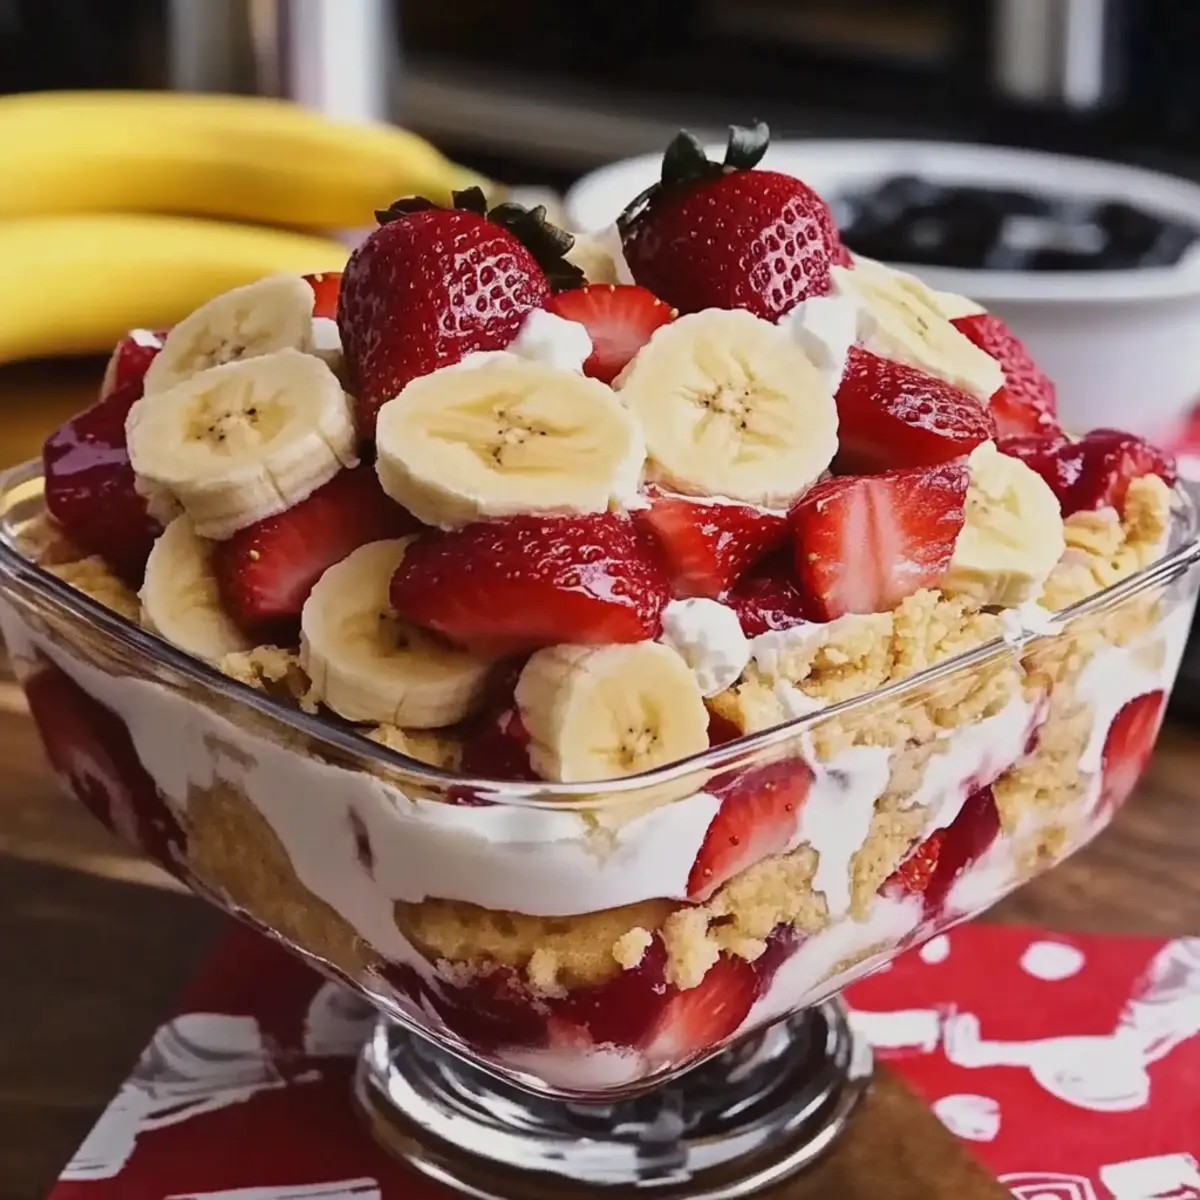
Amid the hustle of everyday life, the thought of creating a delightful dessert can feel lofty. Enter the No-Bake Strawberry Banana Pudding Dream, a dessert that bridges simplicity and indulgence in just 20 minutes of prep! This luscious treat layers velvety pudding with fresh, juicy strawberries and sweet bananas, making it not only a visual masterpiece but also a guaranteed crowd-pleaser. The best part? It’s perfect for busy weekends or last-minute gatherings, and you can make it ahead of time for effortless enjoyment. Whether you’re hosting friends or craving a comforting sweet fix, this dessert promises to satisfy your taste buds without any fuss. Curious how to make this creamy delight a reality? Let’s dive into this easy recipe that’s sure to become a new favorite!
Why is Strawberry Banana Pudding Dream a Must-Try?
Irresistible Flavor: The harmonious blend of fresh strawberries and bananas makes every bite a fruity explosion.
No-Bake Convenience: Save time and effort with this quick, no-bake recipe—perfect for busy weeknights!
Versatile Layers: Mix and match with your favorite fruits, or try variations with flavored pudding like banana or cheesecake for a delicious twist.
Crowd-Pleasing Treat: Ideal for family gatherings or casual get-togethers, this dessert is sure to impress with its vibrant colors and rich taste.
Make-Ahead Wonder: Prepare this pudding dream a day in advance to allow the flavors to meld beautifully, resulting in an even more satisfying treat!
If you’re looking to whip up another fruity favorite, consider trying the delightful Banana Chamomile Tea. You won’t regret it!
Strawberry Banana Pudding Dream Ingredients
For the Pudding Base
- Cream Cheese – Provides richness and creaminess to the pudding. Substitute with Greek yogurt or dairy-free cream cheese for a lighter version.
- Sweetened Condensed Milk – Adds sweetness and a thick texture to the mixture.
- French Vanilla Pudding Mix – Acts as a thickening agent and adds flavor.
- Milk – Combines with the pudding mix to create a creamy texture.
For the Layers
- Vanilla Wafers – Forms the base and adds a crunchy layer. Can be substituted with gluten-free wafers for a gluten-free option.
- Bananas – Fresh slices add natural sweetness and texture. Opt for ripe bananas for the best flavor.
- Strawberries – Provides a vibrant color and tangy flavor. Frozen strawberries can be used if thawed and drained properly.
For the Topping
- Whipped Topping – Lends a light, fluffy finish.
Step-by-Step Instructions for Strawberry Banana Pudding Dream
Step 1: Prepare the Pudding Base
In a large mixing bowl, beat together 8 ounces of softened cream cheese and 1 can of sweetened condensed milk using an electric mixer on medium speed. Blend until the mixture is smooth and creamy, about 2-3 minutes, ensuring there are no lumps. This rich pudding base forms the delightful core of your Strawberry Banana Pudding Dream.
Step 2: Add Pudding Mix and Milk
Next, sprinkle in 1 box of French Vanilla pudding mix while slowly pouring in 2 cups of cold milk. Stir gently with a spatula to combine everything until smooth and thickened, which should take about 2 minutes. You’ll know it’s ready when it’s uniformly creamy and begins to set slightly.
Step 3: Layer the Vanilla Wafers
In a large serving dish or trifle bowl, start by creating the first layer with a generous base of vanilla wafers. Arrange them evenly along the bottom, creating a sturdy foundation. This adds a delightful crunch to your Strawberry Banana Pudding Dream and will soak up the flavors beautifully.
Step 4: Add Fresh Fruit
Now, layer your fresh ingredients! Start by adding sliced bananas over the vanilla wafers, followed by a layer of sliced strawberries. Spread the fruit evenly so each spoonful of the Strawberry Banana Pudding Dream will delight your senses with both texture and natural sweetness.
Step 5: Pour Half of the Pudding Mixture
Carefully pour half of your creamy pudding mixture over the fruit and wafers, using a spatula to spread it evenly. Make sure to cover all the layers, allowing the pudding to seep into the delicious fruits and cookies below, enhancing the flavors and ensuring every bite is a luxurious experience.
Step 6: Repeat the Layering Process
Repeat the layering process by adding another round of vanilla wafers, followed by more sliced bananas and strawberries. Finish by pouring the remaining pudding mixture over the top, smoothing the surface with your spatula. This second layer builds a beautiful height and showcases the colorful ingredients within your Strawberry Banana Pudding Dream.
Step 7: Top with Whipped Topping
Once all layers are in place, gently spread whipped topping over the final pudding layer, creating a fluffy and inviting finish. Use a spatula to make it level and smooth, adding an airy touch that complements the richness beneath, and makes your dessert visually appealing.
Step 8: Chill to Perfection
Finally, cover your Strawberry Banana Pudding Dream with plastic wrap and refrigerate it for at least 4 hours, or ideally overnight. This chill time allows the flavors to meld and ensures the pudding sets properly, resulting in a luscious, creamy dessert that’s ready to impress when you serve it!
Strawberry Banana Pudding Dream Variations
Feel free to get creative and tailor your Strawberry Banana Pudding Dream to your tastes and dietary needs!
- Berry Swap: Replace strawberries with blueberries or raspberries for a fresh twist that’ll brighten up the flavors while adding antioxidant goodness.
- Flavored Pudding: Use banana or cheesecake pudding mix instead of French vanilla to elevate the flavor profile and surprise your guests with something new.
- Nutty Crunch: Add a layer of crushed walnuts or pecans for delightful crunch and a nutty flavor that perfectly complements the creaminess of the pudding.
- Chocolate Twist: Drizzle a layer of chocolate syrup or sprinkle chocolate shavings between the layers for a decadent touch that chocolate lovers will adore.
- Coconut Cream: Swap in coconut whipped topping for a tropical twist; it adds a subtle sweetness and pairs beautifully with the fruity layers.
- Dairy-Free Delight: For a dairy-free version, use coconut cream instead of whipped topping, and opt for dairy-free cream cheese and a dairy-free condensed milk alternative.
- Heat It Up: Add a pinch of cinnamon or nutmeg to the pudding base for warmth and spice that elevates the comfort factor of this classic dessert.
If you’re searching for more delightful recipes, consider the refreshing Blackberry Pistachio Dream for a berry-licious treat! Enjoy experimenting!
Make Ahead Options
These Strawberry Banana Pudding Dreams are perfect for busy cooks looking to save time on dessert prep! You can prepare the pudding base (cream cheese, sweetened condensed milk, pudding mix, and milk) up to 24 hours in advance and store it in the refrigerator. Additionally, you can slice the bananas and strawberries a few hours before serving to keep them fresh—just toss them in a little lemon juice to prevent browning. When ready to assemble, simply layer the vanilla wafers, fruit, and pudding mixture, top with whipped topping, and refrigerate for at least 4 hours before serving. This way, you’ll have a stunning dessert that’s just as delicious, with minimal last-minute effort!
How to Store and Freeze Strawberry Banana Pudding Dream
- Fridge: Store leftover Strawberry Banana Pudding Dream in an airtight container for up to 3 days. Make sure to cover it well to maintain its delightful freshness and creamy texture.
- Freezer: Although not recommended for freezing, if necessary, you can freeze the pudding for up to 1 month. Note that the texture may change upon thawing, so it’s best enjoyed fresh.
- Reheating: There’s no need to reheat this no-bake dessert, but if it’s been chilled too long, let it sit at room temperature for about 30 minutes before serving to bring back its creamy texture.
- Serving Tip: When ready to serve from the fridge, enjoy it cold for the best experience. You can also add extra fresh fruit or whipped topping for a beautiful presentation!
What to Serve with Strawberry Banana Pudding Dream
Imagine a delightful gathering with loved ones, where flavors dance on the palate and laughter fills the air—it’s all about curating the perfect meal experience.
- Grilled Chicken Skewers: The smoky, charred flavor of grilled chicken pairs beautifully with the creamy sweetness of the pudding, creating a balanced meal.
- Garden Salad: Crisp greens and a zesty vinaigrette add a refreshing crunch that complements the rich pudding beautifully.
- Chocolate-Dipped Strawberries: These decadent treats echo the dessert’s strawberries while adding a touch of indulgence that every gathering craves.
- Lemonade or Iced Tea: Refreshing and tangy, these drinks cut through the richness of the pudding and provide a cool contrast, enhancing the joyful experience.
- Cheese Platter: A selection of creamy cheeses with crackers adds a savory note that enriches the overall flavor profile of your meal.
- Vanilla Ice Cream: For an extra creamy touch, serve alongside a scoop of vanilla ice cream; it mirrors the dessert’s flavors and offers delightful contrast.
- Brownies or Blondies: These chewy treats provide a richer texture and add chocolatey goodness, making each bite of pudding even more enjoyable.
- Fruit Tart: Bright, colorful, and fruity, a fruit tart echoes the pudding’s fresh ingredients, creating a harmonious finish to your meal.
- Sparkling Water: Keep your guests refreshed with a fizzy twist; the bubbles elevate the dining experience while perfectly balancing the pudding’s sweetness.
Expert Tips for Strawberry Banana Pudding Dream
-
Choose Ripe Fruits: Use perfectly ripe bananas and fresh strawberries for maximum flavor and sweetness; undercooked fruits can lead to disappointment.
-
Mix Properly: When combining the pudding base, ensure there are no lumps by mixing thoroughly. A smooth base will elevate the creamy texture of your Strawberry Banana Pudding Dream.
-
Layer with Care: Distribute the layers evenly; this ensures a bite filled with balanced flavors and textures. Uneven layers can lead to a mismatched taste experience.
-
Chill Well: Allow the dessert to chill for at least 4 hours, preferably overnight, to ensure flavors meld beautifully and the pudding thicken correctly.
-
Storage Tips: If you have leftovers, cover tightly and store in the fridge for up to three days. This will maintain freshness and texture.
Strawberry Banana Pudding Dream Recipe FAQs
What should I look for when selecting strawberries and bananas?
Absolutely! For the best flavor, choose ripe bananas that are slightly speckled to ensure natural sweetness and a lovely texture. When selecting strawberries, look for ones that are bright red, firm, and plump, with a sweet aroma. Avoid any that show dark spots or signs of mold.
How long can I store leftover Strawberry Banana Pudding Dream?
You can store leftover Strawberry Banana Pudding Dream in an airtight container in the fridge for up to 3 days. To maintain its delightful freshness and creamy texture, make sure to cover it well. Enjoy them chilled for the best experience!
Can I freeze the Strawberry Banana Pudding Dream?
While it’s not recommended to freeze this dessert due to potential changes in texture, you can freeze it for up to 1 month if necessary. First, cover it tightly in plastic wrap and then in aluminum foil. When ready to enjoy, thaw it in the refrigerator overnight. Just be aware that it may become slightly grainy after thawing, so it’s best when enjoyed fresh.
What should I do if the pudding mixture is lumpy?
Very! If your pudding mixture turns out lumpy, don’t worry! Simply beat it again with an electric mixer or a whisk for another few minutes until it smooths out. Make sure to mix it thoroughly when adding the pudding mix and milk to prevent lumps from forming in the first place.
Is this recipe suitable for people with dietary restrictions?
Certainly! The Strawberry Banana Pudding Dream can be easily tailored to dietary needs. You can substitute cream cheese with Greek yogurt or dairy-free cream cheese for a lighter version. For a gluten-free option, simply swap vanilla wafers with gluten-free wafers. Always check that the products you choose meet necessary allergy considerations.
Can I use frozen strawberries in this recipe?
Absolutely! If using frozen strawberries, ensure they are well-thawed and drained to prevent excess moisture from making the layers soggy. It’s best to lay them flat to thaw and pat them dry before incorporating them into your Strawberry Banana Pudding Dream. This way, you can enjoy the vibrant color and flavor even off-season!
Strawberry Banana Pudding Dream: A Blissful No-Bake Treat
Ingredients
Equipment
Method
- In a large mixing bowl, beat together 8 ounces of softened cream cheese and 1 can of sweetened condensed milk using an electric mixer on medium speed for 2-3 minutes until smooth.
- Sprinkle in 1 box of French vanilla pudding mix and slowly pour in 2 cups of cold milk. Stir gently to combine until smooth and thickened, about 2 minutes.
- Create the first layer with a generous base of vanilla wafers in a large serving dish or trifle bowl.
- Layer sliced bananas over the wafers, followed by a layer of sliced strawberries, spreading the fruit evenly.
- Pour half of the pudding mixture over the fruit and wafers, ensuring all layers are covered.
- Repeat the layering with another round of vanilla wafers, bananas, and strawberries, then pour the remaining pudding mixture on top.
- Spread whipped topping over the final pudding layer to create a fluffy finish.
- Cover with plastic wrap and refrigerate for at least 4 hours, preferably overnight, to allow flavors to meld and the pudding to set.
Leave a Reply