
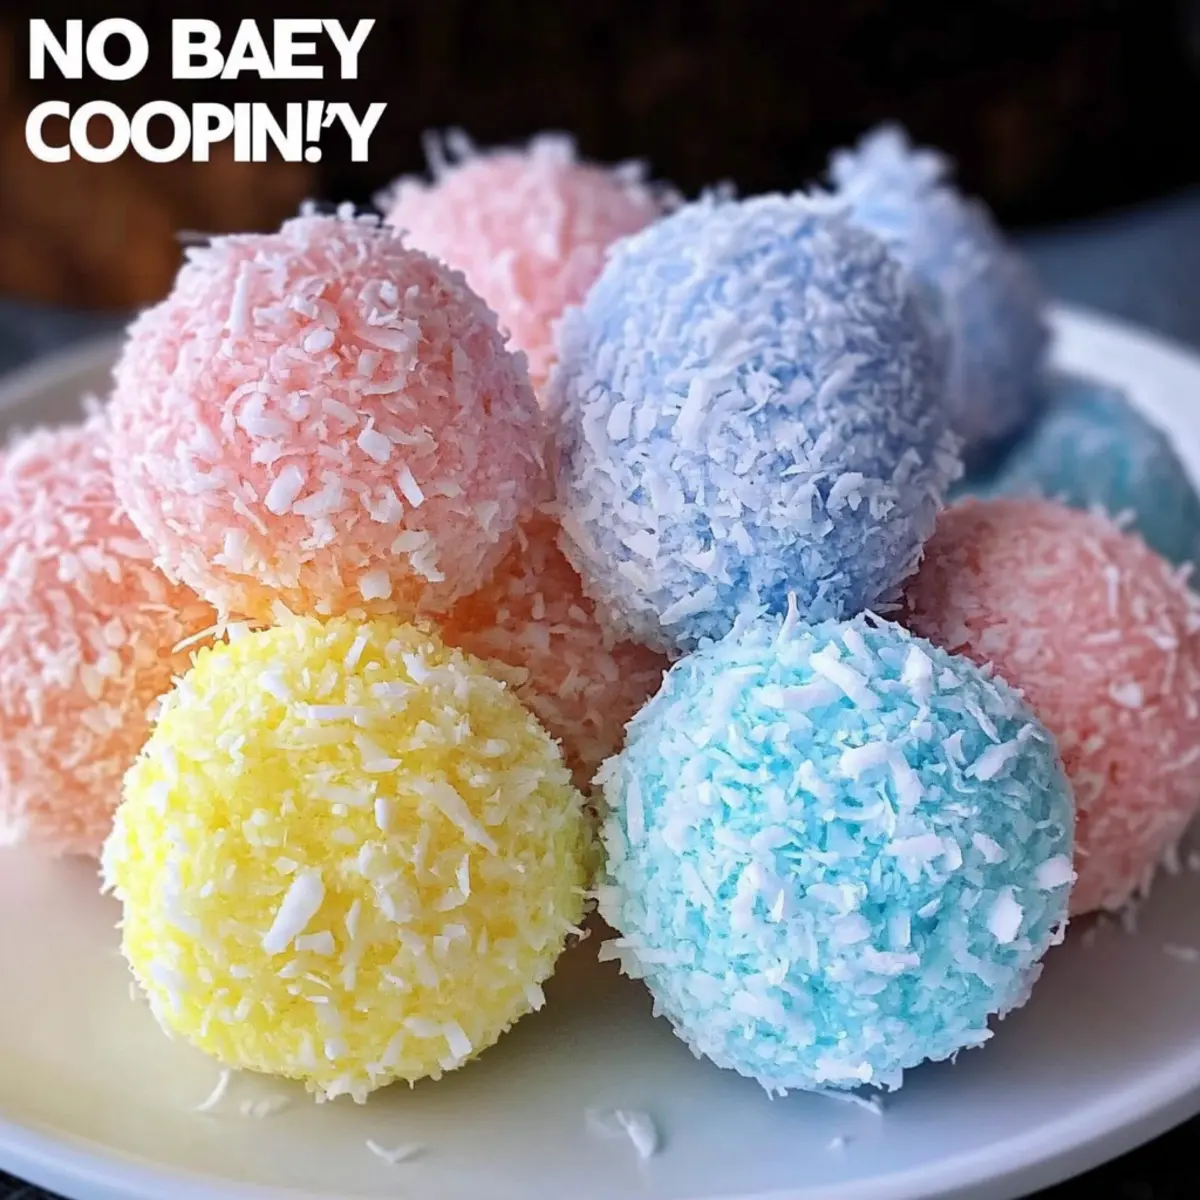
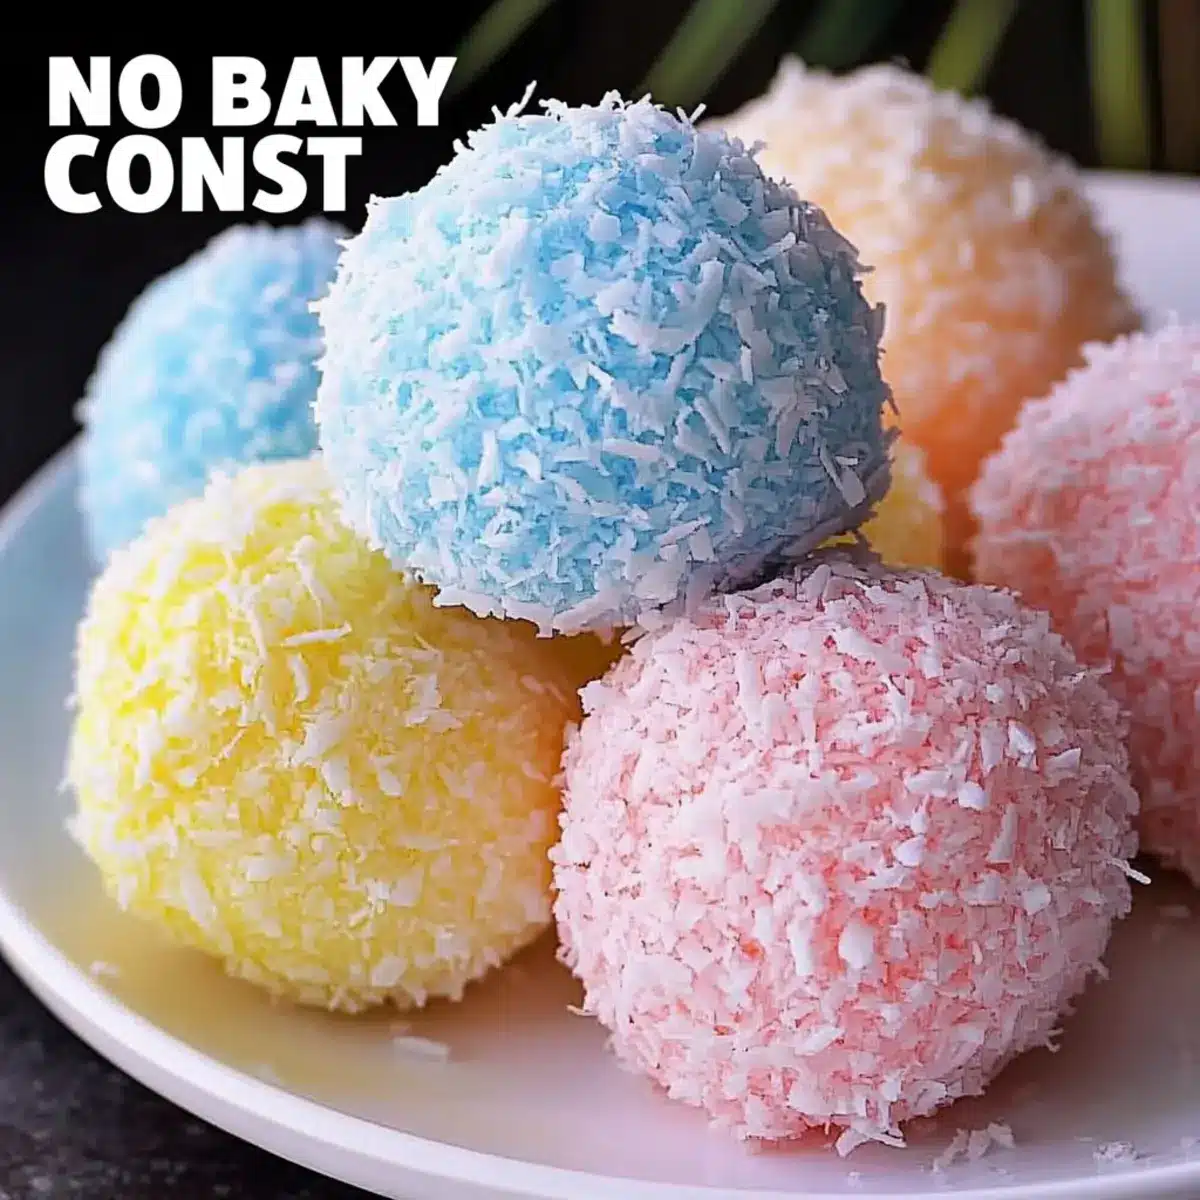
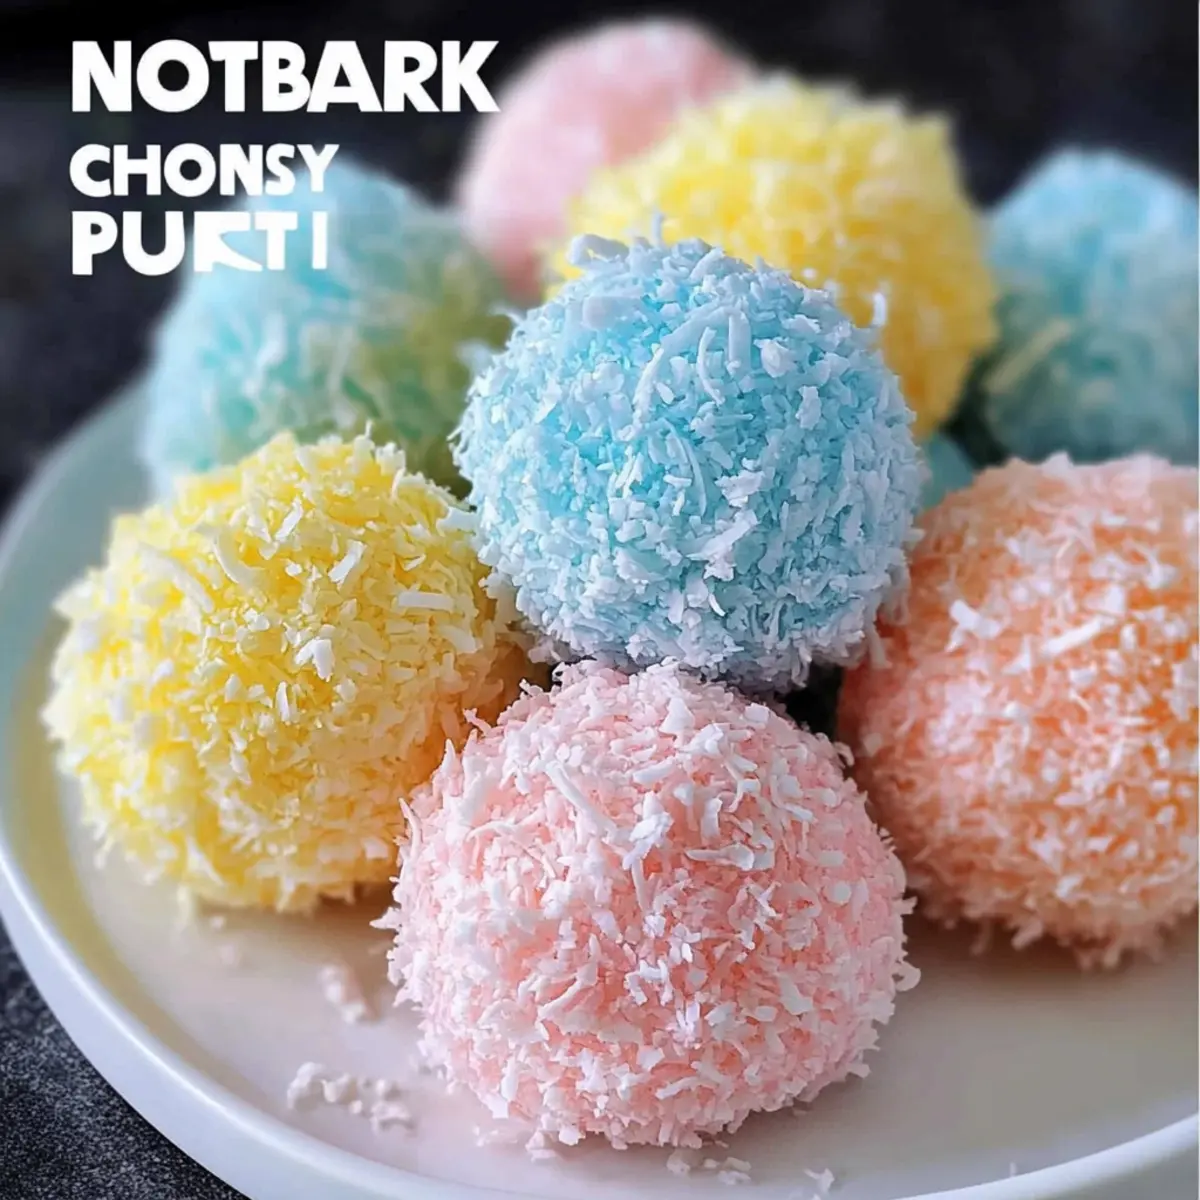
As I stood in my kitchen, the scent of sweetened coconut wafting through the air, I couldn’t help but smile at the rainbow of colors waiting to transform into delightful No-Bake Easter Bunny Coconut Tails. These adorable treats are not just easy to whip up; they’re a fantastic way to get the kids involved in the kitchen! With a simple recipe that requires no baking and makes a fun family activity out of dyeing coconut in pastel shades, they’re the perfect addition to your Easter dessert table. Plus, you can prepare these scrumptious bites ahead of time, leaving you stress-free to enjoy the festivities. Are you ready to create some magic with coconut?
Why Are Easter Bunny Coconut Tails So Fun?
No-Bake Delight: Skip the oven! These treats allow for instant gratification and are perfect for those warm Easter days.
Kid-Friendly Activity: Involve the little ones! The process of dyeing coconut in playful colors transforms baking into a creative art project.
Stress-Free Preparation: Make ahead of time and store them in the fridge, freeing you up for celebrations and family fun.
Appealing Flavors: With a chewy coconut center and the sweetness of condensed milk, they replicate the comforting taste of candy bars like Mounds.
Festive Presentation: Their vibrant colors and shape make them an eye-catching centerpiece at any Easter gathering—everyone will be eager to grab one!
Want more coconut inspiration? Try out my delightful Sweet Coconut Cream Pancakes or indulge in a slice of French Antilles Coconut Flan.
Easter Bunny Coconut Tails Ingredients
For the Coconut Base
• Unsweetened Coconut (Medium Shred) – This provides the essential texture; medium shred ensures a delightful fluffiness with every bite.
• Unsweetened Coconut (Fine Shred) – Used for rolling, fine shred creates an appealing appearance that enhances the playful nature of your Easter Bunny Coconut Tails.
For the Mixture
• Sweetened Condensed Milk – Acts as a binding agent and adds a wonderful sweetness, crucial for the flavor of these kid-friendly treats.
• Butter (Melted) – Incorporates creaminess and richness into the mix, making every bite a heavenly experience.
• Vanilla Extract – Infuses the mixture with a fragrant note that elevates the overall taste of these delightful treats.
• Confectioner’s Sugar – Contributes sweetness and helps achieve a firmer texture—essential for the perfect no-bake consistency.
For the Coloring
• Liquid Food Coloring – Essential for transforming the coconut; use several colors to create vibrant, playful Easter Bunny Coconut Tails that kids will adore!
Step‑by‑Step Instructions for Easter Bunny Coconut Tails
Step 1: Mix Wet Ingredients
In a large bowl, whisk together 1 can of sweetened condensed milk, 1/4 cup of melted butter, and 1 teaspoon of vanilla extract until the mixture is smooth and creamy. This forms the flavorful base for your Easter Bunny Coconut Tails. Ensure everything is combined well to achieve a uniform texture before proceeding to the next step.
Step 2: Combine Dry Ingredients
Next, add 5 cups of medium shred unsweetened coconut and 1 cup of confectioner’s sugar to the wet mixture. Stir gently but thoroughly using a spatula until all ingredients are fully incorporated and the mixture is thick. The combined ingredients should have a moist, sticky consistency, helping the tails hold their shape later.
Step 3: Chill Mixture
Cover the bowl with plastic wrap and refrigerate the mixture for about 15 minutes. This step is crucial as it firms up the mixture, making it easier to handle when forming balls. You’ll know it’s ready when you can easily scoop it without it being too sticky.
Step 4: Prepare Colored Coconut
While the mixture is chilling, prepare the fun colors for your coconut tails! In a separate bowl, place 1/2 cup of fine shredded unsweetened coconut. Add 3–4 drops of your chosen liquid food coloring and mix thoroughly with a hand mixer until uniform. You can create different bowls for pastel colors like pink, yellow, blue, and green, ensuring a festive appearance for your Easter Bunny Coconut Tails.
Step 5: Form Balls
After chilling, remove the mixture from the refrigerator. Scoop out about 1 1/2 teaspoons of the coconut mixture and roll it into a ball using your hands. Immediately roll each ball in the colored coconut until well coated. This adds a playful touch to your Easter Bunny Coconut Tails and gives them a fluffy, festive look.
Step 6: Set and Chill
Place the rolled balls on a parchment-lined baking sheet. Once all are formed, refrigerate them for one hour to allow them to set properly. This final chilling step helps the texture firm up, ensuring that your Easter treats will stay perfectly round and delightful when served.
Step 7: Serve
Keep the completed Easter Bunny Coconut Tails refrigerated until you’re ready to serve. For the best experience, remove them a few minutes before serving to let them warm slightly to room temperature. This enhances their delightful coconut flavor and gives everyone a perfect bite-sized treat at your Easter celebration!

Expert Tips for Easter Bunny Coconut Tails
- Coconut Choice: Use medium shred unsweetened coconut for the base mixture to avoid an overly sweet dessert, ensuring a good bite and fluffy texture.
- Coloring Technique: Opt for liquid food coloring instead of gel for more even coverage while dyeing the coconut; this will also enhance visual appeal and kid engagement.
- Chill Well: Don’t skip the chilling step! Refrigerate the mixture for at least 15 minutes to make it easier to form the balls, leading to better-shaped Easter Bunny Coconut Tails.
- Storage Care: Keep leftover treats refrigerated, and they will last for about a week, maintaining their texture and flavor beautifully.
What to Serve with No-Bake Easter Bunny Coconut Tails
Create a whimsical feast by pairing delightful sides and drinks with these sweet treats!
-
Fresh Fruit Salad: A colorful mix of seasonal fruits adds a refreshing, juicy contrast to the sweet coconut tails, making it a light and vibrant addition to your dessert spread.
-
Bunny-Themed Cupcakes: Decorated with pastel frosting and cute bunny toppers, these cupcakes enhance the playful holiday spirit and bring a delightful sweetness to the table.
-
Chocolate Dipped Pretzels: The saltiness of pretzels coated in rich chocolate harmonizes beautifully with the sweet creamy bites, adding a perfect crunchy element to your Easter gathering.
-
Carrot Sticks with Hummus: For a touch of healthy balance, crunchy carrot sticks paired with creamy hummus deliver a satisfying crunch and are sure to keep little hands occupied while enjoying the sweets.
-
Mint Lemonade: A refreshing drink that has a citrusy zing, cleansing the palate between bites of the Coconut Tails, making it a must-have for warmer spring days.
-
Whipped Cream Fruit Dip: A sweet dip to accompany fresh fruit, it adds a creamy texture that beautifully complements both the fruit and the Easter Bunny Coconut Tails, offering a luscious flavor experience.
-
Mini Cheesecakes: Indulge your guests with individual mini cheesecakes that provide a rich, creamy contrast, perfect for pairing with coconut in a blended dessert platter.
-
Easter-themed Cookies: These can add a nostalgic element to your dessert table, creating a whimsical theme with delightful flavors and playful shapes alongside the Coconut Tails.
How to Store and Freeze Easter Bunny Coconut Tails
Fridge: Keep your Easter Bunny Coconut Tails in an airtight container in the refrigerator for up to 1 week to maintain their fresh texture and flavor.
Freezer: For longer storage, freeze your balls in a single layer on a baking sheet, then transfer to a freezer-safe bag. They can last up to 2 months in the freezer.
Thawing: When ready to enjoy, thaw the treats in the fridge overnight. Serve slightly chilled or at room temperature for the best flavor.
Leftover Storage: If you have leftover treats, ensure they are well-wrapped or in a sealed container to maintain their delightful taste and moist texture.
Easter Bunny Coconut Tails Variations & Substitutions
Feel free to get creative and customize your Easter Bunny Coconut Tails with these delightful variations!
-
Dairy-Free: Substitute coconut cream for sweetened condensed milk for a delicious, creamy base! This will create a vegan-friendly version loved by everyone.
-
Nutty Twist: Replace some of the shredded coconut with finely chopped almonds or walnuts for added crunch and depth. This gives your treats an extra nutty flavor, making them quite irresistible!
-
Flavor Infusion: Add a teaspoon of almond extract alongside the vanilla for a delightful twist. This change brightens up the flavor, creating a unique taste everyone will adore.
-
Chocolate Drizzle: Drizzle melted dark or white chocolate over the finished coconut tails for a decadent touch. This adds a delightful richness, transforming them into a luxurious treat.
-
Color Fantasy: Experiment with edible glitter or sprinkles instead of just colored coconut. This will create a whimsical appearance, sure to delight the kids during Easter celebrations!
-
Tropical Boost: Incorporate dried pineapple or mango bits into the coconut mixture for an exotic flavor. This fruity twist enhances the overall taste, making your bunnies burst with flavor!
-
Spicy Kick: Mix in a pinch of cinnamon or cayenne pepper for a surprising flavor contrast. This adds an unexpected warmth that balances the sweetness beautifully.
-
Use Leftovers Creatively: If you have leftover coconut tails, try crumbling them as a topping for a Coconut Rum Tiramisu or sprinkle over a bowl of fruit for extra sweetness!
Exploring these variations will turn your treats into something truly unique and memorable for your Easter gathering!
Make Ahead Options
These Easter Bunny Coconut Tails are fantastic for busy home cooks looking to simplify their holiday preparations! You can mix the coconut base and chill it up to 24 hours in advance, keeping it covered in the refrigerator to maintain freshness and prevent drying. Additionally, prepare the colored coconut in advance as well—store it in an airtight container for up to 3 days. When you’re ready to serve, simply scoop the chilled mixture, form the balls, and roll them in the colored coconut. This approach not only saves time but also allows you to enjoy delightful, stress-free celebrations without sacrificing flavor or quality!
Easter Bunny Coconut Tails Recipe FAQs
What type of coconut should I use for the best flavor?
Absolutely! I recommend using medium shred unsweetened coconut as the base. This provides the perfect fluffy texture while keeping the sweetness in check, preventing the final product from becoming overly sugary.
How should I store leftover Easter Bunny Coconut Tails?
Keep your delightful Easter Bunny Coconut Tails in an airtight container in the refrigerator for up to 1 week. This will help maintain their texture and flavor, ensuring they remain soft and chewy!
Can I freeze Easter Bunny Coconut Tails?
Yes, you can! To freeze, first place the rolled coconut tails on a baking sheet in a single layer and freeze for about 1-2 hours until firm. Then, transfer them to a freezer-safe bag or container. They can last for up to 2 months in the freezer, perfect for saving some for later!
What if my mixture is too sticky to roll into balls?
If your mixture feels too sticky, don’t worry! You can chill it a bit longer in the refrigerator for an extra 10-15 minutes. This will help firm it up, making it easier to scoop and roll. If it’s still too sticky, simply dust your hands with a little confectioner’s sugar to make rolling easier.
Do these Coconut Tails contain any allergens?
While these Easter Bunny Coconut Tails primarily contain coconut, sweetened condensed milk, and other straightforward ingredients, they can pose a risk for those with dairy or nut allergies. Always check the labels of your materials—especially if you’re using brands that might process allergens. Adjust accordingly by using dairy-free condensed milk to accommodate dietary needs.
Can I customize the colors of the coconut?
The more the merrier! You can definitely customize the colors to your liking! Just use liquid food coloring and mix it into small bowls of fine shredded coconut. Feel free to experiment with pastels or vibrantly bright colors—kids will love the creativity!
Easter Bunny Coconut Tails: Fun No-Bake Treats for Kids
Ingredients
Equipment
Method
- In a large bowl, whisk together 1 can of sweetened condensed milk, 1/4 cup of melted butter, and 1 teaspoon of vanilla extract until smooth and creamy.
- Add 5 cups of medium shred unsweetened coconut and 1 cup of confectioner's sugar to the wet mixture and stir gently until fully incorporated.
- Cover the bowl with plastic wrap and refrigerate the mixture for about 15 minutes.
- In a separate bowl, place 1/2 cup of fine shredded unsweetened coconut and add 3-4 drops of liquid food coloring, mixing thoroughly.
- Scoop out about 1 1/2 teaspoons of the coconut mixture and roll it into a ball, then roll each ball in the colored coconut.
- Place the rolled balls on a parchment-lined baking sheet and refrigerate for one hour to set properly.
- Keep the completed Easter Bunny Coconut Tails refrigerated until ready to serve.
Leave a Reply