
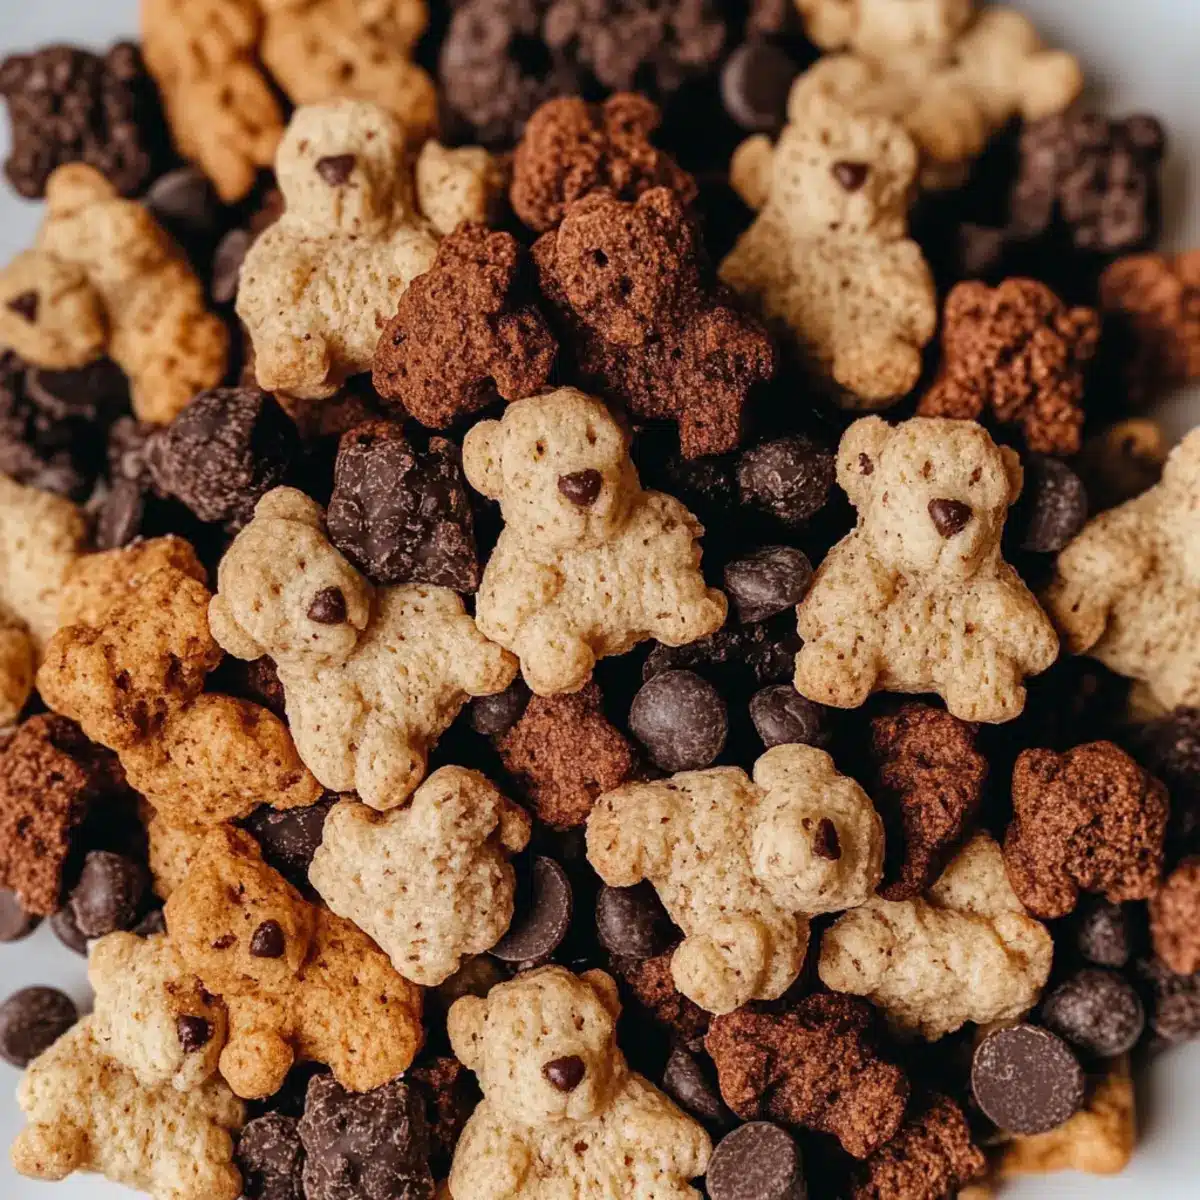
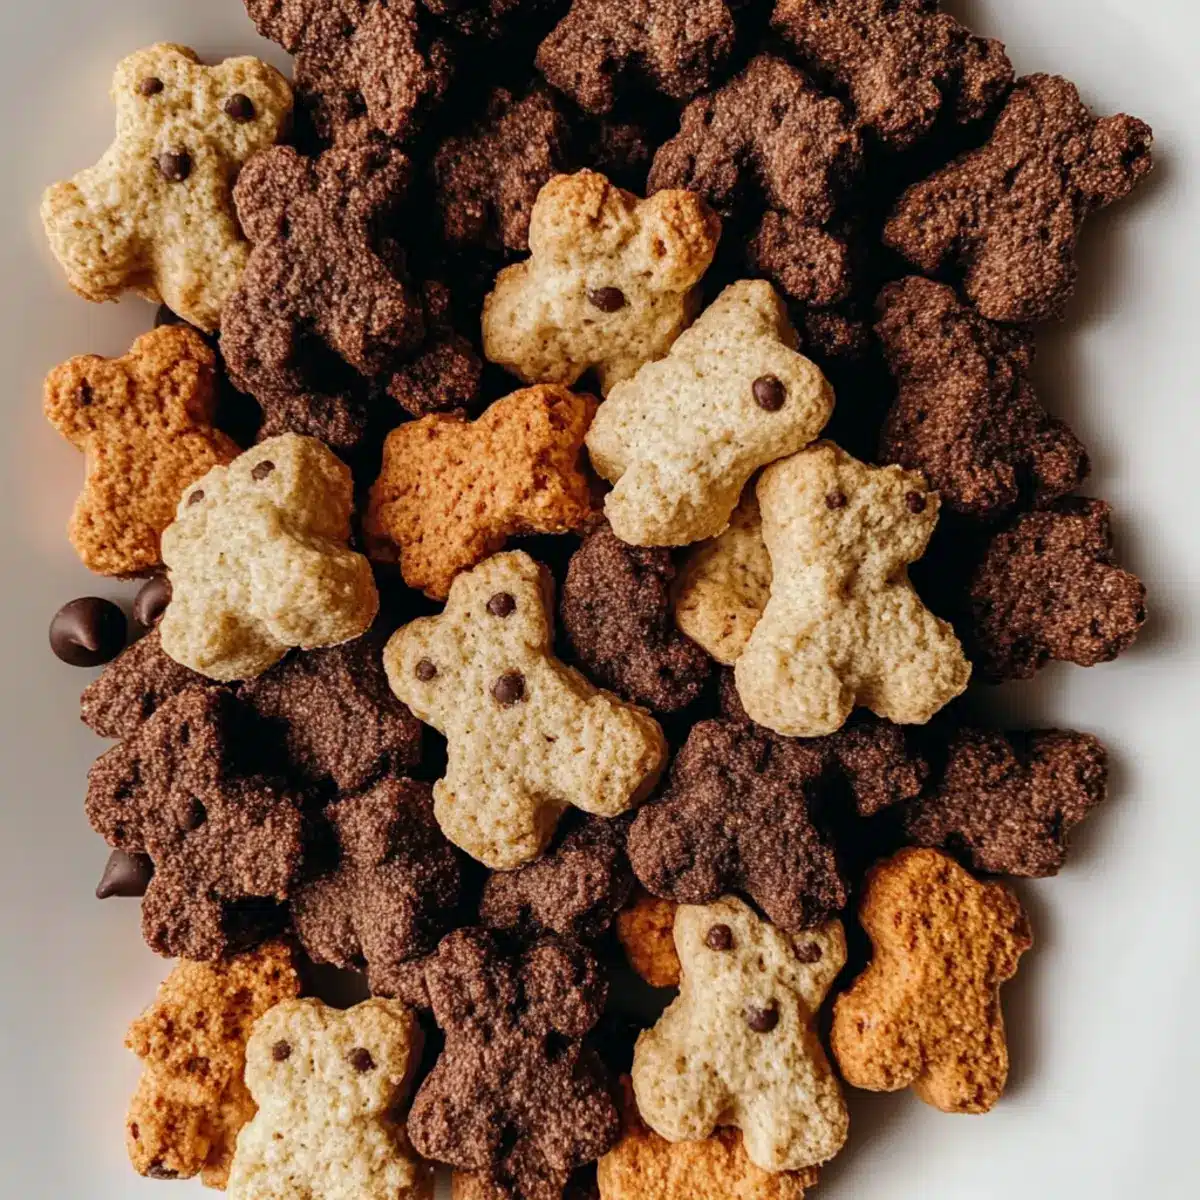
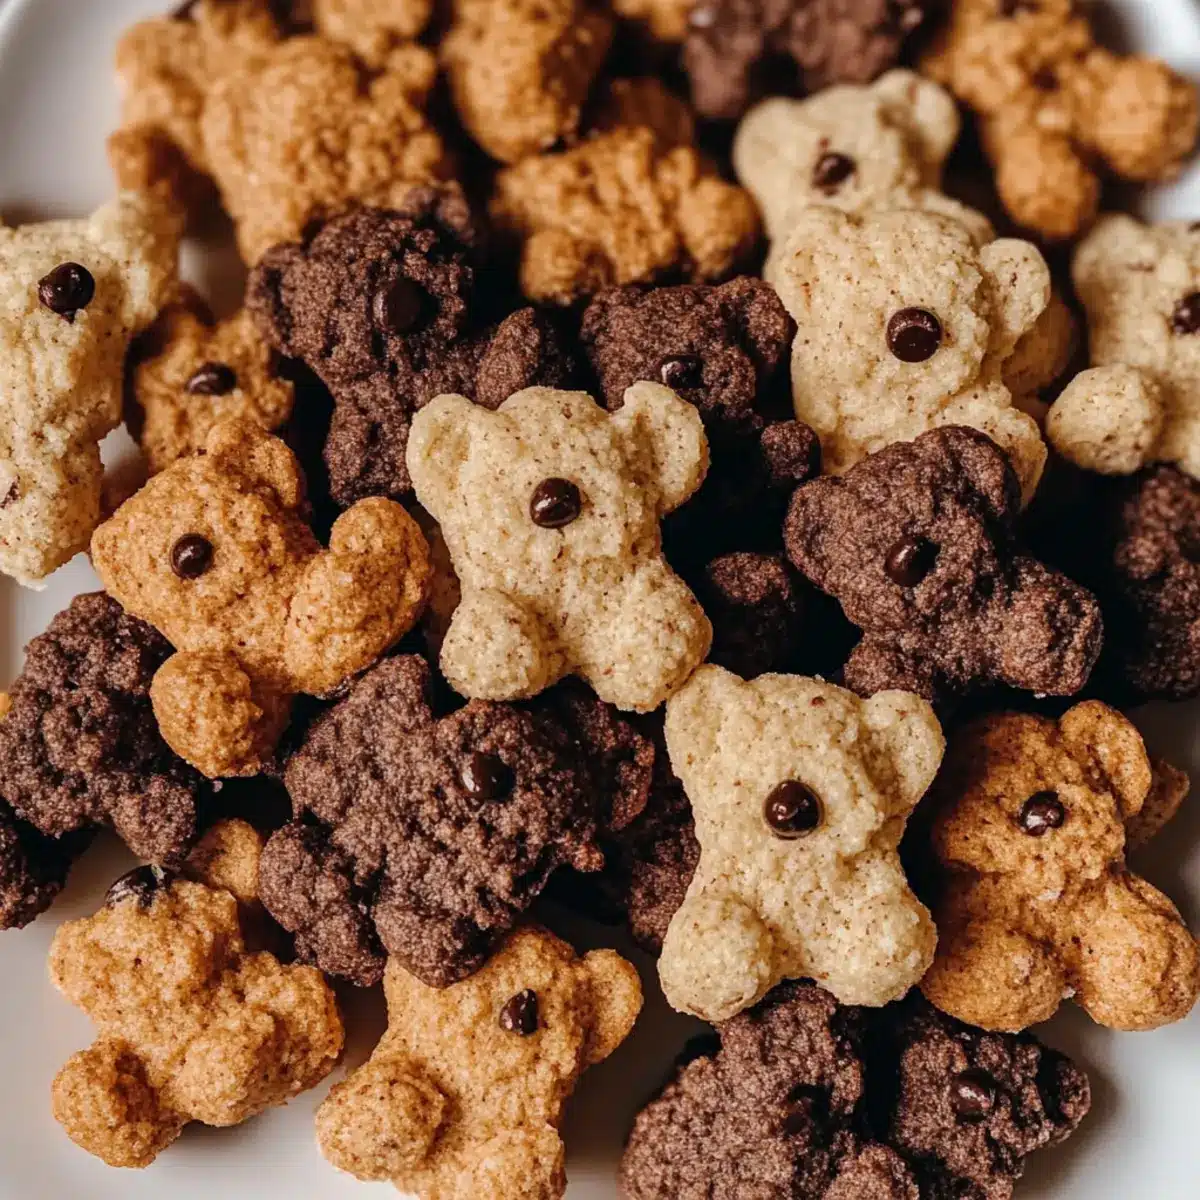
As I rummaged through the pantry for a sweet snack, I stumbled upon a forgotten childhood memory: those cute little Teddy Grahams! This led me to a delightful revelation—why not create my own homemade version? Introducing my Homemade Teddy Grahams, available in three scrumptious flavors: Honey Cinnamon, rich Cocoa, and indulgent Chocolate Chip. Not only are these gems vegan and gluten-free, but they also promise a simple baking experience that’s perfect for a cozy afternoon with the kids. Imagine the joy of crafting your own cookies, each bite delivering a satisfying crunch and a sprinkle of nostalgia. Ready to embark on this fun baking adventure with me? Let’s dive in!

Why make Homemade Teddy Grahams?
Nostalgic Delights: These Homemade Teddy Grahams will transport you back to your childhood, combining fun shapes with the joy of baking.
Versatile Flavors: Choose from Honey Cinnamon, rich Cocoa, or indulgent Chocolate Chip to satisfy any sweet tooth.
Kid-Friendly Fun: They’re a fantastic activity for kids—shape, bake, and enjoy together!
Healthy Twist: Vegan, gluten-free, and tailored to dietary needs, they offer a guilt-free snack option. Experience the joy of baking with your little ones and savor these delightful treats alongside a cup of tea, just like with my Cannoli Cookies Homemade!
Homemade Teddy Grahams Ingredients
For the Dough
- All-Purpose Flour – The base for structure; substitute with a gluten-free flour blend for a gluten-free treat.
- Coconut Sugar – Provides sweetness and offers caramel notes; brown sugar is a good alternative for a similar flavor.
- Plant-Based Butter – Ensures a rich taste; consider using Country Crock Plant Butter, although regular butter also works well.
- Baking Soda – Essential for the cookies to rise; no substitutions recommended here.
For the Honey Cinnamon Flavor
- Cinnamon – Adds warmth and sweetness specifically for the Honey Cinnamon version; skip this in the other flavors.
- Honey – Complement brings sweetness to the Honey Cinnamon cookies; replace with maple syrup for a vegan option.
For the Cocoa Flavor
- Cocoa Powder – Essential for a rich chocolate flavor; use dutch-processed for a deeper undertone and no substitutions allowed.
- Agave Syrup – A sweetener for this version, but you can swap it for maple syrup or honey if you’re not strictly vegan.
Optional Additions
- Mini Chocolate Chips – An extra treat in the Chocolate Chip flavor; opt for dairy-free chips to keep the recipe vegan.
Each ingredient combines to create delightful and nostalgic Homemade Teddy Grahams, perfect for introducing a healthier twist on a childhood favorite!
Step‑by‑Step Instructions for Homemade Teddy Grahams
Step 1: Prepare the Dough
In a large mixing bowl, cream together 1/2 cup of plant-based butter and 1/2 cup of coconut sugar until light and fluffy, about 3-5 minutes. Next, incorporate your wet ingredients—like a splash of vanilla or agave syrup—mixing well to combine. This forms a delightful base for your Homemade Teddy Grahams.
Step 2: Add Dry Ingredients
Gradually sift in 1 ½ cups of all-purpose flour and 1 teaspoon of baking soda into the butter mixture. At this stage, gently fold the mixture until just combined, being careful not to overmix. The dough will be slightly sticky but should hold its shape, setting the foundation for deliciously crunchy cookies.
Step 3: Flavoring
Divide the dough into three equal portions. To make the Honey Cinnamon flavor, mix in a teaspoon of cinnamon and 2 tablespoons of honey into one portion. For the Cocoa flavor, add 1/4 cup of cocoa powder and 2 tablespoons of agave syrup to the second portion. The third portion remains plain for Chocolate Chip cookies; fold in a generous handful of mini chocolate chips.
Step 4: Shape the Cookies
Lightly dust your work surface with flour, then roll out each portion of dough to about 1/4 inch thickness. Use bear-shaped cookie cutters, or hand-shape the cookies, ensuring they’re uniform for even baking. Arrange the shaped cookies on a parchment-lined baking sheet, giving them space to spread slightly as they bake.
Step 5: Bake
Preheat your oven to 350°F (175°C). Once preheated, bake the cookies for 10-12 minutes, or until the edges turn a lovely golden brown. Keep an eye on them; they will set as they cool, ensuring your Homemade Teddy Grahams have that perfect crunch!
Step 6: Cool
After baking, remove the cookies from the oven and allow them to cool on the baking sheet for about 5 minutes. Then, transfer them to a wire rack to cool completely. This cooling stage is vital for achieving the ideal texture, giving you deliciously crunchy Homemade Teddy Grahams to enjoy!
Expert Tips for Homemade Teddy Grahams
• Chill the Dough: Refrigerate the dough for about 30 minutes before shaping. This helps prevent excessive spreading while baking, ensuring your Homemade Teddy Grahams maintain their delightful shapes.
• Precise Measurements Matter: Use a kitchen scale when measuring flour and sugar for the best results. Accurate measurements lead to perfectly textured cookies that are neither too dry nor too gummy.
• Cool Completely: Let the cookies cool fully on a wire rack. If you skip this step, they might become soft and lose that satisfying crunch that makes them so irresistible.
• Experiment with Flavors: Don’t hesitate to mix in your favorite spices or nuts! A touch of nutmeg or some chopped almonds can add a unique twist to your Homemade Teddy Grahams.
• Monitor Baking Time: Every oven is a little different, so start checking the cookies at 10 minutes. You want them golden around the edges but still soft in the center as they will firm up while cooling.
Make Ahead Options
These Homemade Teddy Grahams are perfect for meal prep, making your baking sessions even more efficient! You can easily prepare the dough and refrigerate it for up to 3 days before baking, allowing you to enjoy fresh cookies without the fuss on busy weeknights. When ready to whip up your batch, simply shape the dough into adorable bear forms and bake them. To maintain quality during storage, wrap the chilled dough tightly in plastic wrap, ensuring it doesn’t dry out (this is key!). Once baked, allow the Homemade Teddy Grahams to cool completely before storing them in an airtight container for up to a week. They’ll be just as delicious, packed with flavor every time!
Homemade Teddy Grahams Variations & Substitutions
Customize your Homemade Teddy Grahams with these delightful variations that will make your baking experience even more enjoyable!
-
Gluten-Free: Substitute all-purpose flour with a gluten-free flour blend for a deliciously safe option for celiac friends.
-
Sweetener Swap: Try using maple syrup instead of agave for a rich, natural sweetness that complements all flavors perfectly.
-
Nutty Addition: Mix in a handful of finely chopped walnuts or pecans for added crunch and a nutty flavor that elevates the cookie’s appeal.
-
Seasonal Spice: Incorporate a pinch of nutmeg or ginger for a seasonal twist that will warm your cookies up with cozy spices.
-
Adding a Splash: Enhance the dough with a teaspoon of pure vanilla extract for a deeper flavor profile that rounds out the sweetness beautifully.
-
Chocolate Lovers: For a more indulgent cookie, dip your cooled Teddy Grahams in melted vegan chocolate, creating an irresistible treat.
-
Fruity Flare: Toss in dried cranberries or raisins to one portion of the dough for a chewy pop of flavor that’s unexpectedly delightful!
Planning to try one of these twists? You might just find there’s room in your heart for these irresistibly nostalgic treats alongside some homemade goodies like Homemade Jam Donut or my beloved Cannoli Cookies Homemade. Enjoy experimenting!
What to Serve with Homemade Teddy Grahams?
Imagine delighting in these crunchy, nostalgic treats alongside a medley of scrumptious companions that enhance their playful charm.
-
Creamy Fruit Dip: A smooth blend of yogurt and honey makes a deliciously sweet accompaniment for your bear-shaped cookies, adding fruity freshness to every bite.
-
Nut Butter Spread: Rich almond or peanut butter provides protein and creaminess, enhancing the nutty notes of your Teddy Grahams while satisfying hungry bellies.
-
Fresh Berries: Juicy strawberries, blueberries, or raspberries add a pop of color and tartness, creating a refreshing contrast to the cookies’ sweetness.
-
Whipped Coconut Cream: Light and airy, this dairy-free topping brings a delightful, creamy touch that pairs beautifully with all three flavors, making each cookie even more indulgent.
-
Chai Tea: The warm spices in chai tea resonate with the cinnamon in Honey Cinnamon Teddy Grahams, creating a cozy drink to sip alongside your treats.
-
Chocolate Almond Milk: Sweet and nutty, this is a delightful partner for your Cocoa and Chocolate Chip versions, enhancing the chocolatey flavor while keeping things fun!
-
Caramel Sauce: Drizzling a luscious layer of vegan caramel can elevate your Homemade Teddy Grahams into a gourmet dessert, adding a touch of decadence to snack time.
-
Coconut Sorbet: A refreshing cooling treat, this fruity sorbet pairs well with the sweetness of the cookies, making for a playful dessert that’s both fun and light.
-
Coffee Stout: The rich, robust flavors of a coffee stout offer a grown-up twist, perfect for enjoying your cookies with a touch of sophistication during a cozy evening at home.
Storage Tips for Homemade Teddy Grahams
Room Temperature: Store your Homemade Teddy Grahams in an airtight container at room temperature for up to 1 week to maintain their crunchy texture.
Fridge: For longer freshness, you can refrigerate the cookies. However, they may soften slightly; enjoy within 10 days for the best taste.
Freezer: Freeze the cookies in a single layer, then transfer to a freezer bag for up to 3 months. Allow them to thaw at room temperature before enjoying.
Reheating: If stored in the fridge or freezer, for a warm treat, reheat in the oven at 300°F (150°C) for about 5 minutes, keeping them crispy and delightful.
Homemade Teddy Grahams Recipe FAQs
What type of flour should I use for Homemade Teddy Grahams?
You can use all-purpose flour as the base for these adorable cookies. If you’re aiming for a gluten-free option, a gluten-free flour blend works beautifully. I recommend looking for a blend that contains xanthan gum for the best texture!
How do I store my Homemade Teddy Grahams?
Store your Homemade Teddy Grahams in an airtight container at room temperature for up to 1 week. This will keep them deliciously crunchy. If you’re looking for longer storage, consider refrigerating them for up to 10 days; just note that they may soften slightly.
Can I freeze Homemade Teddy Grahams?
Absolutely! You can freeze your Homemade Teddy Grahams for up to 3 months. To do so, place the cookies in a single layer on a baking sheet to freeze individually. Once frozen, transfer them to a freezer bag. When you’re ready to enjoy, let them thaw at room temperature. For a warm, delightful treat, reheat in the oven at 300°F (150°C) for about 5 minutes.
What can I do if the dough is too sticky?
If your dough turns out too sticky, don’t worry! You can simply mix in a bit more flour, a tablespoon at a time, until it holds together well. Alternatively, chilling the dough in the refrigerator for about 30 minutes can help firm it up, making it easier to shape.
Are Homemade Teddy Grahams suitable for kids with allergies?
These Homemade Teddy Grahams can be made to suit various dietary needs. They are vegan and gluten-free, making them a suitable option for many children. However, always check for specific allergies, such as chocolate or nuts, especially if you decide to add any optional mix-ins like mini chocolate chips or nuts.
How can I keep the Teddy Grahams crispy after baking?
To maintain that lovely crunch, allow your Homemade Teddy Grahams to cool completely on a wire rack. This step is crucial, as cookies can trap steam and become soft if left on the baking sheet too long. Also, ensure they are stored in an airtight container once cooled to lock in their texture.
Homemade Teddy Grahams: 3 Easy Flavors You’ll Love
Ingredients
Equipment
Method
- In a large mixing bowl, cream together ½ cup of plant-based butter and ½ cup of coconut sugar until light and fluffy, about 3-5 minutes. Incorporate wet ingredients and mix well.
- Gradually sift in 1½ cups of all-purpose flour and 1 teaspoon of baking soda, gently folding until just combined.
- Divide the dough into three portions. Mix 1 teaspoon of cinnamon and 2 tablespoons of honey into one portion. For the Cocoa flavor, add ¼ cup of cocoa powder and 2 tablespoons of agave syrup.
- Roll out each portion of dough to ¼ inch thickness, using cookie cutters to shape. Arrange on a parchment-lined baking sheet.
- Preheat oven to 350°F (175°C). Bake cookies for 10-12 minutes until golden brown.
- Let cool on the baking sheet for 5 minutes, then transfer to a wire rack to cool completely.
Leave a Reply