
As I rummaged through my pantry one afternoon, I stumbled upon a treasure: nori sheets waiting to be transformed. This sparked a craving for something fresh and light, leading me to create these delightful Tuna Salad Nori Wraps. Packed full of protein and ready in just five minutes, they blend the satisfying flavors of traditional sushi with the heartiness of a classic tuna salad. Whether you’re searching for a quick meal prep solution or a crowd-pleaser for lunch gatherings, these wraps are a perfect fit. The satisfying crunch from the nori adds an exciting texture that beautifully contrasts the creamy, savory filling. So, what will you include in your wrap to make it uniquely yours?
Why Are Tuna Salad Nori Wraps a Must-Try?
Quick and Easy: In just 5 minutes, you can whip up these wraps for a healthy meal that doesn’t sacrifice flavor or satisfaction.
Versatile Fillings: Customize your wrap with your favorite ingredients—try adding avocado or bell peppers for an extra pop of color and taste!
Low in Sugar: Perfect for those keeping an eye on their sugar intake, these wraps align with your healthy eating goals.
Gluten-Free Option: With nori and fresh vegetables, these wraps fit smoothly into a gluten-free lifestyle.
Crowd-Pleasing Appeal: Serve them at lunch gatherings or meal prep for the week; they’ll be a hit with everyone! Pair with a light salad like Pineapple Cucumber Salad for a well-rounded spread.
Tuna Salad Nori Wraps Ingredients
For the Filling
- Canned Tuna – Provides protein and flavor; option to use fresh cooked tuna for a gourmet touch.
- Mayonnaise – Acts as a binding agent for creaminess; Greek yogurt is a healthier substitute.
- Celery – Adds crunch and freshness; replace with cucumber for a different texture.
- Green Onions – Enhances the flavor with a mild onion taste; chives make an excellent substitute.
For the Wrap
- Nori Sheets – Wraps the filling, providing a unique texture; substitute with lettuce for a lower-carb option.
Optional Seasonings
- Salt and Pepper – Season to taste for a balanced flavor; consider adding sesame oil for a tasty kick.
These simple Tuna Salad Nori Wraps are just a few ingredients away from becoming your new favorite quick meal!
Step‑by‑Step Instructions for Tuna Salad Nori Wraps
Step 1: Prepare the Tuna Salad
In a medium mixing bowl, combine one can of drained tuna, a generous spoonful of mayonnaise, diced celery, and chopped green onions. Use a fork to mix everything together until well combined, about 2-3 minutes. Adjust seasoning with salt and pepper to taste, ensuring it’s flavorful yet balanced. Set the tuna salad aside while you prepare the nori sheets.
Step 2: Assemble the Nori Wrap
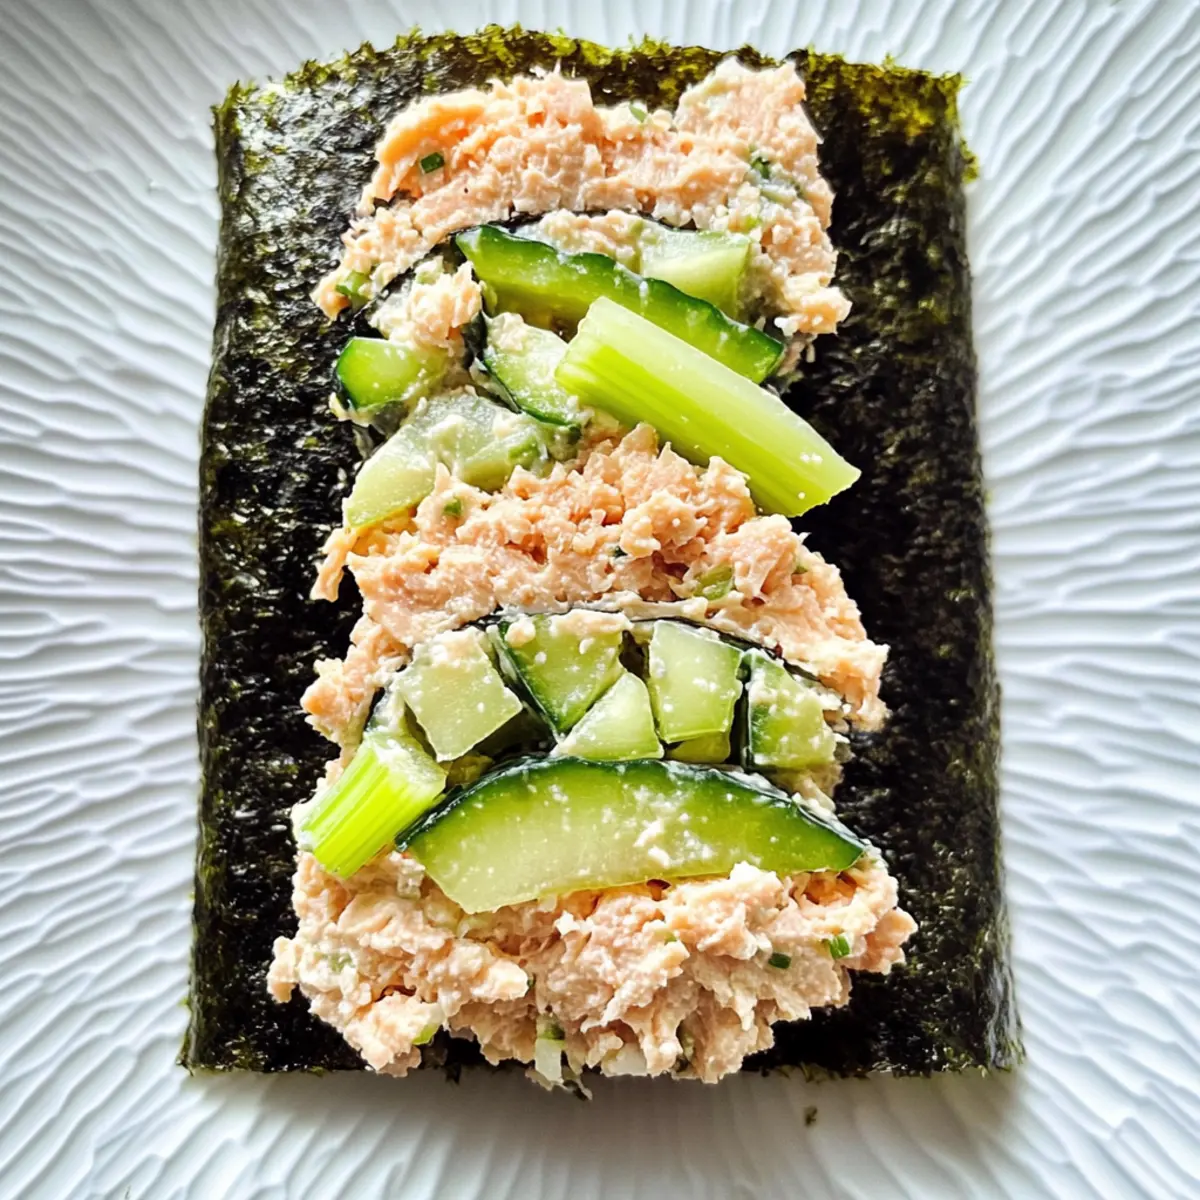
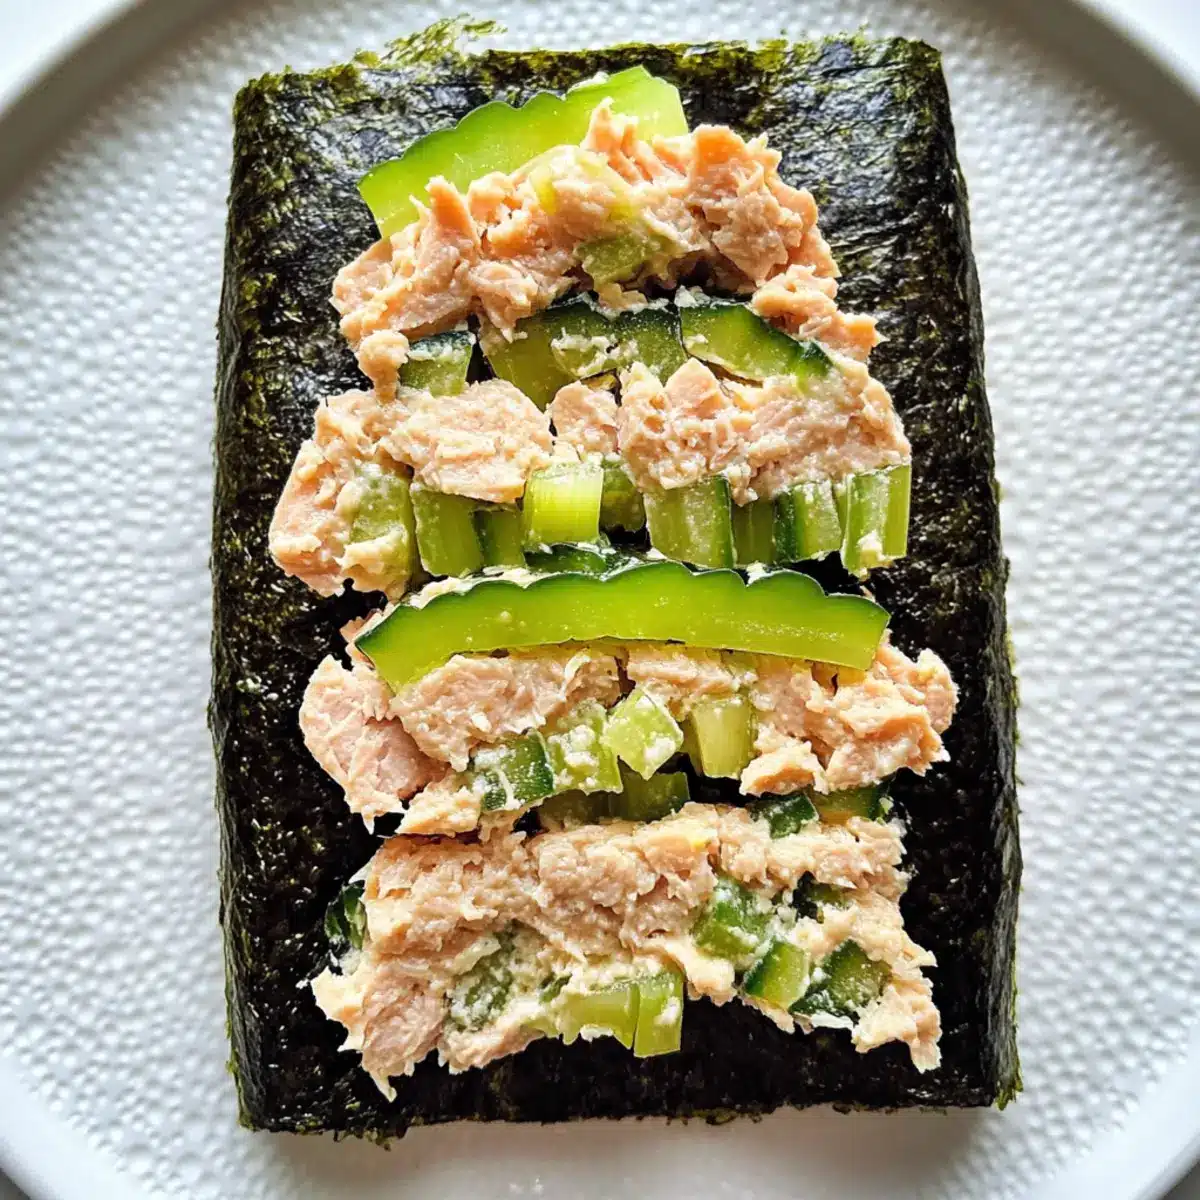
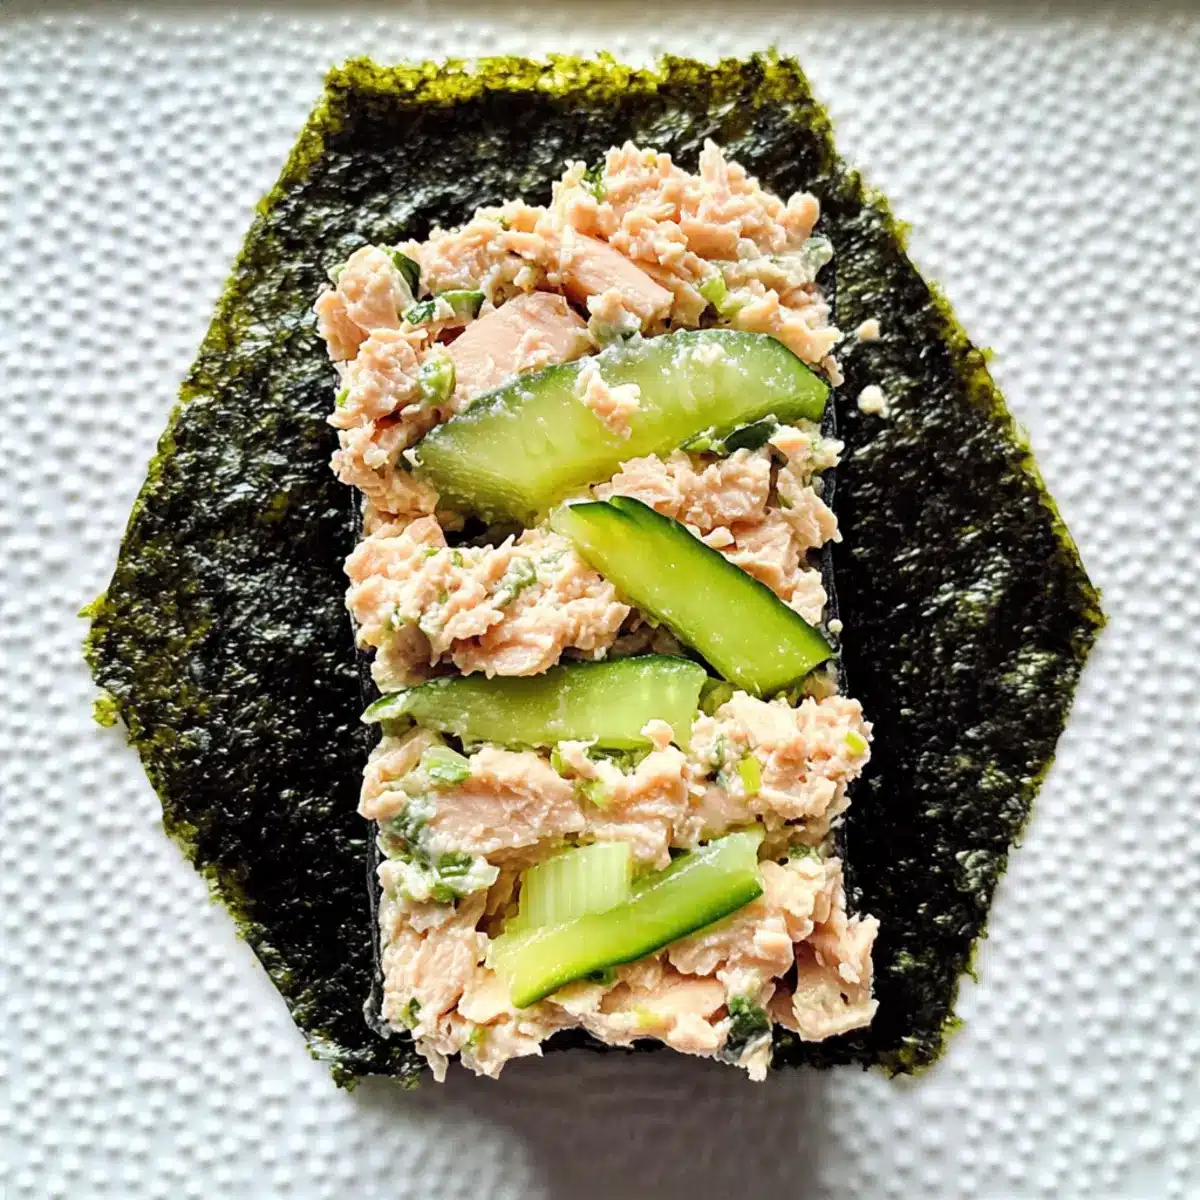
Lay a nori sheet flat on a clean, dry surface or a bamboo sushi mat. With a spatula, spread a portion of the tuna salad mixture onto the nori, leaving about an inch of space at the edges. The filling should cover the center of the nori sheet evenly, making it easier to roll tightly. This step sets the foundation for your Tuna Salad Nori Wraps, so ensure a consistent layer for the best bites.
Step 3: Roll the Wrap
Starting from the edge where the filling is placed, gently roll the nori sheet over the filling, tucking it tightly. Keep the roll tight but not too tight to avoid squeezing out the filling. Use a little water to moisten the edge of the nori to help it seal securely. This process captures all the delightful flavors of the filling inside the wrap, creating a cohesive, flavorful bite.
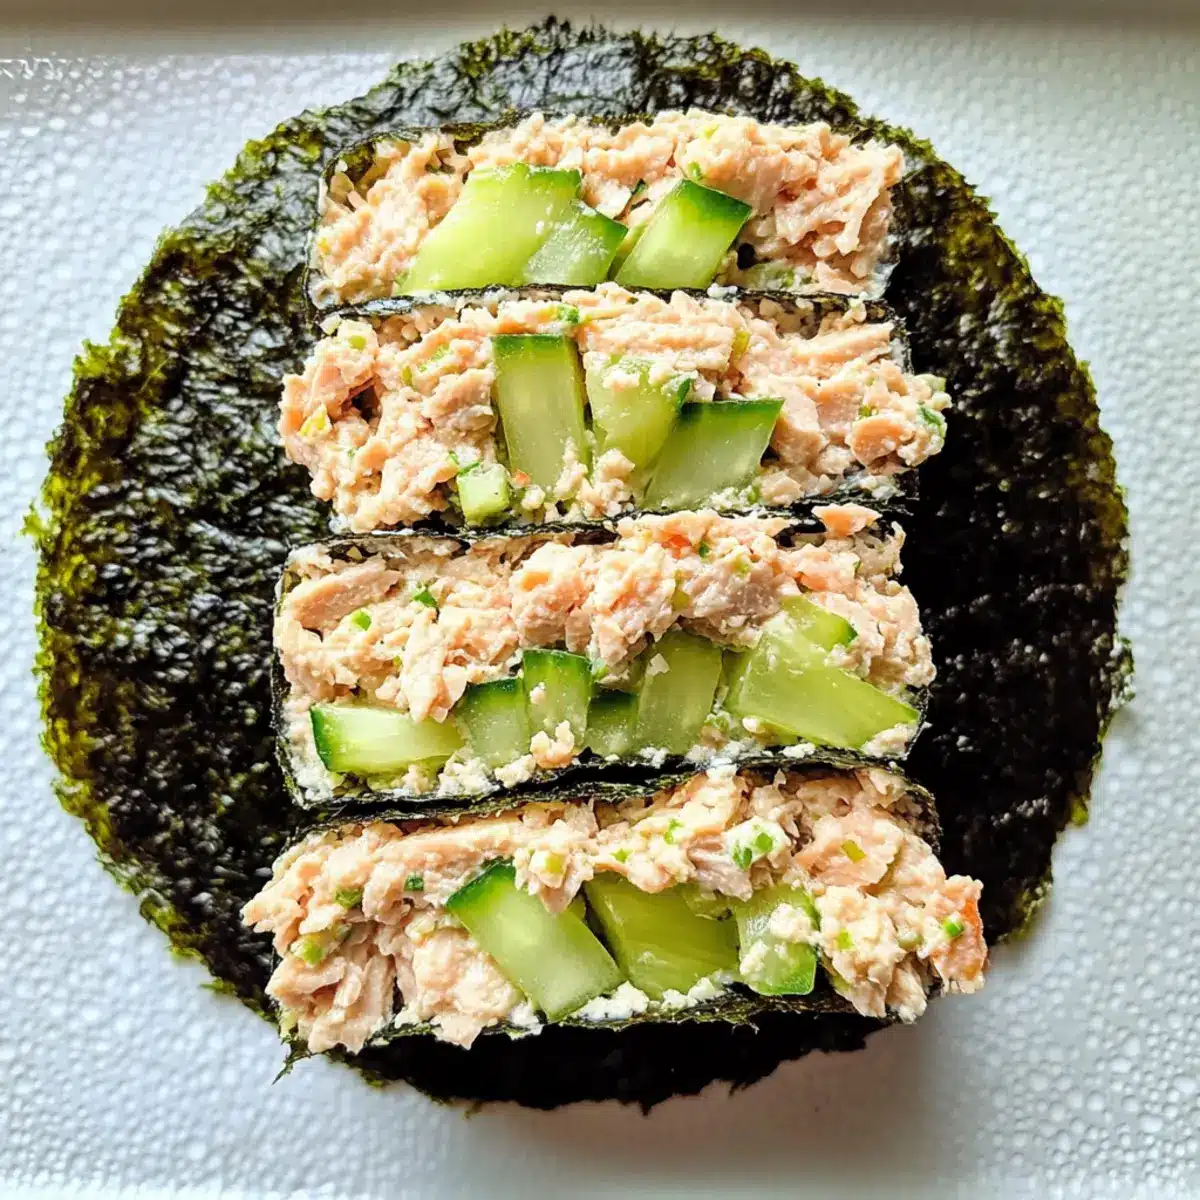
Step 4: Slice and Serve
Once your wrap is fully rolled and sealed, use a sharp knife to slice it into bite-sized pieces, roughly 1-2 inches thick. Arrange the pieces on a serving platter, showcasing the beautiful layers of the Tuna Salad Nori Wraps. Serve immediately for optimal freshness, as the nori is at its crunchiest right after rolling. Enjoy this quick and healthy lunch option with your favorite dips or sides!
Make Ahead Options
These Tuna Salad Nori Wraps are ideal for meal prep, saving you precious time during busy weekdays! You can prepare the tuna salad mixture up to 3 days in advance—just combine the drained canned tuna, mayonnaise, diced celery, and chopped green onions in an airtight container and refrigerate. To maintain optimal freshness, store the nori sheets separately and wrap them just before serving to keep their delightful crunch. When you’re ready to enjoy, simply roll the tuna salad into the nori and slice it into bite-sized pieces. This way, you’ll have a quick, healthy lunch option ready in no time, just as delicious as if you made it fresh!
Tuna Salad Nori Wraps Variations
Feel free to explore these delicious twists and make these Tuna Salad Nori Wraps your own!
-
Avocado Creaminess: Add sliced avocado for a richer texture and a burst of healthy fats, enhancing the overall flavor.
Imagine the smoothness melding with the savory tuna for a delightful bite! -
Bell Pepper Crunch: Incorporate diced bell peppers for a splash of color and a crisp bite that contrasts beautifully with the creamy filling.
Their sweet crunch makes each bite an exciting experience! -
Chickpea Delight: Swap tuna for chickpeas for a plant-based protein option, perfect for vegan friends or a lighter lunch.
The flavor still shines, lending itself to a hearty, satisfying wrap. -
Spicy Kick: Add a dash of sriracha or chili flakes to awaken your taste buds with a spicy twist.
Let the heat dance alongside the savory tuna for a thrilling flavor combination! -
Herb Infusion: Mix in fresh herbs like dill or cilantro for an aromatic punch that brings a garden-fresh aspect to your wraps.
These additions can create a vibrant, flavor-packed experience with every bite. -
Crunchy Cucumber: Replace celery with diced cucumbers for a refreshing crunch and lower-carb option.
The coolness of cucumber adds a wonderful contrast to the savory filling, making it delightful. -
Lettuce Wrap Alternative: Feeling low-carb? Swap nori for lettuce leaves for a fresh, crunchy wrap that’s just as satisfying.
Each bite will burst with crispness, while still delivering on flavor – a delightful shift!
For more twists, consider pairing these wraps with a light salad, like Cucumber Mozzarella Salad, to keep your meal fresh and exciting. Besides, you could also try a quick Chicken Caesar Wraps for a wonderful variation wealth of texture and taste. Happy wrapping!
What to Serve with Tuna Salad Nori Wraps?
Picture yourself enjoying a light meal with these delightful wraps, complemented by vibrant flavors and textures that invite your taste buds to dance.
-
Crispy Veggie Sticks: Fresh carrots and cucumbers provide a satisfying crunch and a refreshing contrast to the creamy tuna filling. Perfect for dipping in your favorite sauce!
-
Light Miso Soup: This warm soup offers a comforting addition, blending umami flavors that enhance the sushi-inspired traits of the wraps. Each sip is a cozy embrace!
-
Avocado Salad: A mix of ripe avocado and cherry tomatoes creates a creamy, delightful side. The added freshness pairs beautifully with the savory tuna salad.
-
Fruit Salad: A medley of mango, berries, and citrus adds a sweet note, balancing the savory wraps while providing a nutritional boost with seasonal fruits.
-
Sesame Noodles: Chilled sesame noodles with a hint of soy sauce can offer a delightful contrast. The nutty flavor complements the rich tuna while keeping it light.
-
Chilled Green Tea: Refreshing and subtly flavored, green tea acts as an invigorating beverage that complements the fresh ingredients in your nori wraps.
-
Coconut Chia Pudding: For dessert, this pudding provides a creamy finish. Its natural sweetness and texture add a satisfying end to your light meal!
-
Edamame Beans: Lightly salted edamame brings a protein punch. Their earthy flavor pairs well with the fresh ingredients of your tuna salad wraps!
-
Ginger Ale: A bubbly ginger ale can cleanse the palate while adding a subtle spice, enhancing the overall eating experience.
-
Pickled Ginger: For an authentic touch, serve with pickled ginger. Its zesty flavor clears the palate and balances each bite of the wraps.
Expert Tips for Tuna Salad Nori Wraps
-
Drain Well: Ensure you drain the canned tuna thoroughly to prevent a soggy wrap, which can compromise the texture of your Tuna Salad Nori Wraps.
-
Chill for Flavor: Let the tuna salad sit for 10-15 minutes before assembling the wraps for flavors to meld; it makes a noticeable difference!
-
Prep Nori Last: Wrap the nori just before serving; this keeps it crispy and prevents it from becoming limp, ensuring a delightful crunch.
-
Season Generously: Don’t shy away from seasoning! A sprinkle of salt or sesame oil can elevate the taste, so adjust to your preference.
-
Customizable Options: Experiment with fillings like diced peppers or avocado to create your perfect Tuna Salad Nori Wraps, enhancing taste and nutrition.
Storage Tips for Tuna Salad Nori Wraps
-
Fridge: Store leftover tuna salad in an airtight container for up to 3 days to maintain freshness. Keep the filling and nori sheets separate until you’re ready to assemble your wraps for maximum crunch.
-
Freezer: While nori does not freeze well, you can freeze the tuna salad mixture for up to 2 months. Thaw in the fridge before using; assemble the wraps fresh for the best texture.
-
Reheating: If you prefer a warm twist, reheat the tuna salad mixture in the microwave for 30-60 seconds until heated. However, assembling with nori should be done right before serving to maintain its delightful crunch.
-
Make-Ahead: Prepare the tuna salad a day ahead for best flavor, but avoid assembling the Tuna Salad Nori Wraps until serving to ensure the nori stays crispy and enjoyable.
Tuna Salad Nori Wraps Recipe FAQs
How do I choose the right canned tuna?
Absolutely! Look for tuna packed in water or olive oil for the best flavor and texture. If you’re aiming for a lower-sodium option, go for brands labeled as “low sodium.” Fresh cooked tuna can also elevate the dish—just be sure it’s fully cooked and cooled before mixing.
What’s the best way to store leftover tuna salad?
Very! Store leftover tuna salad in an airtight container in the refrigerator for up to 3 days. Keep it separate from the nori sheets until you’re ready to serve to avoid sogginess and maintain that satisfying crunch.
Can I freeze the tuna salad mixture?
Of course! You can freeze the tuna salad mixture for up to 2 months. Here’s how:
- Portion the tuna salad into airtight containers or freezer bags, removing as much air as possible.
- Label with the date for easy reference.
- To use, simply transfer to the fridge to thaw overnight before assembling your wraps. Remember, the nori sheets must be used fresh, so leave those out of the freeze!
What should I do if my nori sheets are getting soft?
Great question! If your nori sheets feel soft or flimsy, make sure to store them in a cool, dry place and seal the packaging tightly. If they’ve already lost some of their crispness, you can lightly toast them on a dry skillet for a few seconds on each side to revive their crunchy texture.
Are these wraps safe for pets or people with food allergies?
Definitely check! Tuna can be a treat for some pets, but it should only be given in moderation and avoid using seasonings like onion or garlic, which can be harmful. For people with allergies, ensure that all ingredients—like mayonnaise or any optional seasonings—are allergy-friendly or skip them entirely based on personal dietary needs.
Can I customize the ingredients used in the wraps?
Absolutely! The beauty of Tuna Salad Nori Wraps lies in their versatility. Feel free to play with the filling by adding ingredients like diced bell peppers, shredded carrots, or sliced avocado. Not only does this introduce new flavors and textures, but it also allows you to cater to different dietary preferences. Have fun making it uniquely yours!
Tuna Salad Nori Wraps: Quick, Healthy Lunch You’ll Love
Ingredients
Equipment
Method
- In a medium mixing bowl, combine one can of drained tuna, mayonnaise, diced celery, and chopped green onions. Mix until well combined, adjusting seasoning with salt and pepper to taste.
- Lay a nori sheet flat on a clean surface. Spread a portion of the tuna salad mixture onto the nori, leaving about an inch of space at the edges.
- Starting from the edge where the filling is placed, roll the nori sheet over the filling, tucking tightly. Moisten the edge of the nori with water to seal securely.
- Once rolled, use a sharp knife to slice the wrap into bite-sized pieces. Arrange on a serving platter and serve immediately.
Leave a Reply