
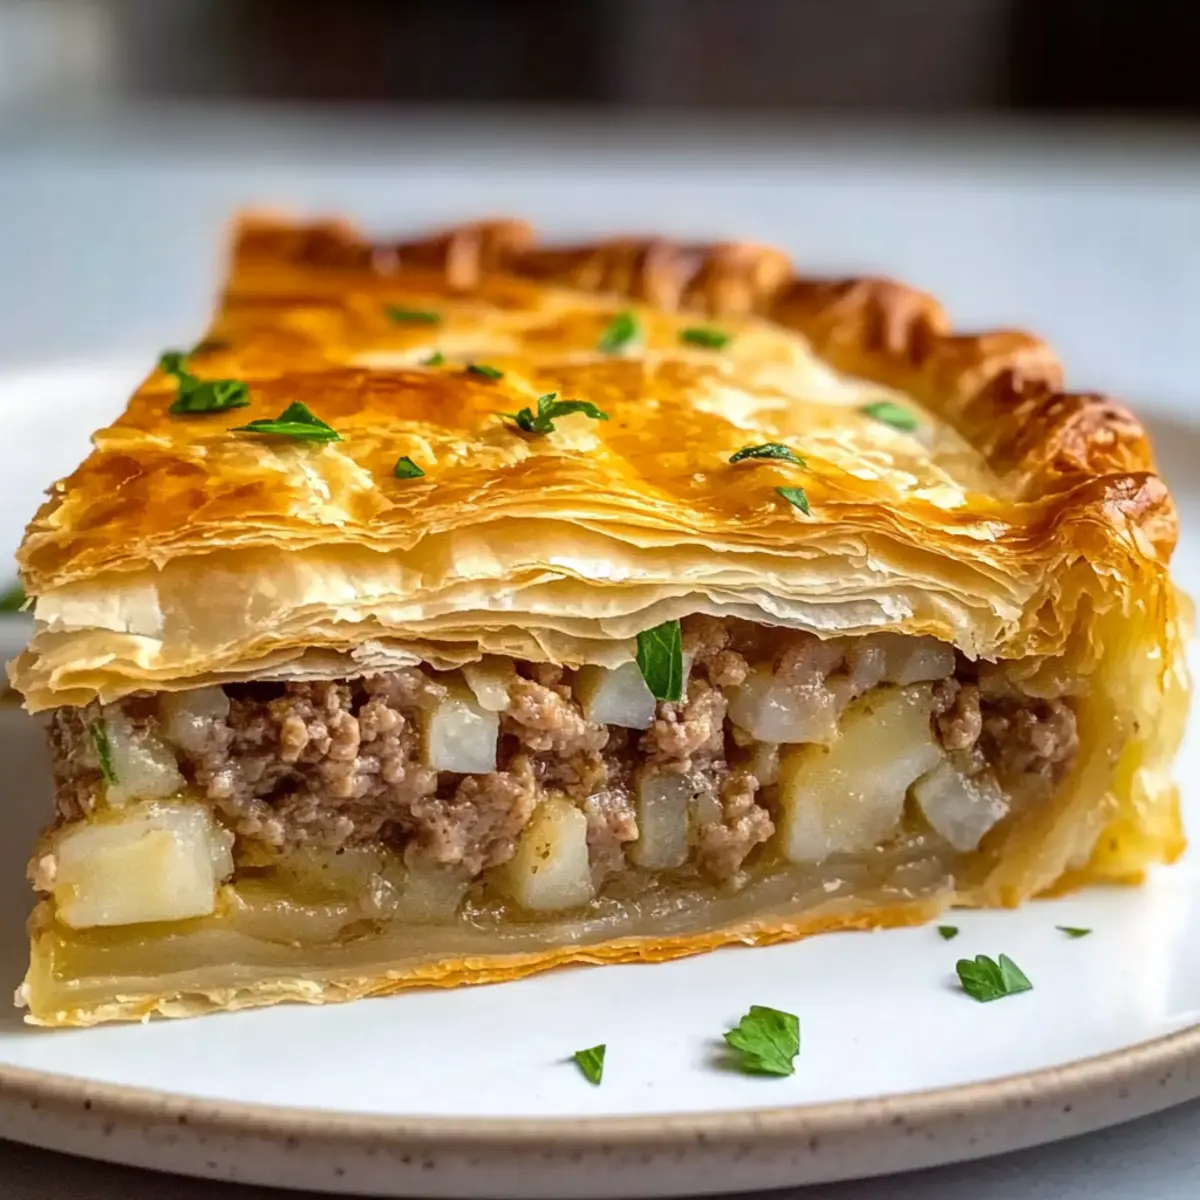
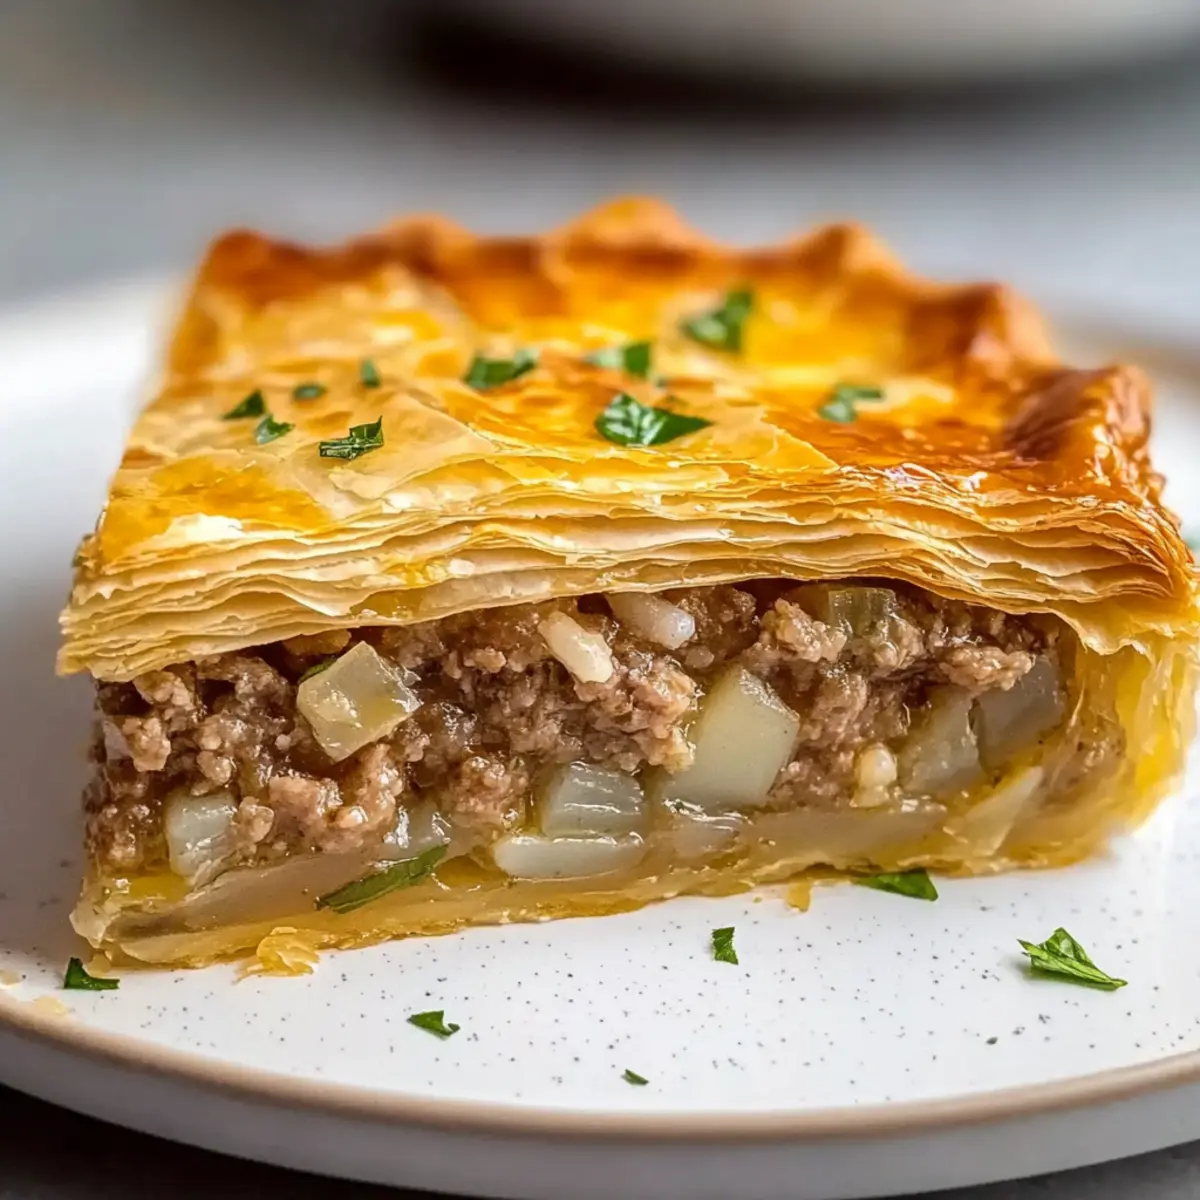
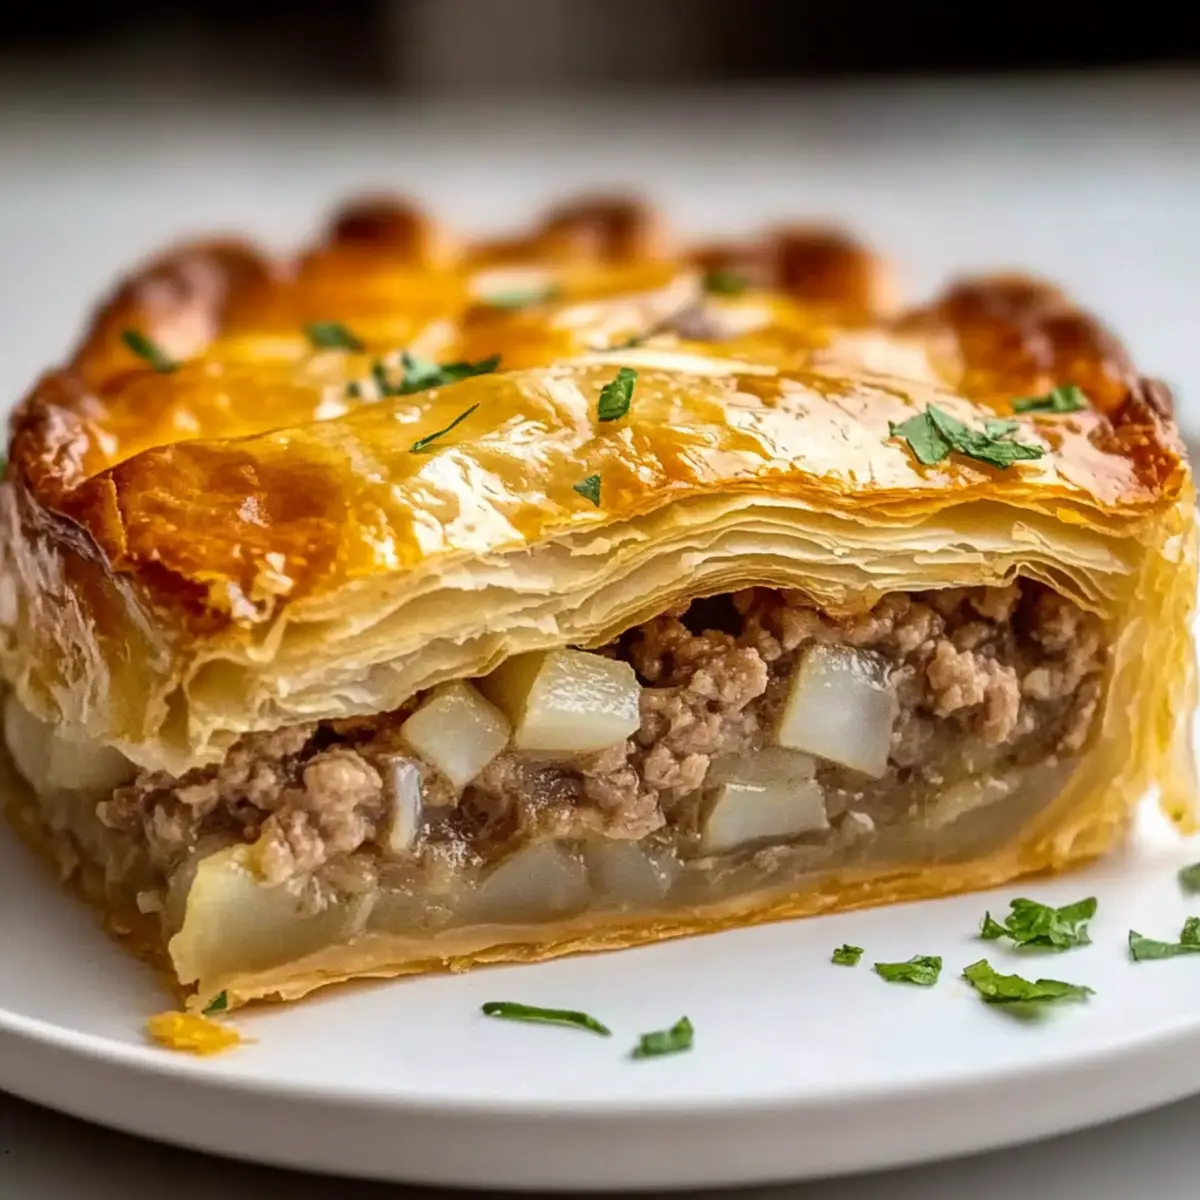
In the cozy warmth of my kitchen, I often find myself longing for simple yet satisfying meals that whisk me away to distant lands. Enter the delectable Kreatopita recipe, a Greek meat pie that marries flaky phyllo pastry with a savory filling of ground beef and rice. This dish is a breeze to prepare, making it an ideal choice for busy weeknights or a show-stopper at your next gathering. Not only does it transport your taste buds to the Mediterranean, but it’s also a comforting hug on a plate, perfect for anyone seeking to enjoy heartwarming home-cooked goodness. With endless customization options—from lamb to quinoa—you can easily tailor it to suit your palate or dietary needs. What filling combination will delight your family tonight?
Why is Kreatopita a Must-Try?
Simplicity, this recipe comes together effortlessly, making it perfect for even novice cooks looking to impress. Savory satisfaction, each bite of this meat pie is filled with seasoned ground beef and aromatic herbs that evoke a sense of fond comfort. Versatile options, feel free to substitute ground beef with lamb or incorporate quinoa for a healthier twist! Crowd pleaser, whether it’s a casual dinner or a festive gathering, Kreatopita is guaranteed to steal the show. To round out the meal perfectly, consider pairing it with a fresh Greek salad or some tzatziki. Trust me, your guests will be raving about this one!
Kreatopita Recipe Ingredients
Get ready to whip up this mouth-watering Greek meat pie with these essential ingredients!
For the Filling
- Ground Beef – The rich flavor forms the heart of your Kreatopita; you can easily substitute it with ground lamb or pork if preferred.
- Onion – Brings an aromatic sweetness; finely chop for even cooking in the filling.
- Uncooked Rice – Absorbs flavors while cooking; consider using brown rice for an earthy twist.
- Tomato Sauce – Adds moisture and acidity, balancing the meat’s richness; low-sodium varieties work great.
- Oregano – Infuses a Mediterranean flavor; feel free to switch it up with thyme or Italian seasoning.
- Salt & Pepper – Essential for seasoning; adjust according to your taste for a more personalized flavor.
For the Phyllo Crust
- Phyllo Dough – Provides that beloved flaky texture; keep unused sheets moist with a damp towel to prevent drying.
- Oil or Melted Butter – Brush between layers for added flavor and a golden finish; don’t skimp on this for optimal browning.
Prepare your kitchen and enjoy every delicious bite of your homemade Kreatopita!
Step‑by‑Step Instructions for Kreatopita Recipe
Step 1: Preheat Your Oven
Begin by preheating your oven to 180°C (350°F). This ensures your Kreatopita will bake evenly and achieve that delightful golden-brown color. Prepare a baking dish by greasing it lightly with oil or melted butter, setting the stage for a beautifully crisp crust.
Step 2: Sauté the Onion
Heat a tablespoon of oil in a skillet over medium heat. Add the finely chopped onion and sauté for about 5-7 minutes until soft and fragrant, turning translucent. This step builds a flavorful base for your filling, as the onion begins to caramelize and release its aromas.
Step 3: Brown the Ground Beef
Add the ground beef to the skillet, breaking it up with a wooden spoon. Cook for around 8-10 minutes until it is well-browned and no longer pink. This step allows the meat to absorb the savory flavors from the sautéed onion, creating a rich filling for your Kreatopita recipe.
Step 4: Combine Rice and Seasonings
Stir in the uncooked rice, tomato sauce, oregano, salt, and pepper. Add a splash of water to help it all meld together. Allow this mixture to simmer for about 10 minutes, during which the flavors will deepen and the rice will absorb moisture, working its magic before filling the pie.
Step 5: Prepare the Phyllo Layers
While your filling cooks, carefully unroll the phyllo dough and cover it with a damp towel to prevent it from drying out. Brush a few sheets with oil or melted butter, stacking them in layers at the bottom of the greased baking dish. Aim for about five sheets for a sturdy base, ensuring each layer is well-coated.
Step 6: Add the Filling
Once the filling has cooled slightly, evenly spread it over the layered phyllo dough in the baking dish. Make sure to distribute the filling well to avoid sogginess. This is where the juicy, savory goodness of your Kreatopita blends with the flaky crust, creating a hearty dish.
Step 7: Top with Phyllo
Cover the filling with another five layers of phyllo, brushing each sheet generously with oil or melted butter. Take care to crinkle and fold the edges for a rustic look, ensuring the filling is completely enclosed. This double-layered approach ensures a perfectly flaky exterior.
Step 8: Bake Until Golden
Place your assembled Kreatopita in the preheated oven and bake for 40-45 minutes or until the phyllo turns golden and crispy. Keep an eye on it during the last few minutes, so it achieves that irresistible crunch that makes this dish so special.
Step 9: Rest and Serve
Once baked, remove the Kreatopita from the oven and allow it to rest for about 10 minutes. This helps the filling set a little, making it easier to slice. Use a sharp knife for clean cuts, and serve warm—enjoy the delightful layers of flavor!

How to Store and Freeze Kreatopita
Fridge: Keep any leftover Kreatopita in an airtight container for up to 3 days. This helps maintain its flaky texture while allowing the flavors to meld beautifully.
Freezer: For longer storage, wrap individual slices tightly in plastic wrap and then place them in a freezer bag. Frozen Kreatopita can be stored for up to 2 months.
Reheating: To warm up, place the slices in the oven at 180°C (350°F) for about 20 minutes, or until heated through. This will help restore some of that coveted crispiness!
Room Temperature: If you have leftovers after a gathering, let them cool to room temperature and refrigerate within 2 hours to ensure freshness and safety.
Kreatopita Recipe Variations
Feel free to let your creativity shine as you customize this dish to suit your family’s tastes and dietary preferences!
-
Lamb Substitute: Swap ground beef for ground lamb for an authentic Mediterranean flavor that elevates your Kreatopita to new heights. The richness of lamb brings a unique taste that warmly complements the spices.
-
Quinoa Alternative: Use quinoa instead of rice for a nutrient-packed option, providing a delightful texture while keeping it gluten-free. This swap creates a more cohesive filling without compromising flavor.
-
Pork Option: Want more variety? Ground pork offers a slightly sweeter taste. Just remember to drain excess fat after cooking for a perfect balance of flavors without greasiness.
-
Vegan Twist: Replace meat with finely minced mushrooms and lentils for a hearty vegetarian version. The combination not only absorbs flavors well but also offers a satisfying texture everyone will enjoy!
-
Heat It Up: Add crushed red pepper flakes or diced jalapeños for a spicy kick that will awaken your taste buds. A little heat can make this comforting dish even more thrilling.
-
Herb Blend: For a unique flavor, replace oregano with fresh dill or basil, which introduces a fresh note that brightens the entire dish, perfect for those who love herbaceous notes!
-
Mini Kreatopitas: Use muffin tins to create bite-sized individual pies for parties, making them easy to serve and perfect for gatherings. Just adjust the baking time accordingly, ensuring they’re golden brown.
-
Cheesy Surprise: Sprinkle shredded feta or mozzarella cheese into the filling for an ooey-gooey surprise in every bite. The creaminess adds an entirely new dimension to your Kreatopita experience.
Embrace these variations to amplify your Kreatopita adventure! Don’t forget to explore delightful pairings like a fresh Greek salad or creamy tzatziki, enhancing your family meal even more. If you’re interested in more recipes, you might also enjoy making Zebra Cookies Swirled or Peanut Butter Blossoms for a sweet finish!
What to Serve with Golden, Flaky Kreatopita?
Pair your Kreatopita with delightful side dishes that enhance this savory Greek meat pie’s rich flavors and textures.
-
Fresh Greek Salad: A medley of crisp cucumbers, juicy tomatoes, and tangy feta brings a refreshing balance to the rich pie. It’s the perfect way to brighten your plate.
-
Tzatziki Sauce: This cool, creamy yogurt dip with hints of garlic and cucumber complements the warm spices in the filling, adding a refreshing contrast that is utterly irresistible.
-
Warm Pita Bread: Soft and pillowy pita acts like a sponge for any leftover filling, inviting you to savor every single bite while adding a lovely texture to the meal.
-
Roasted Vegetables: A medley of roasted seasonal veggies drizzled with olive oil provides a delightful caramelization, elevating the meal with sweet and earthy flavors that pair beautifully.
-
Olive Tapenade: This salty, savory spread brings Mediterranean flair and delivers an extra kick when enjoyed alongside each bite, highlighting the robust flavors of the Kreatopita.
-
Red Wine: A glass of light-bodied red wine like Pinot Noir complements the savory notes of the meat pie and enhances the overall meal experience.
Enhance your dining table with these delicious accompaniments, and watch as they elevate your family meal into a Mediterranean feast!
Expert Tips for Kreatopita Recipe
-
Keep Phyllo Covered: Always cover your unused phyllo sheets with a damp towel while working. This prevents them from drying out and becoming difficult to handle.
-
Sharp Knife for Slicing: After resting your baked Kreatopita, use a sharp knife to slice it. This ensures neat edges and enhances the presentation when serving.
-
Avoid Overcrowding: Limit the amount of filling you add to avoid overflowing and sogginess. Ensure even distribution for a well-cooked pie that maintains its crispness.
-
Customize Your Filling: Don’t hesitate to experiment! Swap ground beef with lamb for a traditional twist or use quinoa for a healthier alternative. Tailor your Kreatopita recipe to suit your taste!
-
Check for Doneness: Keep an eye on the color during the last few minutes of baking. You want a beautiful golden hue to achieve that perfect crispy finish.
-
Rest Before Serving: Allow the pie to rest for about 10 minutes before slicing. This lets the filling set, making it easier to cut and serve.
Make Ahead Options
These Kreatopita are perfect for busy home cooks looking to streamline meal prep! You can prepare the filling up to 24 hours in advance by sautéing the onions, browning the meat, and mixing in the rice and seasonings. Allow the mixture to cool, then refrigerate in an airtight container to maintain its flavor and prevent drying out. You can also layer the phyllo in the baking dish and store it, covered, for up to 3 days before adding the filling. When you’re ready to enjoy your Kreatopita, simply assemble it and bake as directed for delicious, hassle-free results that feel just as fresh!
Kreatopita Recipe FAQs
What type of phyllo dough should I use for the Kreatopita?
Absolutely! When making Kreatopita, I recommend using fresh or frozen phyllo dough. If using frozen, be sure to thaw it in the refrigerator overnight. Always keep the phyllo sheets covered with a damp towel while you work to prevent them from drying out and becoming brittle.
How long can I store leftover Kreatopita in the fridge?
Very! You can store any leftover Kreatopita in an airtight container in the fridge for up to 3 days. This not only keeps it fresh but also allows the flavors to meld, often enhancing the taste! Just make sure to let it cool to room temperature before storing.
Can I freeze Kreatopita, and if so, how?
Of course! To freeze your Kreatopita, let it cool completely, then wrap individual slices tightly in plastic wrap. Place the wrapped slices in a freezer bag, and they can last up to 2 months. When you’re ready to enjoy them again, simply reheat in the oven at 180°C (350°F) for about 20 minutes to get that crispy texture back!
What should I do if my filling is too watery?
If you find that your filling is too watery, don’t worry! To remedy this, you can try cooking the filling a bit longer to allow excess moisture to evaporate. Alternatively, you can add a small amount of breadcrumbs or an extra spoonful of uncooked rice to help absorb some of the liquid. Make sure to mix it well before assembling the pie!
Is Kreatopita suitable for people with specific dietary restrictions?
Definitely! If you have dietary considerations, Kreatopita can be easily adapted. You can use ground turkey or even plant-based meat alternatives if you’re looking to reduce meat intake. For gluten-free options, look for gluten-free phyllo dough or try wrapping the filling in cabbage leaves instead. Always double-check your ingredients to ensure they align with any allergies or dietary needs.
How can I tell when my Kreatopita is done baking?
Great question! You’ll know your Kreatopita is perfectly baked when the top is golden brown and crispy, which usually takes about 40-45 minutes. Keep an eye on it in the last few minutes to prevent over-browning. Allow it to rest for around 10 minutes before slicing for more manageable portions. Don’t forget to enjoy the wonderful aroma that fills your kitchen!
Savory Kreatopita Recipe: Perfect Greek Meat Pie for Cozy Nights
Ingredients
Equipment
Method
- Preheat your oven to 180°C (350°F) and grease a baking dish with oil or melted butter.
- Heat a tablespoon of oil in a skillet over medium heat. Add the finely chopped onion and sauté for about 5-7 minutes until soft and fragrant.
- Add the ground beef to the skillet, breaking it up with a wooden spoon. Cook for around 8-10 minutes until it is well-browned.
- Stir in the uncooked rice, tomato sauce, oregano, salt, and pepper. Allow to simmer for about 10 minutes.
- Unroll the phyllo dough and cover with a damp towel. Brush a few sheets with oil or melted butter and stack them in layers in the baking dish.
- Spread the filling evenly over the phyllo dough in the baking dish.
- Cover the filling with another five layers of phyllo, brushing each layer with oil or melted butter.
- Bake in the preheated oven for 40-45 minutes or until golden and crispy.
- Allow the Kreatopita to rest for about 10 minutes before slicing and serving warm.
Leave a Reply