
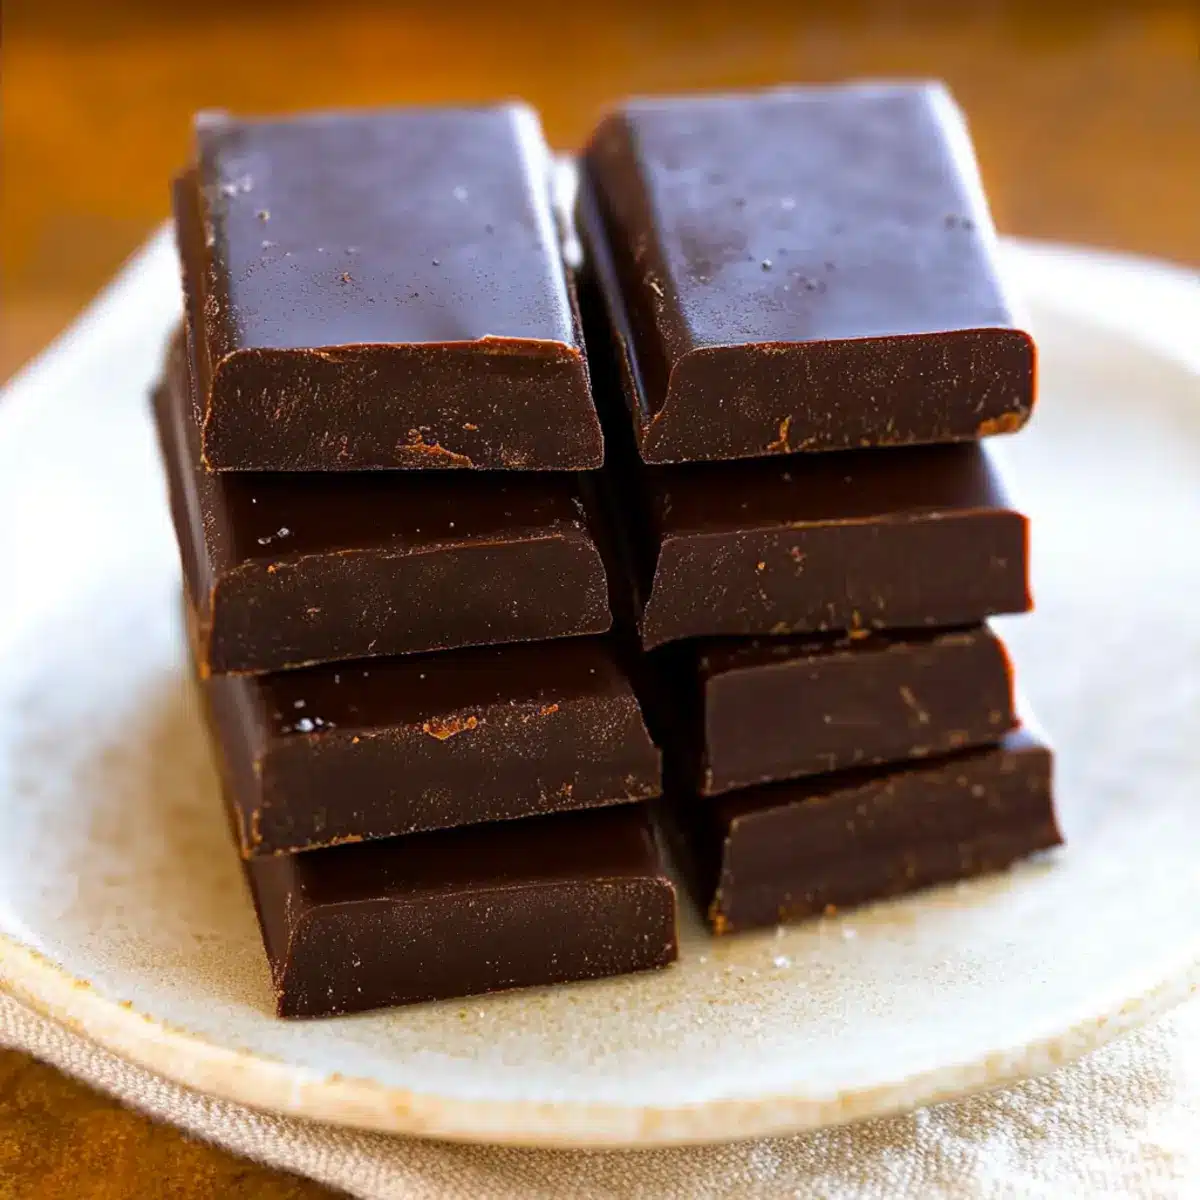
If you ever find yourself craving a sweet fix but don’t want to dive into store-bought options filled with additives, I have the perfect solution: homemade chocolate bars! With just three simple ingredients, you can whip up these rich, velvety treats in under 5 minutes. These homemade chocolate bars are not only a delightful indulgence, but they also come with the incredible perks of being customizable—think refreshing mint or creamy peanut butter swirls—and can suit various dietary needs like vegan or keto-friendly options. Plus, they’re a no-bake wonder, perfect for when the oven is the last thing you want to deal with. Ready to unleash your inner chocolatier? Let’s dive into this easy recipe that’s bound to satisfy your chocolate cravings! What flavor variation will you try first?
Why Make Homemade Chocolate Bars?
Customizable Fun: With just three ingredients, you can create a chocolate bar tailored to your taste buds. Guilt-Free Indulgence: Indulge without the guilt, as these bars can be made sugar-free and vegan-friendly. Quick and Easy: Ready in under 5 minutes, they are a perfect solution for instant cravings. No Baking Required: Enjoy the simplicity of a no-bake recipe while still impressing your friends. Crowd-Pleasing Delight: Share these treats at gatherings, and watch them disappear quicker than store-bought options! For more chocolate inspiration, consider trying out some Chocolate Chip Cookie Dough Truffles or a rich Disneylands Hot Chocolate.
Homemade Chocolate Bars Ingredients
For the Chocolate Base
• Cacao or Cocoa Powder – Provides the rich chocolate flavor; substitute with unsweetened cocoa powder for a similar taste.
• Coconut Oil – Acts as a creamy binding base; for a coconut-free version, use cocoa butter.
• Pure Maple Syrup, Honey, or Agave – Sweetens the chocolate while adding flavor; use vanilla stevia drops for a sugar-free option.
For Customization
• Optional Extracts (e.g., peppermint extract) – Enhance flavor without added sugar; explore various extracts to match your cravings.
• Add-ins (e.g., nuts, cocoa nibs, chia seeds) – Elevate texture and taste; get creative with your favorite ingredients to personalize your bars.
Step‑by‑Step Instructions for Homemade Chocolate Bars
Step 1: Prepare Ingredients
Begin by ensuring all your ingredients are ready. If your coconut oil is solid, gently warm it in the microwave for about 15-20 seconds until it melts into a liquid form. This will help blend the chocolate mixture smoothly. Measure out your cacao powder, sweetener, and any optional extracts or add-ins you plan to use to create your delicious homemade chocolate bars.
Step 2: Mix Ingredients
In a medium mixing bowl, combine the melted coconut oil with the cacao powder and your chosen sweetener. Use a whisk or spatula to mix the ingredients thoroughly for about 2-3 minutes until the texture is thick and silky smooth. This step is essential to achieve the best consistency for your chocolate bars, allowing all flavors to meld beautifully.
Step 3: Mold and Chill
Once your chocolate mixture is well-combined, pour it into flat containers or chocolate molds. If you don’t have molds, feel free to line a small baking dish with wax paper or use Ziploc bags cut at the bottom. Spread the mixture evenly, ensuring it fills the corners, as this will help create uniform homemade chocolate bars when set.
Step 4: Set
Place your filled molds or containers in the refrigerator to chill for approximately 30 minutes, or until the chocolate bars are firm and solid to the touch. For a quicker setting, you can also place them in the freezer for about 10-15 minutes, but watch closely to prevent over-chilling.
Step 5: Serve or Store
After the chocolate bars have solidified, carefully remove them from the molds or containers. Cut them into desired sizes using a sharp knife. You can serve your homemade chocolate bars immediately or store them in an airtight container in the fridge or freezer to keep them fresh and maintain their structure for future cravings.
What to Serve with 3-Ingredient Homemade Chocolate Bars
These delightful chocolate bars aren’t just a treat on their own; pairing them with complementary flavors can elevate your indulgence to heavenly heights!
-
Creamy Almond Butter: A luscious spread that adds a nutty richness, enhancing the chocolate flavor with a smooth contrast.
-
Fresh Berries: Juicy strawberries or raspberries provide a vibrant tartness that cuts through the richness, creating a balanced bite. The combination of sweet chocolate with tangy berries is simply irresistible.
-
Coconut Whipped Cream: Light and fluffy, this vegan-friendly topping infuses a tropical flair, making each bite even more decadent. It’s a perfect way to add creaminess without dairy!
-
Honey-Sweetened Greek Yogurt: The tangy creaminess complements the sweetness of the bars while adding protein, making it a delightful dip or side – think balance in every mouthful!
-
Hazelnut Coffee: Pair these bars with a warm cup of hazelnut-infused coffee for a cozy experience. The subtle nutty notes enhance the chocolate flavors beautifully.
-
Gourmet Sea Salt: A sprinkle of flaky sea salt over each bar brings a savory twist that contrasts with the sweetness, awakening your palate.
-
Chia Seed Pudding: For a nutritious side, whip up a chia seed pudding flavored with coconut or almond milk. The chewy texture adds an interesting contrast to the smoothness of the chocolate.
-
Matcha Latte: Enjoy a calming matcha latte alongside your chocolate bars. The earthy flavors offer a soothing yet sophisticated pairing that contrasts nicely with sweet treats.
Variations & Substitutions for Homemade Chocolate Bars
Feel free to get creative with your homemade chocolate bars and explore delicious twists that suit your taste!
-
Mint Chocolate: Add peppermint extract and stir in cacao nibs for a refreshing burst of flavor. This variation is perfect for those who love a cool aftertaste—great for enhancing chocolate’s richness!
-
Rocky Road: Fold in mini marshmallows and chopped nuts before chilling for a delightful texture contrast. This classic variation brings nostalgia and playfulness in every bite, making it a family favorite.
-
Peanut Butter Swirl: Swirl melted peanut butter into the chocolate mixture for a creamy, indulgent experience. It adds a nutty depth that complements the chocolate beautifully while doubling the yum factor.
-
Coconut Bliss: Incorporate shredded coconut into the mix for a tropical twist. This variation adds a delightful chewiness and pairs wonderfully with the chocolate’s richness—your taste buds will be doing a happy dance!
-
Low-Carb/Keto Option: Use unsweetened cocoa powder and sugar-free sweeteners like erythritol or stevia for a guilt-free treat. Perfect for those following a keto lifestyle, it satisfies chocolate cravings without the carbs!
-
Spicy Dark Chocolate: Add a pinch of cayenne pepper or chili powder for a spicy kick. It creates a unique flavor profile that tantalizes the taste buds, perfect for adventurous chocolate lovers!
-
Coffee Infusion: Mix in instant coffee granules for a mocha flavor that’s simply irresistible. This variation is ideal for those who enjoy a caffeine boost in their chocolate delight.
-
Fruit Fusion: Dried fruits like cranberries or cherries can elevate your bars with a burst of sweetness and tartness. Pairing chocolate with fruit adds a healthy twist, ensuring every bite is packed with flavor and texture!
Explore these variations and make these homemade chocolate bars your own. Looking for more chocolate inspiration? You might also love these Chocolate Peppermint Fudge treats, or perhaps some delightful Chocolate Orange Shortbread cookies to pair with your bars!
Storage Tips for Homemade Chocolate Bars
-
Fridge: Store your homemade chocolate bars in an airtight container in the fridge for up to 2 weeks. This keeps them fresh and maintains their rich, velvety texture.
-
Freezer: For longer storage, freeze the chocolate bars in a suitable container for up to 3 months. Ensure they are well-wrapped to prevent freezer burn.
-
Reheating: If you choose to enjoy your bars warm or melted, gently microwave them in short bursts (about 10-15 seconds) until desired consistency is reached—great for drizzling!
-
Room Temperature: If serving immediately, keep the bars at room temperature for no longer than 30 minutes to avoid melting, especially during warmer months.
Make Ahead Options
These Homemade Chocolate Bars are a wonderful choice for meal prep! You can prepare the chocolate mixture up to 24 hours in advance by mixing your cacao powder, melted coconut oil, and sweetener in a bowl. Transfer the combined mixture into molds or lined flat containers, then store them in the refrigerator. This helps to prevent browning while maintaining their delightful texture. When you’re ready to enjoy, simply pull them out, chill for 30 minutes if previously frozen, and you’ll have a treat that’s just as delicious and perfectly satisfying with minimal effort. Enjoy the convenience of having your sweet snacks ready to go!
Expert Tips for Homemade Chocolate Bars
-
Temperature Matters: Ensure coconut oil is fully melted before mixing. This helps achieve a smooth texture for your homemade chocolate bars.
-
Mind the Chill: Allow enough chilling time in the fridge or freezer. Undercooling can lead to crumbly bars, so patience is key!
-
Customize Smartly: When adding flavors and textures, be mindful of balance. Too many add-ins can disrupt the consistency of your homemade chocolate bars.
-
Serve Smart: If serving at a gathering, keep chocolate bars cool until just before serving to prevent melting and maintain their shape.
-
Storage Secrets: Store in an airtight container in the fridge or freezer. This keeps your treats fresh and extends their shelf life!
Homemade Chocolate Bars Recipe FAQs
How do I select the right cacao or cocoa powder?
Absolutely! When choosing cacao or cocoa powder, look for unsweetened options that are dark and rich in color. This indicates a deep flavor. For baking or making chocolate bars, I often prefer organic varieties, as they tend to contain fewer additives and offer a more intense chocolate experience.
What is the best way to store homemade chocolate bars?
Very! You can store your homemade chocolate bars in an airtight container in the fridge for up to 2 weeks. This helps maintain their delicious texture. If you prefer a longer shelf life, wrap them well and freeze for up to 3 months. Just remember to let them thaw in the fridge before enjoying for the best texture.
Can I freeze homemade chocolate bars?
Certainly! To freeze your chocolate bars, wrap them tightly in plastic wrap or store them in a freezer-safe container. This prevents freezer burn and keeps them fresh for up to 3 months. When you’re ready to indulge, let them thaw in the fridge for a few hours before serving.
What should I do if my chocolate bars crumble after setting?
Oh no! If your chocolate bars crumble, it could be due to insufficient chilling time. Make sure they are fully set before cutting. If they still seem crumbly, consider adding a little more coconut oil in your next batch to provide better binding. A thicker mix may also help; try reducing the cocoa a bit in favor of more coconut oil.
Are these chocolate bars safe for pets?
Good question! While homemade chocolate bars are a treat for you, keep them away from pets as chocolate can be toxic to dogs and other animals. If your furry friend gets into any, consult your veterinarian right away. Stick to pet-safe treats to keep them happy and healthy!
Can I adjust the sweetener in the recipe according to my dietary needs?
Absolutely! You can easily adjust the sweetener in your homemade chocolate bars to suit your dietary needs. For a sugar-free option, use vanilla stevia drops or erythritol. Start with a small amount and adjust to taste, keeping in mind that different sweeteners have different levels of sweetness!
Homemade Chocolate Bars: Easy, Customizable, Guilt-Free Treats
Ingredients
Equipment
Method
- Prepare all your ingredients and warm solid coconut oil in the microwave for 15-20 seconds until melted.
- In a bowl, mix melted coconut oil with cacao powder and chosen sweetener for 2-3 minutes until smooth.
- Pour the mixture into molds or containers, ensuring to fill the corners for even bars.
- Chill in the refrigerator for about 30 minutes or the freezer for 10-15 minutes until firm.
- Remove from molds, cut into desired sizes, and serve or store in an airtight container.
Leave a Reply