
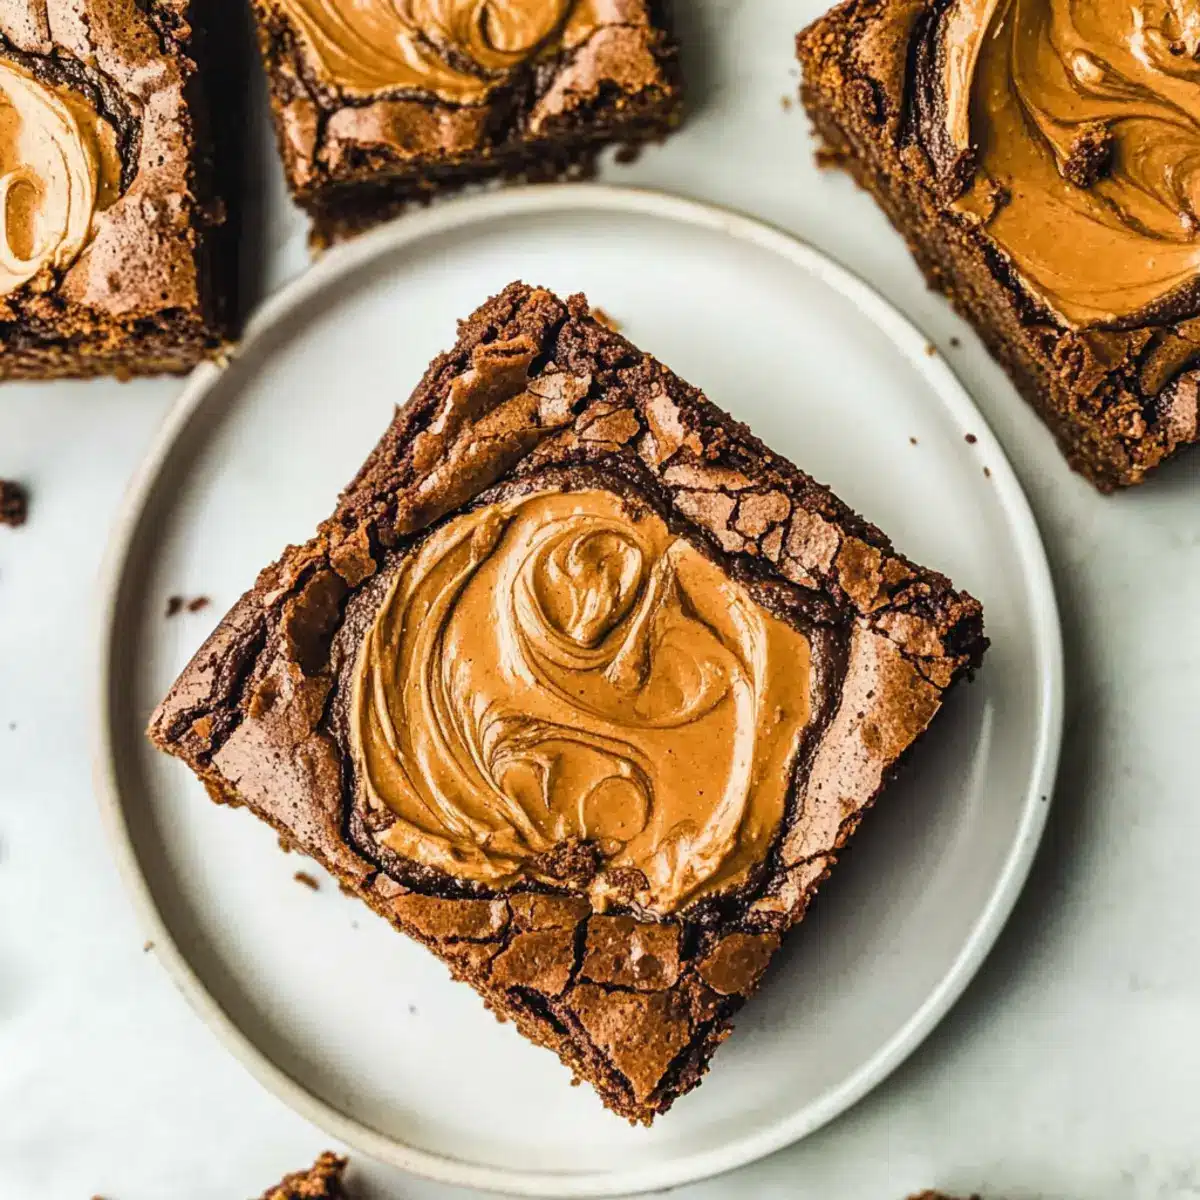
While rummaging through my pantry last week, I stumbled upon a forgotten stash of Biscoff cookies, nestled amidst the usual suspects of flour and sugar. It was a mini cooking crisis waiting to happen, urging me to create something special—a recipe to flaunt their caramelized sweetness. Enter my Gooey Biscoff Brownies with Cookie Butter Swirls. This easy, one-bowl recipe transforms those delightful cookies into rich, fudgy brownies topped with luscious cookie butter, making them an irresistible dessert for any occasion. Perfect for both beginner bakers and seasoned pros, these brownies not only simplify your baking but also deliver a flavor explosion that has friends and family begging for more. Are you ready to elevate your dessert game and indulge in a sweet treat that promises both comfort and satisfaction?
Why are Biscoff Brownies a Must-Try?
Irresistible Flavor: These brownies uniquely blend rich chocolate and caramelized Biscoff cookies, creating a dessert that tantalizes your taste buds with every bite.
One-Bowl Wonder: Say goodbye to complicated recipes; this one-bowl method makes baking a breeze—perfect for those busy weeknights or spontaneous gatherings.
Fudgy Perfection: Enjoy a soft, gooey center paired with crispy edges, ensuring the ultimate brownie experience everyone will adore.
Versatile Options: Want to mix it up? Feel free to substitute the cookie butter or try different cookie variations for a personalized twist.
Crowd-Pleasing Delight: Whether served at a party or enjoyed as an afternoon snack, these Biscoff brownies will wow your guests and leave them craving more! For more delicious dessert ideas, check out my easy baking recipes for inspiration.
Biscoff Brownie Ingredients
Here’s what you’ll need to create your delightful Biscoff brownies!
For the Brownie Batter
- Butter – provides moisture and richness; substitute with coconut oil for a dairy-free version.
- Chocolate (Semi-sweet or Dark) – adds depth and balances sweetness; opt for high-quality chocolate for the best flavor.
- Granulated Sugar – sweetens the batter; you can use brown sugar for a chewier texture.
- Eggs – binds the mixture and adds richness; flax eggs work well as a vegan substitute.
- Vanilla Extract – enhances the overall flavor; ensure it’s pure for optimal taste.
- All-Purpose Flour – forms the structure of the brownies; gluten-free flour can be used if necessary.
- Cocoa Powder – intensifies the chocolate flavor; Dutch-processed cocoa offers a unique taste.
- Salt – balances the sweetness; essential for enhancing the overall flavor.
- Crushed Biscoff Cookies – adds texture and that signature flavor; can substitute with any spiced cookie if needed.
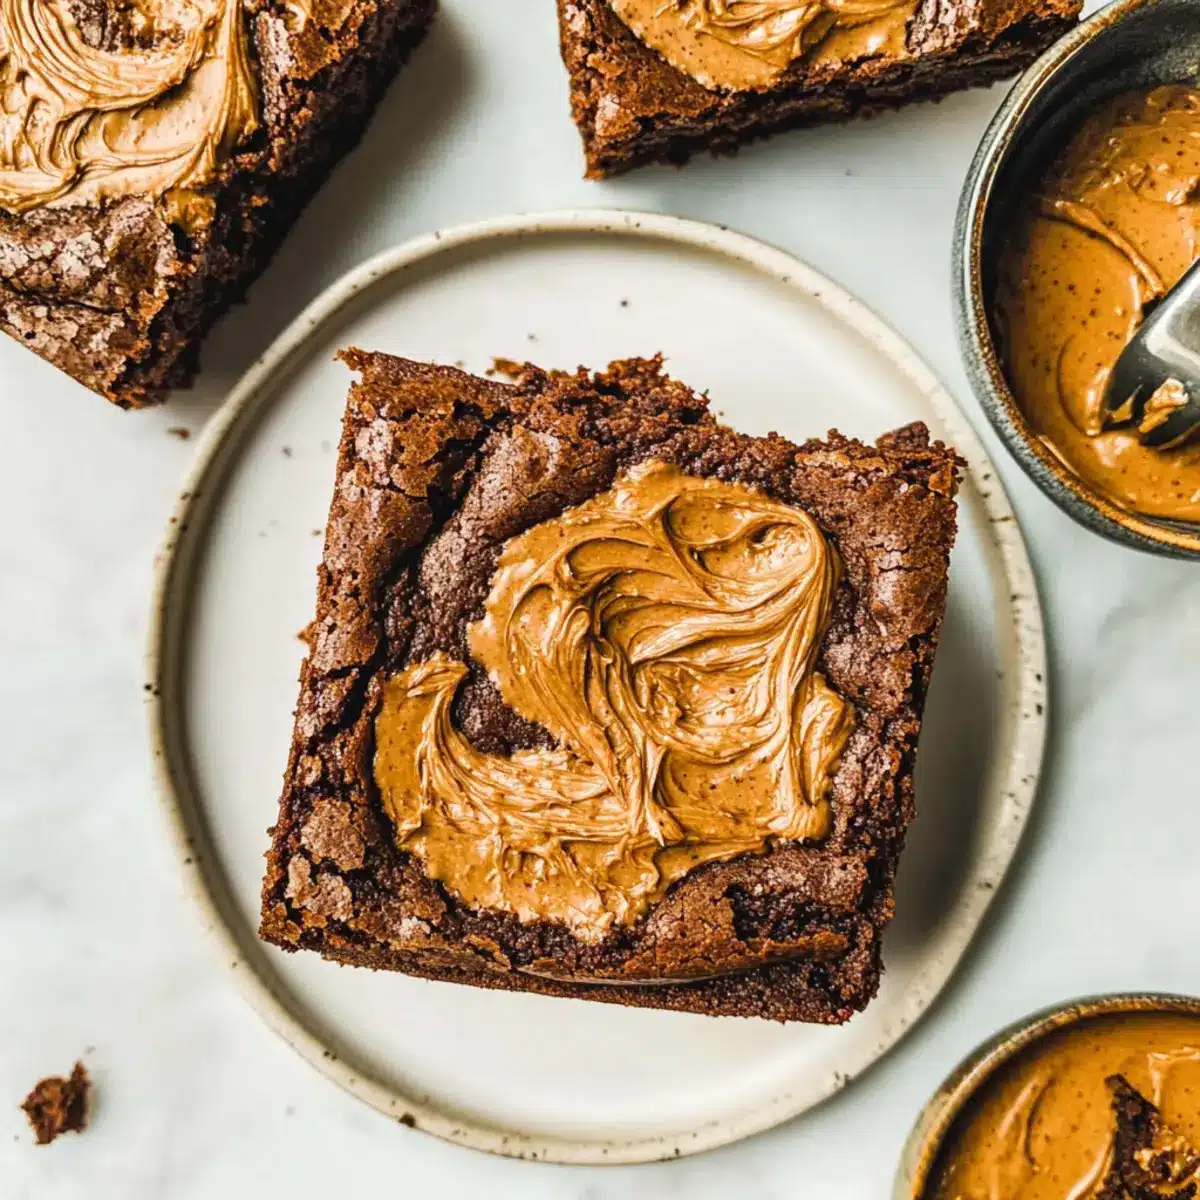
- Cookie Butter – creates those delicious swirls and adds extra flavor; nut butter serves as a great substitution for a different twist.
Feel free to gather these ingredients, and let’s dive into the world of decadent Biscoff brownies!
Step‑by‑Step Instructions for Biscoff Brownies
Step 1: Preheat and Prepare
Begin by preheating your oven to 350°F (180°C). While the oven is warming up, line an 8-inch square pan with parchment paper, allowing some overhang for easy lifting later. This simple lining technique will ensure that your gooey Biscoff brownies release effortlessly after baking.
Step 2: Melt the Chocolate and Butter
In a heatproof bowl, combine the butter and chocolate, placing it over a pot of simmering water to create a double boiler. Stir continuously until melted and smooth, about 5-7 minutes. If using a microwave, heat in 30-second intervals, stirring in between. Allow the mixture to cool slightly before moving to the next step, ensuring the chocolate stays glossy.
Step 3: Whisk the Wet Ingredients
In a large mixing bowl, whisk together eggs, granulated sugar, and vanilla extract until light in color and slightly fluffy, about 2-3 minutes. This process incorporates air into the batter, helping achieve a delightful texture in your Biscoff brownies.
Step 4: Combine the Mixtures
Gently stir the cooled melted chocolate mixture into the egg mixture using a rubber spatula. Ensure everything is well combined without overmixing. The glossy chocolate should blend seamlessly with the wet ingredients, creating a rich, decadent base for your batter.
Step 5: Fold in the Dry Ingredients
Sift in the all-purpose flour, cocoa powder, and salt. Carefully fold these dry ingredients into the wet mix until just combined—this creates the fudgy texture you’re looking for. Be cautious not to overmix; small lumps are perfectly fine. Finally, fold in the crushed Biscoff cookies for added flavor and crunch.
Step 6: Prepare for Baking
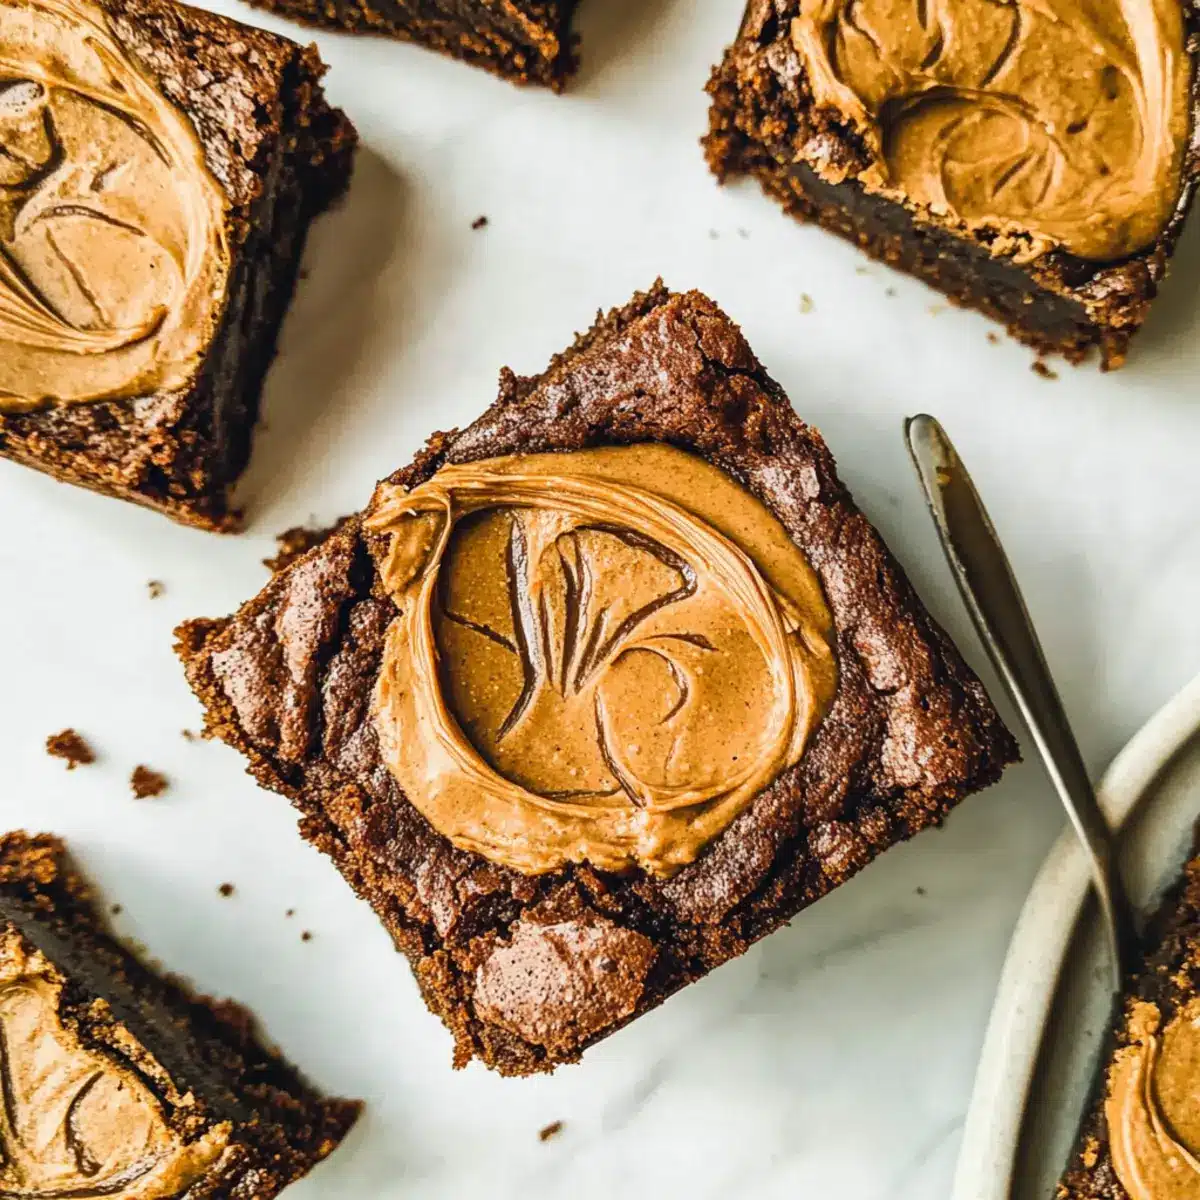
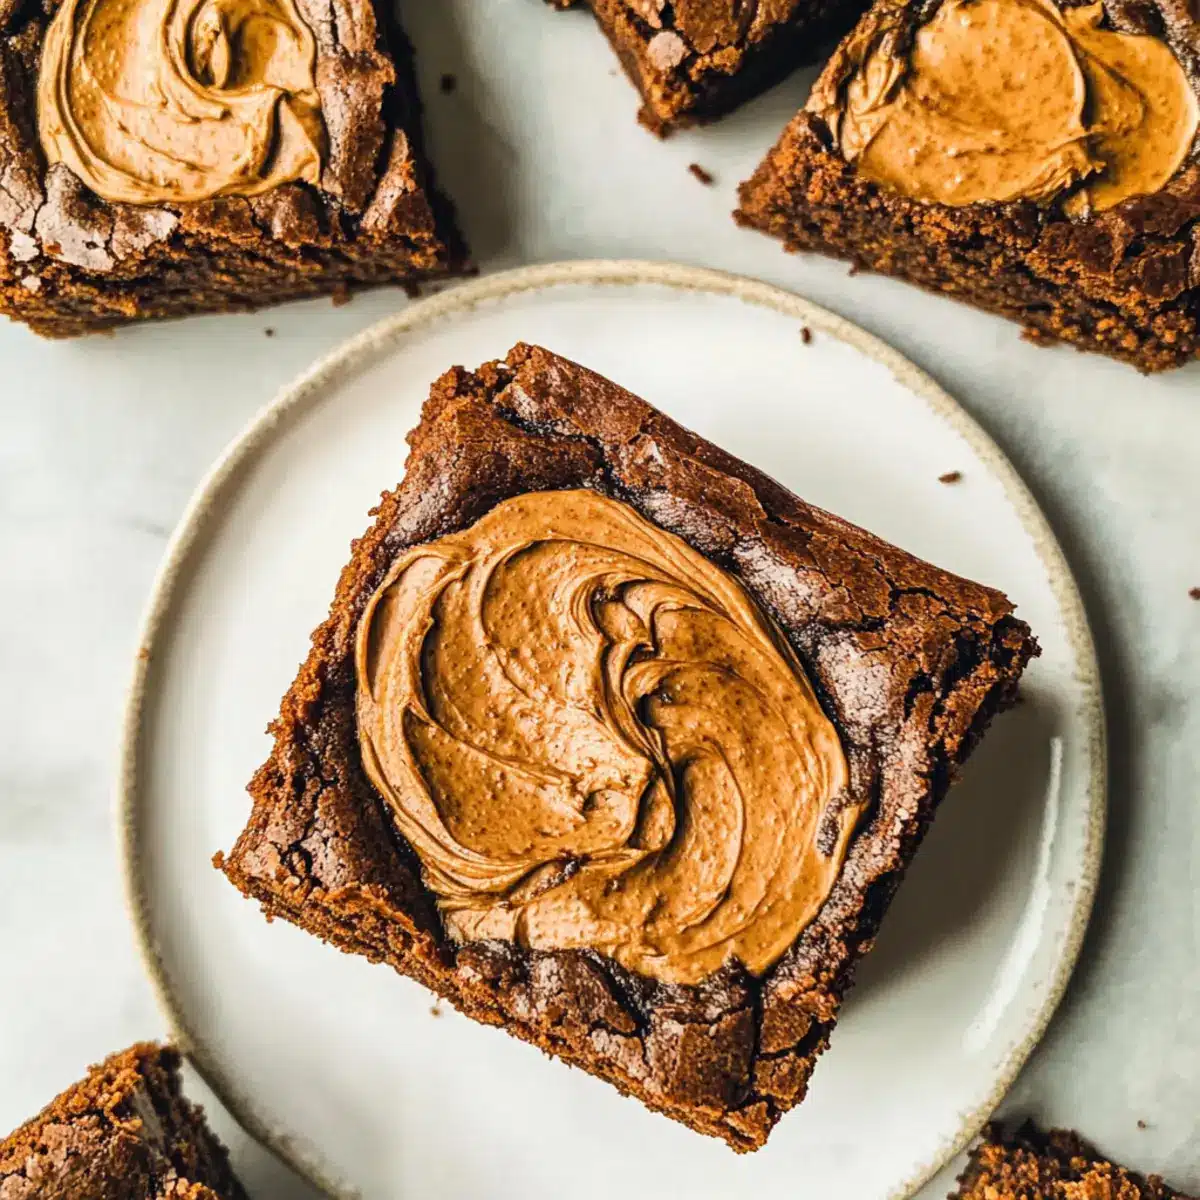
Pour the brownie batter into the prepared pan, using a spatula to level the top. For an extra treat, dollop spoonfuls of cookie butter on top, then gently swirl it into the batter with a knife to create beautiful marbled patterns. For added crunch, sprinkle additional crushed Biscoff cookies over the top if desired.
Step 7: Bake to Perfection
Place your pan in the preheated oven and bake for 30-35 minutes. Keep an eye on it; the edges should be set with a slightly soft center. You can check for doneness by inserting a toothpick; it should come out with a few moist crumbs for that perfect gooey brownie texture.
Step 8: Cool Before Serving
Once baked, allow the brownies to cool in the pan on a wire rack. For cleaner cuts, refrigerate for about 1 hour after cooling. This step will help the Biscoff brownies firm up a bit, making them easier to slice and serve, showing off those delicious cookie butter swirls.
Biscoff Brownies Variations & Substitutions
Feel free to get creative with these delightful brownies, making them uniquely yours while still holding onto that comforting Biscoff essence!
-
Nut-Free: Swap out the cookie butter with sunbutter for a nut-free twist that doesn’t skimp on flavor. It still delivers a creamy richness.
-
Vegan: Use flax eggs instead of traditional eggs and coconut oil in place of butter for a fully plant-based treat. You won’t miss the eggs one bit!
-
Gluten-Free: Substitute all-purpose flour with your favorite gluten-free blend to ensure everyone can enjoy this sweet indulgence. It’s just as delicious!
-
Extra Flavor: Add a teaspoon of espresso powder to amplify the chocolate flavor and deepen the richness of your brownies. It’s a game-changer for coffee lovers!
-
Fruity Twist: Mix in a handful of dried cherries or cranberries for a fruity burst and a pop of color. This little addition adds both tartness and a chewy texture.
-
Minty Fresh: Stir in a few drops of peppermint extract for a refreshing mint chocolate vibe. Perfect for those who crave a little extra zing!
-
Spicy Kick: Add a tiny pinch of cayenne pepper or chili powder for a surprising hint of heat that beautifully contrasts with the sweet flavors. It’s an adventure in every bite!
-
Cheesecake Swirl: Introduce a layer of cream cheese mixed with sugar on top of the brownie batter before baking for a delicious cheesecake ripple effect that’ll take your treats to the next level.
Let your imagination run wild as you savor these decadent treats! For more twists on classic desserts, check out my easy baking recipes that will inspire you to create even more deliciousness.
Storage Tips for Biscoff Brownies
Room Temperature: Store your Biscoff brownies in an airtight container at room temperature for up to 3 days. This keeps them fresh and maintains their gooey texture.
Fridge: If you prefer a firmer brownie, refrigerate them in an airtight container for up to a week. Let them come to room temperature before serving for optimal flavor.
Freezer: For longer storage, freeze slices of Biscoff brownies in an airtight container or freezer bag for up to 3 months. Thaw in the fridge overnight before enjoying again.
Reheating: To enjoy your brownies warm, microwave a slice for 10-15 seconds. This will enhance the gooey cookie butter swirls, bringing back that fresh-baked taste!
Make Ahead Options
These Gooey Biscoff Brownies are perfect for meal prep, saving you time on busy weeknights! You can prepare the brownie batter up to 24 hours in advance. Simply mix everything as instructed, then cover the bowl with plastic wrap and refrigerate until you’re ready to bake. This keeps the flavors rich and ensures the batter remains fresh. When you’re ready to enjoy a delicious treat, simply pour the chilled batter into the lined pan, dollop with cookie butter, and bake as directed. These brownies will be just as fudgy and delightful, ready to satisfy your sweet tooth with minimal effort!
Expert Tips for Biscoff Brownies
Avoid Overbaking: Keep an eye on your brownies; they should come out with moist crumbs. Overbaking will lead to a dry texture.
Use Quality Ingredients: Opt for high-quality semi-sweet chocolate to enhance the flavor of your Biscoff brownies. Your choice of chocolate matters!
Cool Properly: Allow the brownies to cool in the pan before refrigerating. This step is crucial for achieving that perfect gooey center.
Mix Gently: When folding in the dry ingredients, do so gently to maintain that fudgy texture. Overmixing can lead to a cake-like consistency.
Perfect Swirls: When adding cookie butter on top, use a knife but don’t over-swirl; you want those beautiful cookie butter pockets in every bite.
What to Serve with Gooey Biscoff Brownies?
Indulging in these fudgy delights opens the door to a world of delicious pairing possibilities that will elevate your dessert experience.
-
Vanilla Ice Cream: The creamy richness perfectly balances the brownie’s fudginess, creating a delightful contrast in textures. A scoop atop your warm brownie is pure heaven!
-
Whipped Cream: Light and airy, a dollop of freshly whipped cream enhances the sweetness and adds a luscious texture, perfect for those who enjoy a lighter touch.
-
Espresso or Coffee: The bold flavors of coffee enhance the chocolate while counteracting the sweetness, making for a sophisticated flavor combination. Sip alongside your brownie for an extra cozy treat.
-
Caramel Sauce: Drizzling warm caramel on top adds a rich, buttery flavor that complements the cookie butter swirls. It elevates the dessert to a whole new level of indulgence!
-
Chopped Nuts: Adding toasted walnuts or pecans introduces a delightful crunch, enhancing both texture and flavor. The nutty notes pair beautifully with the spiced Biscoff cookie flavor.
-
Mint Chocolate Chip Ice Cream: This refreshing option introduces a burst of cool mint that contrasts against the warm, rich brownies. It’s a fun twist that’ll keep your taste buds intrigued.
-
Coconut Whipped Topping: For a dairy-free alternative, coconut cream whipped into a fluffy topping offers a unique flavor complimenting the Biscoff’s spices. It’s a delightful treat for everyone!
-
Chocolate Sauce: A drizzle of rich chocolate sauce deepens the choco flavor and adds an elegant touch, making these brownies even more irresistible, especially for chocolate lovers.
-
Brewed Tea: A cup of chai or spiced tea complements the brownie’s speculoos flavors, enhancing the overall experience with fragrant spices and a calming warmth.
Biscoff Brownies Recipe FAQs
What type of Biscoff cookies should I use?
You can use regular Biscoff cookies for that classic caramelized flavor, but feel free to explore alternative spiced cookies if you want to customize the taste. Just ensure they have a similar texture for the best results!
How should I store leftover Biscoff brownies?
Store your Biscoff brownies in an airtight container at room temperature for up to 3 days. If you prefer a firmer texture, you can refrigerate them for up to a week. Just make sure to let them come back to room temperature before indulging!
Can I freeze Biscoff brownies?
Absolutely! To freeze your Biscoff brownies, slice them and place them in an airtight container or a freezer bag. They can be frozen for up to 3 months. To enjoy, simply let them thaw in the fridge overnight and warm them in the microwave for 10-15 seconds for that fresh-baked taste!
What if my brownies are too cakey?
If your Biscoff brownies turn out cakey, it might be due to overmixing the batter or baking them for too long. To maintain that fudgy texture, mix until just combined and keep an eye on them while baking; they should come out with moist crumbs on the toothpick!
Can I make this recipe vegan-friendly?
Yes! To make vegan Biscoff brownies, substitute the eggs with flax eggs (1 tablespoon ground flaxseed mixed with 2.5 tablespoons of water per egg) and replace butter with coconut oil. Everything else can remain the same for delicious, plant-based brownies!
How can I tell when the brownies are done baking?
Check for doneness by inserting a toothpick into the center. If it comes out with a few moist crumbs, your Biscoff brownies are ready! The edges should be set, while the center remains soft for that perfect gooey bite.
Decadent Biscoff Brownies with Irresistible Cookie Butter Swirls
Ingredients
Equipment
Method
- Preheat your oven to 350°F (180°C) and line an 8-inch square pan with parchment paper.
- Melt the butter and chocolate together in a double boiler until smooth, stirring frequently.
- In a bowl, whisk eggs, sugar, and vanilla until light and fluffy, approximately 2-3 minutes.
- Combine the melted chocolate mixture into the egg mixture, stirring gently until blended.
- Fold in the flour, cocoa powder, and salt until just combined, then fold in the crushed Biscoff cookies.
- Pour the batter into the prepared pan, dollop cookie butter on top, and swirl it gently.
- Bake for 30-35 minutes until the edges are set but the center is still soft; check with a toothpick for doneness.
- Let the brownies cool in the pan on a wire rack before refrigerating for about an hour for cleaner cuts.
Leave a Reply