
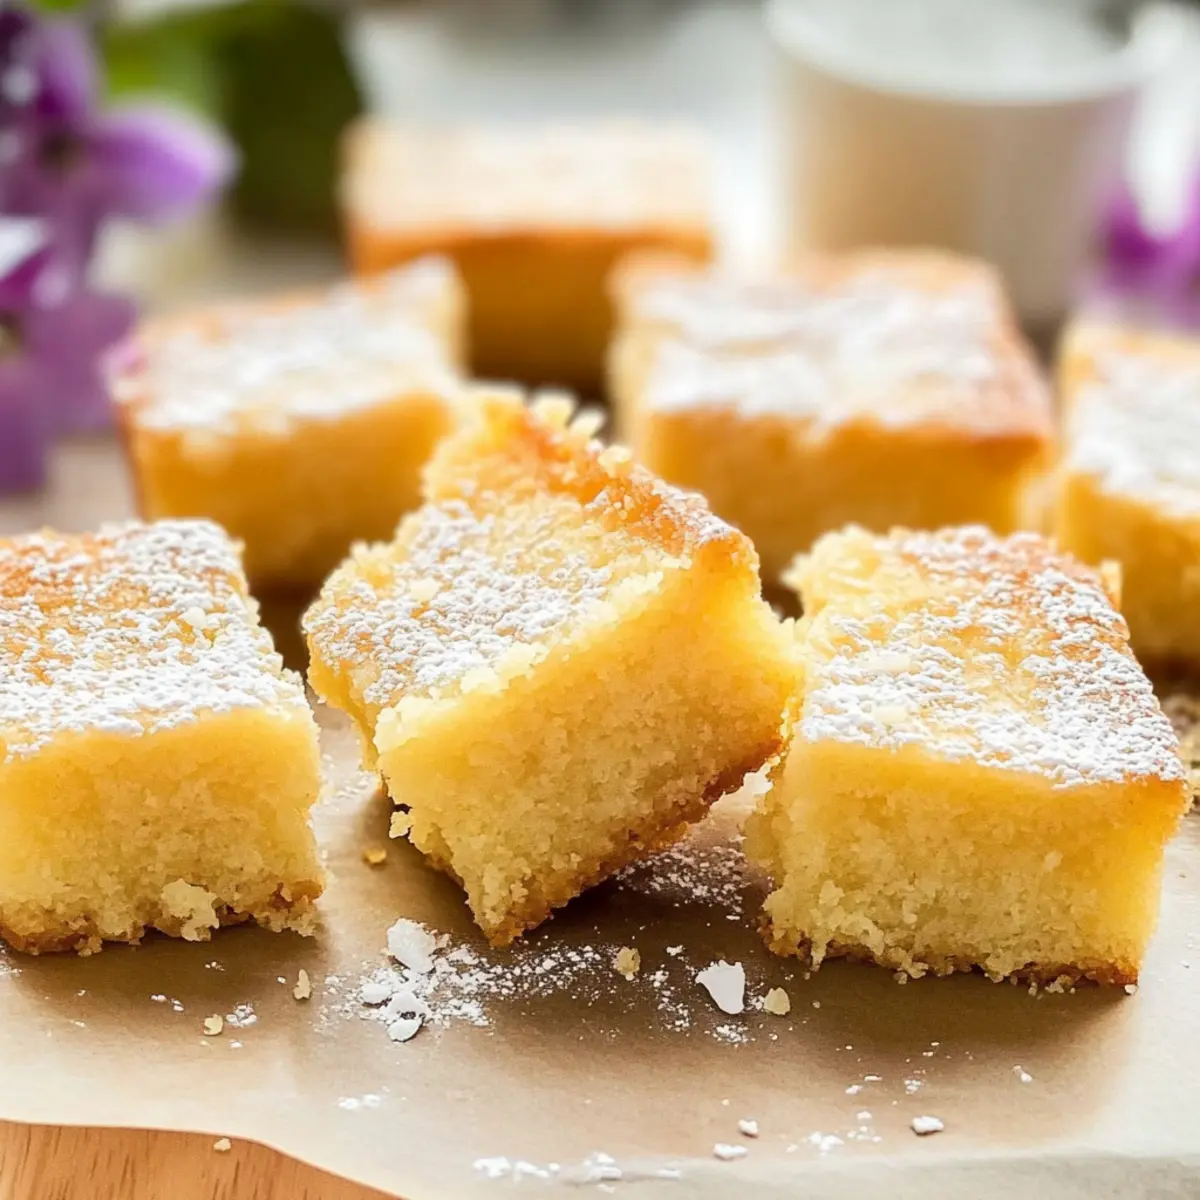
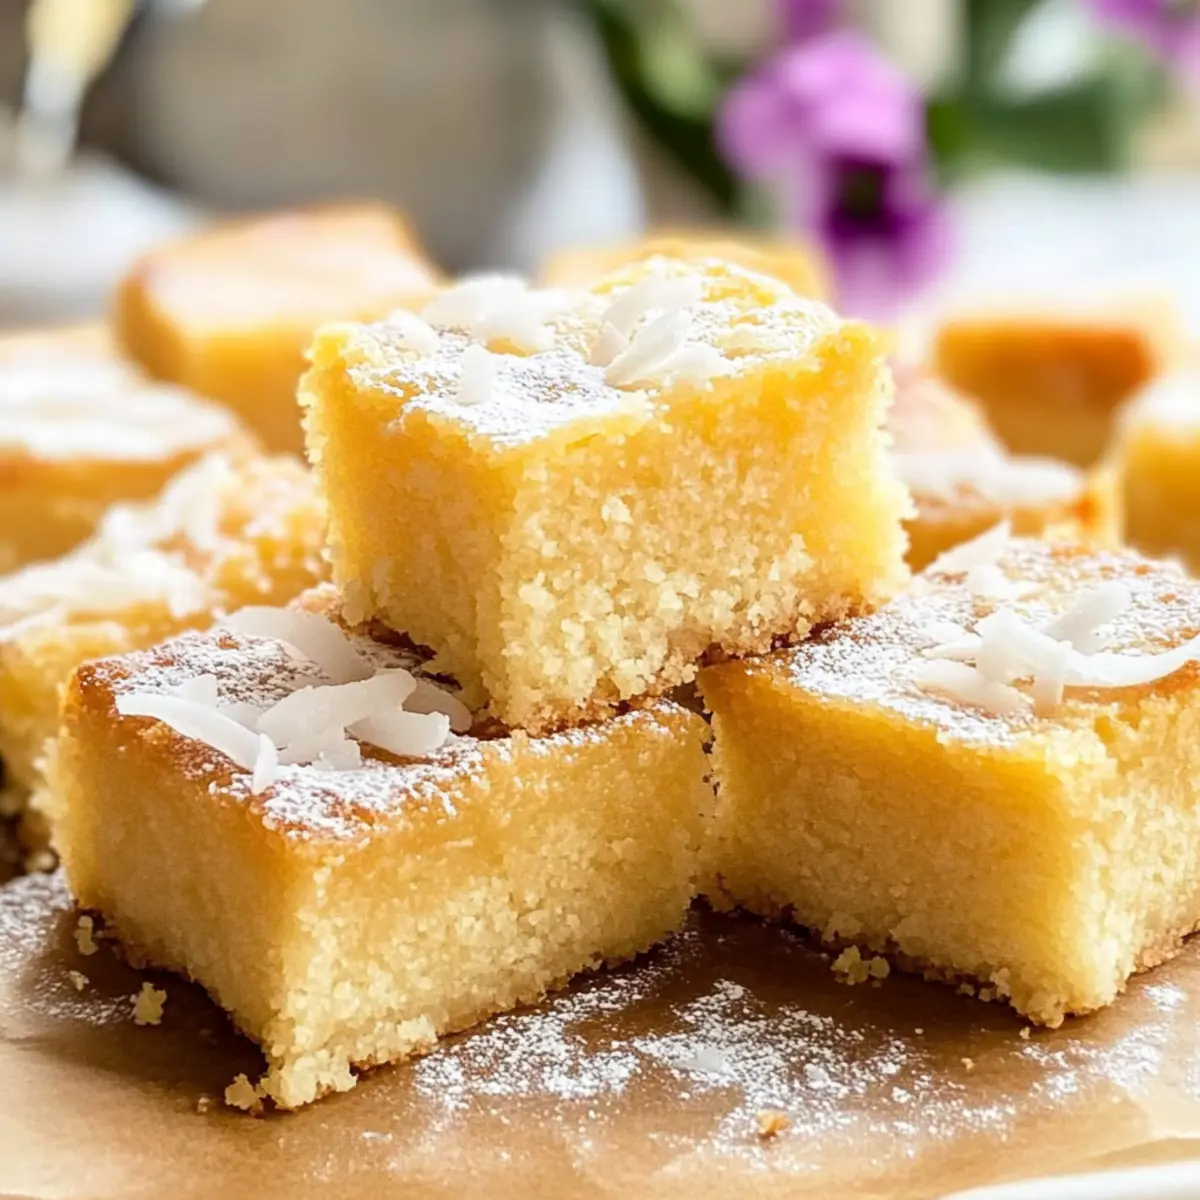
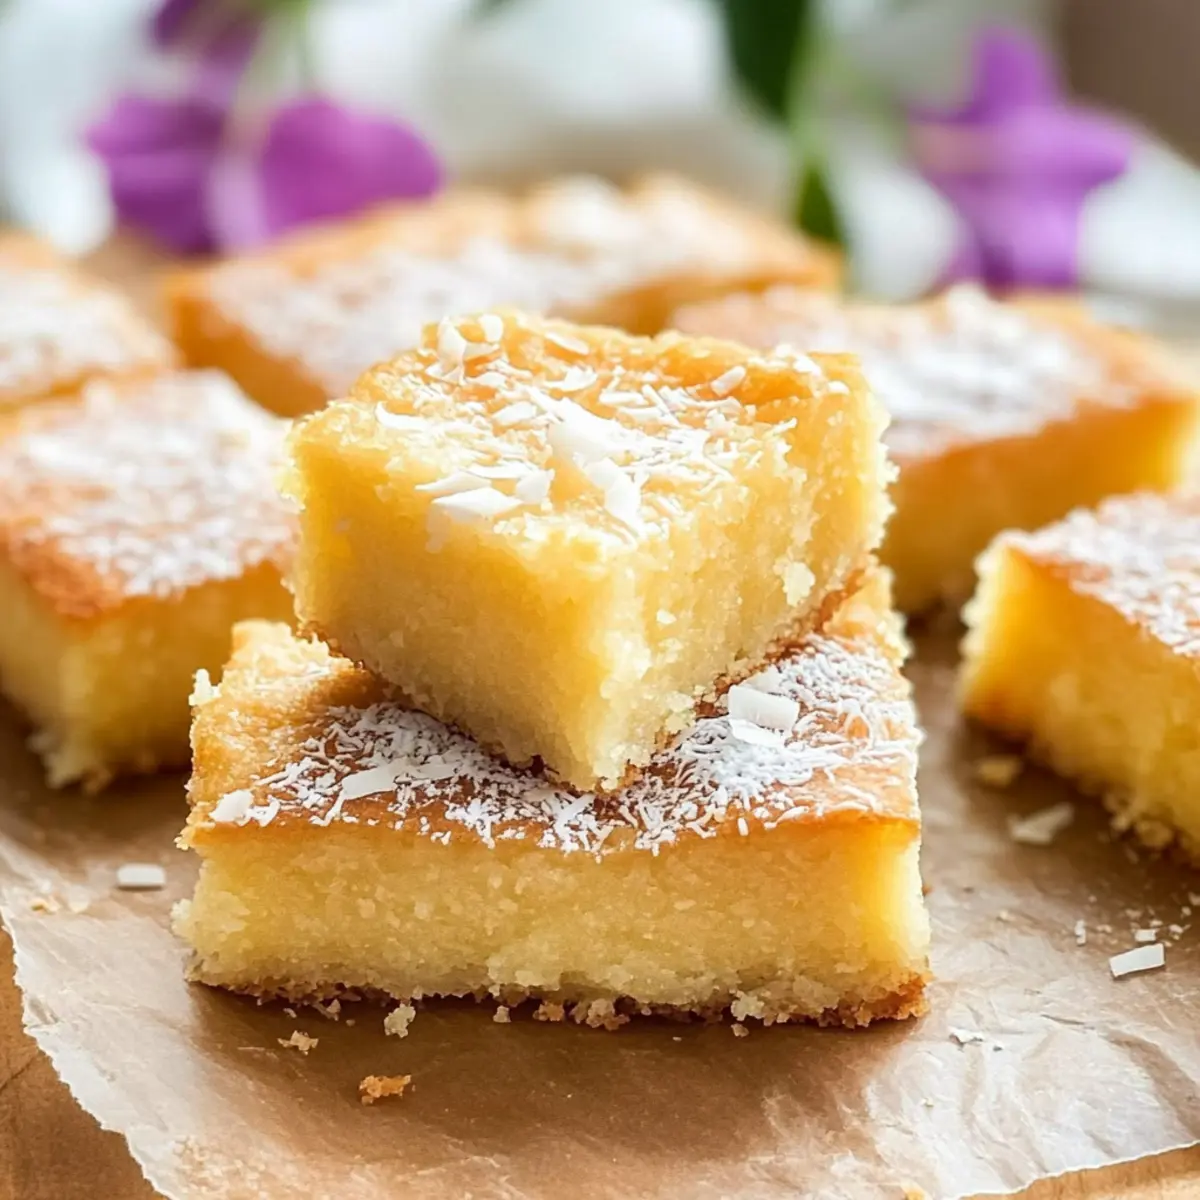
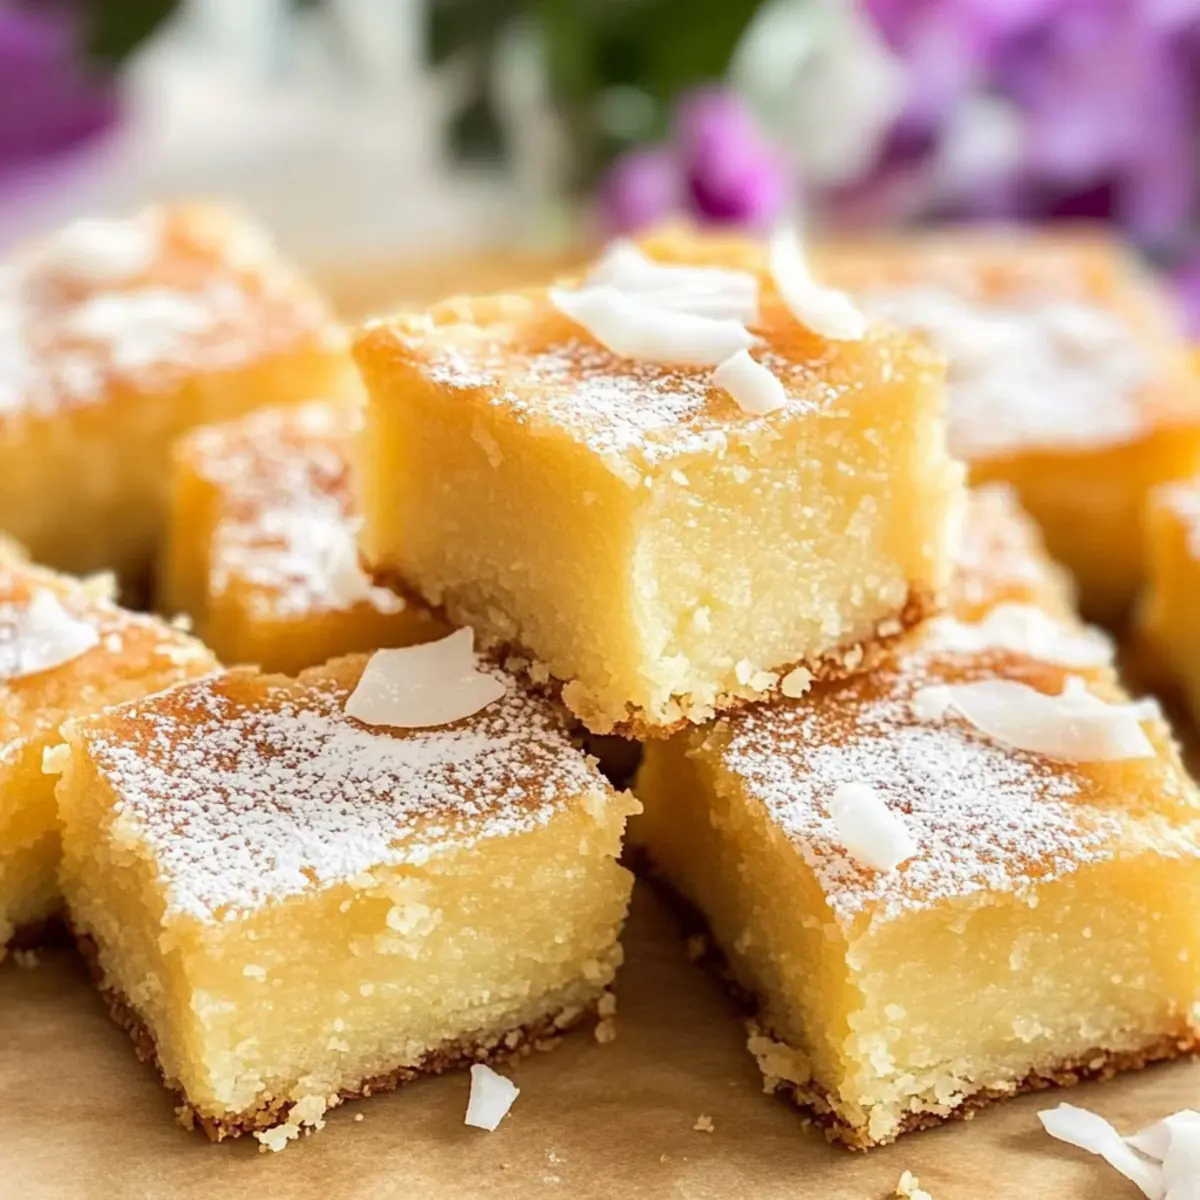
In a bustling kitchen filled with the delightful scent of melting butter and coconut, I stumbled upon a recipe that whisks me away to the Hawaiian shores: Butter Mochi! This unique cake combines the soft, chewy texture of traditional mochi with a rich, tropical coconut flavor that’s simply irresistible. The best part? This Tropical Butter Mochi Cake is not only gluten-free, but it also comes together with just a handful of ingredients, making it a perfect solution for anyone tired of fast food or looking for a sweet treat to serve at gatherings. Whether enjoyed warm or chilled, each bite is a comforting reminder of sun-soaked days and island vibes. Curious how to bring this taste of Hawaii right into your home? Let’s dive in!
Why is Butter Mochi so Special?
Texture: The unique combination of glutinous rice flour gives this cake a wonderfully chewy feel that melts in your mouth, making it a delight for texture lovers.
Tropical Flavor: With rich coconut notes from both coconut cream and milk, each bite transports you to a serene Hawaiian beach, leaving you craving more.
Simple & Straightforward: This recipe is easy to follow, requiring only basic kitchen skills—perfect for those wanting to impress without the fuss!
Gluten-Free Delight: Enjoy a sweet treat that’s completely gluten-free, making it suitable for gluten-sensitive friends and family, ensuring everyone can indulge.
Crowd-Pleaser: Whether you’re making it for a casual family gathering or a special occasion, this cake is sure to become a fan favorite that leaves everyone asking for seconds! Pair it with fresh fruit for a delightful contrast, just like with Texas Roadhouse Butter for an added tropical touch.
Butter Mochi Ingredients
For the Batter
- Unsalted Butter – Melted butter adds richness and ensures a smooth batter.
- Granulated Sugar – Sweetness comes from sugar, contributing to the delightful texture.
- Evaporated Milk – Creaminess is achieved with evaporated milk; swap for a non-dairy milk for vegan butter mochi.
- Coconut Milk or Coconut Cream – This ingredient enhances the tropical flavor; opt for coconut cream for a denser cake.
- Vanilla Extract – Adds depth to the sweetness; feel free to use almond extract if you prefer a unique twist.
- Large Eggs – Essential for structure and moisture in your butter mochi cake.
- Glutinous Rice Flour (Mochiko) – This key ingredient provides the signature chewy texture; don’t substitute with regular rice flour.
- Baking Powder – Ensures the cake rises beautifully during baking.
Enjoy making your butter mochi and relish the tropical flavors that bring a taste of Hawaii right to your kitchen!
Step‑by‑Step Instructions for Butter Mochi
Step 1: Preheat the Oven
Begin by preheating your oven to 350°F (175°C). This ensures that the oven reaches the ideal temperature when you’re ready to bake your butter mochi, resulting in a perfectly set cake. While the oven heats, gather your ingredients and prepare your baking pan.
Step 2: Prepare the Baking Pan
Grease a 9 x 13-inch baking pan with a little butter or non-stick spray. Then, line the bottom with parchment paper for easy removal later. This preparation will help create a smooth surface when you slice your butter mochi and ensures it won’t stick to the pan.
Step 3: Mix the Butter and Sugar
In a large mixing bowl, combine the melted unsalted butter and granulated sugar. Using a whisk or electric mixer, blend them together until the mixture is thoroughly combined and appears smooth and glossy. This step lays the foundation for the rich flavor and texture of your butter mochi.
Step 4: Incorporate the Wet Ingredients
Next, add the evaporated milk, coconut milk, vanilla extract, and large eggs to the butter and sugar mixture. Mix everything together until fully combined, ensuring a creamy consistency without any lumps. This step enhances the tropical flavor profile of your butter mochi.
Step 5: Add the Dry Ingredients
Gradually fold in the glutinous rice flour and baking powder. Use a spatula to gently mix on low speed or by hand until the batter is smooth and everything is well incorporated. Avoid over-mixing, as this can affect the cake’s chewy texture, a key characteristic of butter mochi.
Step 6: Bake the Butter Mochi
Pour the prepared batter into your greased and lined baking pan, spreading it evenly. Place it in the preheated oven and bake for about 60 minutes. You’ll know it’s ready when a toothpick inserted in the center comes out clean, with a slightly golden top.
Step 7: Cool and Serve
Once baked, remove the butter mochi from the oven and let it cool in the pan for at least 15 minutes before transferring it to a wire rack. Allow it to cool completely before slicing it into squares. This cooling period is essential for achieving the perfect chewy texture in every bite.
Expert Tips for Butter Mochi
- Premeasure Ingredients: Gather and measure all ingredients beforehand to ensure a smooth baking process, keeping your butter mochi consistent every time.
- Avoid Over-Mixing: Gently fold the flour into the batter; over-mixing can lead to a denser texture, which is not the goal for this chewy delight.
- Cooling Time Matters: Allow the butter mochi to cool completely before slicing. This step is crucial to achieve that wonderfully chewy consistency.
- Check Bake Time: Ovens may vary, so check for doneness a few minutes early; a toothpick should come out clean, not wet.
- Storing for Freshness: Keep the leftovers in an airtight container at room temperature. Refrigeration can change the delightful chewy texture of your butter mochi.
Storage Tips for Butter Mochi
Room Temperature: Store your butter mochi in an airtight container at room temperature for up to 2 days to maintain its chewy texture and delicious flavor.
Fridge: If you want to extend its freshness, refrigerate for up to 5 days. However, avoid chilling if you prefer to keep that delightful chewiness.
Freezer: For longer storage, wrap slices in plastic wrap and place them in an airtight container. Butter mochi can be frozen for up to 3 months.
Reheating: To enjoy this tropical delight after freezing, simply thaw in the fridge overnight and warm in the microwave for about 10-15 seconds before serving.
Make Ahead Options
These Butter Mochi squares are perfect for meal prep enthusiasts looking to save time during busy weeknights! You can prepare the batter up to 24 hours in advance by mixing all the ingredients (just remember to refrigerate it to maintain freshness). The unique chewy texture of the butter mochi can be preserved by ensuring it’s tightly covered to prevent it from drying out. When you’re ready to bake, simply pour the batter into your greased pan and follow the baking instructions as usual. This method allows you to enjoy a delightful Hawaiian treat without much fuss, giving you restaurant-quality results with minimal effort!
Butter Mochi Variations & Substitutions
Feel free to let your culinary imagination run wild and make this butter mochi your own!
-
Matcha Twist: Add 2-3 teaspoons of matcha powder for a delightful green tea flavor. The earthy tones of matcha beautifully complement the sweetness of the cake.
-
Chocolate Chip Delight: Fold in semi-sweet chocolate chips to introduce a rich, sweet contrast to the creamy coconut base. Everyone loves a chocolate surprise!
-
Tropical Fruit Fusion: Toss in diced mango or pineapple for a fruity explosion. It brings a refreshing sweetness that’ll have you dreaming of sandy beaches.
-
Nutty Addition: Stir in chopped macadamia nuts or almonds for an added crunch. This variation provides a textural contrast and a nutty depth of flavor that pairs wonderfully with the coconut.
-
Coconut Cream Upgrade: Use all coconut cream instead of coconut milk for a richer, denser cake. It amplifies that tropical taste and gives a luscious mouthfeel.
-
Spicy Kick: Add a pinch of cayenne pepper for a gentle heat. This unexpected twist creates a delightful contrast to the sweetness, perfect for adventurous eaters.
-
Vanilla Bean Elegance: Substitute vanilla extract with fresh vanilla bean for a gourmet touch. The tiny specks of vanilla will make your butter mochi look and taste exquisite, just like a luscious French Butter Cake.
-
Vegan Version: For a dairy-free option, swap evaporated milk with almond milk and replace eggs with flaxseed eggs. This way, everyone can enjoy the tropical goodness of butter mochi without any animal products!
Feel free to explore these delightful variations, and if you’re craving more sweet treats later, consider trying the delightful Peanut Butter Blossoms or a savory delight like Garlic Butter Fettucine to keep your taste buds dancing!
What to Serve with Tropical Butter Mochi Cake
Indulge in the comforting flavors of Hawaii while crafting the perfect meal around this exquisite treat!
- Tropical Fruit Salad: Fresh mango, pineapple, and kiwi bring a bright, juicy contrast to the chewy mochi. The vibrant colors and flavors create a delightful medley.
- Coconut Whipped Cream: This airy topping adds a touch of sweetness and a creamy texture that enhances the coconut flavor in the butter mochi. Perfect for those who love rich, velvety desserts.
- Ice Cream Delight: Pair your butter mochi with a scoop of vanilla or coconut ice cream for a delightful temperature contrast. The cold creaminess offsets the mochi’s warm, chewy goodness beautifully.
- Hibiscus Iced Tea: A refreshing drink with floral notes that complement the cake’s tropical essence. Serve it chilled for that extra layer of relaxation while enjoying your dessert.
- Mochi Sundae: Elevate this classic dessert by layering cubes of butter mochi with scoops of ice cream, fresh fruit, and drizzles of chocolate sauce. It’s playful and inviting!
- Pineapple Upside-Down Cake: This nostalgic dessert echoes the island vibes and its golden caramelized pineapple pairs harmoniously with butter mochi. A delightful homage to tropical flavors!
- Coconut Macaroons: Serve these chewy, sweet delights alongside your butter mochi for an all-out coconut celebration. Texturally similar but distinctly delicious!
- Honey-Lime Drizzle: Create a zesty topping by mixing honey and fresh lime juice. Drizzle it over fruit or directly on your butter mochi for a sweet-tart contrast.
- Mai Tai Mocktail: Enjoy this non-alcoholic twist on the classic cocktail, bursting with tropical flavors that echo the essence of butter mochi, perfect for a festive touch.
Butter Mochi Recipe FAQs
How do I select the right ripeness of ingredients for Butter Mochi?
Absolutely! Ensure your eggs are fresh and at room temperature for optimal mixing. For the best flavor, use high-quality coconut milk or cream, which should be rich and without dark spots. If you’re using evaporated milk, check the expiration date to ensure freshness, as old dairy can negatively impact your cake.
What’s the best way to store Butter Mochi?
To keep your Butter Mochi fresh, store it in an airtight container at room temperature for up to 2 days. If you want it to last longer, refrigerate it for up to 5 days, but be aware that chilling may make it less chewy, as the texture could change slightly.
Can I freeze Butter Mochi, and if so, how?
Yes, you can! To freeze Butter Mochi, first allow it to cool completely. Then, slice the cake into squares and individually wrap each piece in plastic wrap. Place these wrapped portions in an airtight container or freezer-safe bag and freeze for up to 3 months. When you’re ready to enjoy, thaw in the fridge overnight and warm in the microwave for 10-15 seconds before serving to regain that delightful chew.
What if my Butter Mochi doesn’t rise properly?
If your Butter Mochi doesn’t rise as expected, there are a couple of things to check. Ensure your baking powder is fresh; an old leavening agent may lose its potency. Also, be cautious not to over-mix the batter after adding glutinous rice flour, as this can lead to a denser texture. Quick checks with a toothpick inserted into the center of the cake will help ensure it rises appropriately and is baked through.
Is Butter Mochi suitable for people with allergies?
While Butter Mochi is gluten-free, it does contain eggs and dairy. For those with egg allergies, I recommend using a flaxseed egg (1 tablespoon ground flaxseed mixed with 2.5 tablespoons of water, let sit for a few minutes to thicken) as a replacement. For a dairy-free version, use non-dairy milk alternatives, such as almond or oat milk, and ensure your butter is substituted with a plant-based version. Always double-check ingredient labels if sharing with others who have allergies.
Perfectly Chewy Butter Mochi: A Tropical Delight at Home
Ingredients
Equipment
Method
- Preheat your oven to 350°F (175°C).
- Grease a 9 x 13-inch baking pan and line the bottom with parchment paper.
- In a large mixing bowl, combine the melted butter and sugar until smooth and glossy.
- Add the evaporated milk, coconut milk, vanilla extract, and eggs. Mix until fully combined.
- Fold in glutinous rice flour and baking powder until smooth, avoiding over-mixing.
- Pour the batter into the prepared pan and bake for about 60 minutes, until a toothpick comes out clean.
- Let cool in the pan for at least 15 minutes before transferring to a wire rack.
Leave a Reply