
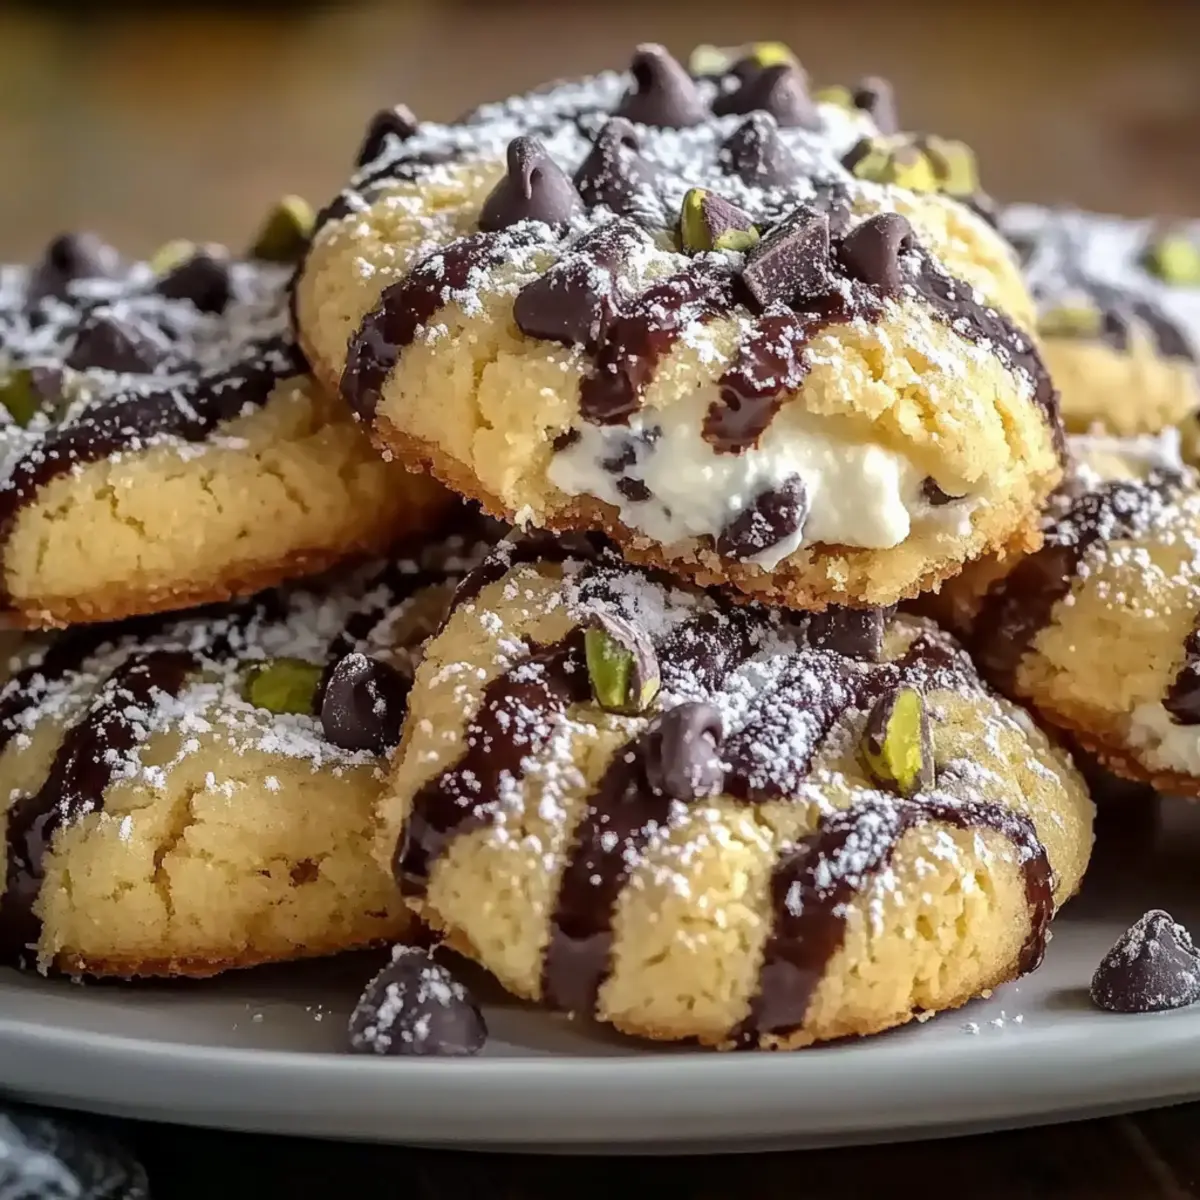
The kitchen filled with the warm, sweet scent of nostalgia as I pulled my first batch of Cannoli Cookies from the oven. These delightful treats marry the classic Italian pastry with the simple joy of homemade cookies, creating a unique indulgence that’s both easy to make and hard to resist. With a crispy exterior and a creamy ricotta filling punctuated by chocolate chips, these Cannoli Cookies are the perfect answer to your cravings, making them a hit at family gatherings or cozy afternoons at home. Plus, the quick preparation means more time to enjoy them with your loved ones! What exciting variations could be made to these flavorful bites? Let’s dive in!

Why are Cannoli Cookies so beloved?
Sweet, Nostalgic Flavor: Each bite delivers a delightful blend of creamy ricotta and rich chocolate, reminiscent of cherished Italian desserts.
Quick Preparation: With minimal steps, you’ll have these cookies ready to enjoy in under 30 minutes!
Versatile Delight: Whether you’re adding dried fruit or drizzling chocolate glaze, the options for customization are endless.
Family Favorite: Their unique taste is sure to impress friends and family, making them a must-have for gatherings or celebrations.
Perfect Pairing: Serve them alongside coffee or tea, just like traditional Italian desserts, for an authentic experience. For more sweet inspirations, check out our Maple Cinnamon Cookies that are sure to please as well!
Cannoli Cookies Ingredients
• Dive into the delightful flavors of Cannoli Cookies with these essential ingredients!
For the Cookie Dough
- All-Purpose Flour – Provides essential structure; can be substituted with gluten-free flour for a gluten-free version.
- Granulated Sugar – Adds sweetness and moisture; coconut sugar is a lower glycemic index option to consider.
- Large Egg – Binds the ingredients and adds richness; a flax egg (1 tablespoon flaxseed meal + 2.5 tablespoons water) is a great vegan alternative.
- Vanilla Extract – Enhances the sweetness and depth of flavor; opt for pure vanilla extract for the best results.
- Lemon Zest – Adds a fresh, bright note to the cookies; substitute with orange zest for a different twist.
For the Ricotta Filling
- Ricotta Cheese – The star that creates a creamy filling; make sure it’s well-drained to ensure proper texture.
- Mini Chocolate Chips – Offer a sweet surprise in the filling; dark chocolate chips can add a richer taste.
- Chopped Pistachios – Provide a delightful crunch and nutty flavor; feel free to substitute with chopped almonds or walnuts if desired.
For Dusting
- Powdered Sugar – Adds a beautiful dusting of sweetness for serving; it enhances the visual appeal of these delectable cookies.
Step‑by‑Step Instructions for Cannoli Cookies
Step 1: Preheat the Oven
Begin by preheating your oven to 350°F (175°C). Make sure your oven rack is in the center position to ensure even baking. While the oven heats, gather your ingredients and prepare your baking sheets by lining them with parchment paper for easy cleanup.
Step 2: Whisk Together Dry Ingredients
In a large mixing bowl, whisk together the all-purpose flour and granulated sugar until thoroughly combined. The mixture should be light and airy, without any lumps. This combination lays the foundation for your delicious Cannoli Cookies, so ensure everything is well-blended before moving on to the next step.
Step 3: Prepare the Ricotta Mixture
In a separate bowl, mix together the well-drained ricotta cheese, large egg, vanilla extract, and lemon zest. Stir until the mixture is smooth and creamy, creating a luscious filling for your cookies. This step is essential in achieving that delightful blend reminiscent of traditional cannoli.
Step 4: Combine the Mixtures
Gradually add the dry flour and sugar mixture to the ricotta mixture, stirring gently until a soft dough forms. Avoid overmixing to maintain the tender texture of your Cannoli Cookies. Once combined, the dough should feel slightly sticky but manageable, ready for resting.
Step 5: Rest the Dough
Cover the dough with plastic wrap or a clean kitchen towel and let it rest for 30 minutes at room temperature. This resting period allows the gluten to relax, making it easier to roll out the dough. Use this time to clean up your workspace or prepare any toppings.
Step 6: Roll Out the Dough
After the resting period, lightly flour your work surface and roll out the dough to about ¼ inch thick. Using a sharp knife or a pizza cutter, cut the dough into 2×3 inch rectangles. Take a moment to create uniform pieces, ensuring even baking and consistency in size for your Cannoli Cookies.
Step 7: Prepare the Filling
In a separate bowl, combine any remaining ricotta, mini chocolate chips, and chopped pistachios for your flavorful filling. Mix well until all the ingredients are evenly distributed. This rich filling is the star of your Cannoli Cookies, adding creaminess and delightful crunch.
Step 8: Fill the Dough Rectangles
Place a spoonful of the ricotta filling onto the center of each dough rectangle. Carefully fold each rectangle in half to create a pocket and seal the edges tightly by pressing them together. This step ensures that the filling stays inside while baking, resulting in perfect Cannoli Cookies.
Step 9: Bake the Cookies
Transfer the filled cookies to the prepared baking sheets, ensuring they’re spaced a few inches apart. Bake in the preheated oven for 15-18 minutes, or until they turn golden brown. Keep a close eye on them to prevent over-browning, as the visual cue is key in creating that perfect cookie texture.
Step 10: Cool and Dust with Sugar
Once baked, remove the cookies from the oven and allow them to cool on wire racks for about 10 minutes. After they have cooled, dust generously with powdered sugar for a sweet finish. This final touch enhances the presentation of your Cannoli Cookies, making them even more tempting to enjoy.
Storage Tips for Cannoli Cookies
Room Temperature: Store your Cannoli Cookies in an airtight container at room temperature for up to 3 days to maintain their freshness and texture.
Fridge: If you prefer, you can refrigerate the cookies for up to 5 days. Just make sure they’re in a well-sealed container to prevent drying out.
Freezer: For longer storage, freeze Cannoli Cookies well-wrapped in plastic wrap or foil for up to a month. This keeps their flavors intact.
Reheating: Thaw frozen cookies at room temperature, or warm them briefly in the oven at 300°F (150°C) for a few minutes. Dust with powdered sugar before serving for that fresh-baked feel!
Cannoli Cookies Variations & Substitutions
Customize your Cannoli Cookies adventure by trying out these exciting variations that will keep your taste buds dancing!
- Gluten-Free: Substitute all-purpose flour with a 1:1 gluten-free flour blend for a deliciously inclusive treat.
- Dairy-Free: Use vegan cream cheese instead of ricotta; it yields a creamy filling without the dairy. Feel free to add a splash of vanilla to enhance flavor!
- Sugar-Free: Swap out granulated sugar with your favorite sweetener, like erythritol, to enjoy a guilt-free dessert without sacrificing sweetness.
- Flavor Burst: Incorporate spices like cinnamon or nutmeg into the dough for a warm, spicy twist that’s perfect for cozy gatherings. Trust me, it takes them to a whole new level!
- Nut-Free: Replace chopped pistachios with sunflower seeds for crunch without the nuts, ensuring a safe choice for allergy-friendly snacking.
- Chocolate Lovers: Drizzle with melted dark chocolate or even white chocolate for an elegant finish that pleases any chocoholic. The extra richness is simply irresistible!
- Fruity Surprise: Try adding dried fruits like cherries or apricots to the filling for a tart contrast that complements the sweet ricotta beautifully.
- Extra Zest: Upgrade the flavor profile by swapping lemon zest for orange zest for a vibrant, citrusy kick in each bite.
Wondering what else to bake? If you’re loving these sweets, don’t miss out on our delicious Maple Cinnamon Cookies that are perfect for any occasion!
Make Ahead Options
These Cannoli Cookies are perfect for meal prep enthusiasts! You can prepare the dough up to 24 hours in advance and store it wrapped tightly in plastic wrap in the refrigerator to maintain its freshness. The creamy ricotta filling can also be prepared and kept in an airtight container for up to 3 days. When you’re ready to bake, simply take the dough and filling out, let them sit at room temperature for about 15 minutes, and then follow the rolling and baking instructions as usual. This way, you can enjoy freshly baked Cannoli Cookies with minimal effort, saving time in your busy schedule while keeping them just as delicious!
Expert Tips for Cannoli Cookies
Perfect Ricotta: Use well-drained ricotta to prevent soggy cookies, ensuring a delightful texture in each Cannoli Cookie.
Gentle Mixing: Avoid overmixing the dough; this keeps it tender and light, allowing those beautiful flavors to shine through.
Egg Technique: Beat the egg until frothy for a lighter dough that puffs beautifully during baking.
Baking Watch: Keep an eye on the baking time to prevent over-browning; golden edges mean perfectly done cookies.
Cool Properly: Allow the cookies to cool on wire racks; this helps maintain crispness while allowing the filling to set properly.
What to Serve with Cannoli Cookies
Indulge in a delightful experience that elevates your Cannoli Cookies into a full, memorable meal.
- Rich Espresso: The strong, bold flavor of espresso perfectly balances the sweet creaminess of the cannoli cookies, creating a classic Italian duo.
- Fresh Berries: A mix of strawberries, blueberries, and raspberries adds a refreshing contrast, enhancing the sweetness with vibrant flavors and textures.
- Pistachio Gelato: Creamy pistachio gelato echoes the nutty notes from the cookies, providing a luxurious finish to your dessert spread.
- Chocolate Sauce: A drizzle of rich chocolate sauce creates an indulgent touch that takes your Cannoli Cookies to the next level of decadence.
Pairing these treats with a smooth dessert wine or a refreshing glass of milk can also enhance the overall experience, making your sweet moment even more delightful.
- Herbal Tea: A soothing chamomile or mint tea offers a relaxing antidote to the sugar, adding warmth and comfort to your dessert time.
- Zesty Lemon Sorbet: The bright, tangy flavor of lemon sorbet refreshes the palate after each creamy bite, creating a balanced tasting journey.
Cannoli Cookies Recipe FAQs
What type of ricotta cheese should I use for Cannoli Cookies?
Absolutely! It’s crucial to use well-drained ricotta cheese to achieve the perfect texture in your Cannoli Cookies. Look for ricotta that is labeled as whole milk for the creamiest filling. If it comes in a tub, place it in a fine-mesh strainer lined with cheesecloth for about 30 minutes to remove excess moisture, ensuring your dough and filling won’t turn soggy.
How can I store Cannoli Cookies to keep them fresh?
You can store your Cannoli Cookies in an airtight container at room temperature for up to 3 days. For a longer shelf life, consider refrigerating them, where they’ll stay fresh for up to 5 days. Just remember to seal them well to prevent drying out. If you want to store them for even longer, freeze the cookies in plastic wrap or foil for up to a month. Thaw at room temperature and dust with powdered sugar before serving!
Can I freeze Cannoli Cookies? If so, how?
Yes, you can freeze Cannoli Cookies! To do this, allow the baked cookies to cool completely. Then, wrap each cookie individually in plastic wrap or aluminum foil to protect them from freezer burn. Place all wrapped cookies in a sealable freezer bag or airtight container, and they’ll stay fresh for up to 3 months. To enjoy, simply thaw at room temperature or warm in the oven without over-baking.
What if my dough is too sticky?
If you find that your dough is too sticky to handle, don’t worry! Simply sprinkle a little flour on your work surface and on your hands while forming the rectangles. Additionally, you can chill the dough in the refrigerator for about 15 minutes. This will make it easier to roll out while keeping that delectable flavor intact.
Are Cannoli Cookies safe for people with nut allergies?
Absolutely! To make Cannoli Cookies nut-free, you can easily omit the chopped pistachios from the filling. You might also want to steer clear of any chocolate that may be processed in facilities that handle nuts if you’re concerned about cross-contamination. This way, everyone can enjoy these delicious treats without worry!
What are some variations I can try with the ingredients?
Very! You can get creative with your Cannoli Cookies by experimenting with fillings. Instead of mini chocolate chips, consider adding dried fruits like cherries or cranberries for a twist. You can also mix in different spices such as cinnamon or nutmeg into the dough for added warmth and flavor. Drizzling melted chocolate on top or incorporating a glaze can elevate them even further!
Homemade Cannoli Cookies: Sweet, Creamy, and Irresistible
Ingredients
Equipment
Method
- Preheat your oven to 350°F (175°C) and prepare baking sheets with parchment paper.
- Whisk together the flour and sugar in a large mixing bowl until light and airy.
- In a separate bowl, mix the ricotta, egg, vanilla, and lemon zest until smooth.
- Gradually add the dry mixture to the ricotta mixture, stirring gently until a soft dough forms.
- Cover the dough and let it rest for 30 minutes at room temperature.
- Roll out the dough to about ¼ inch thick and cut into 2x3 inch rectangles.
- Combine remaining ricotta, chocolate chips, and pistachios for the filling.
- Place a spoonful of filling on each dough rectangle, fold, and seal the edges.
- Bake the filled cookies for 15-18 minutes, or until golden brown.
- Cool for 10 minutes and dust with powdered sugar before serving.
Leave a Reply