
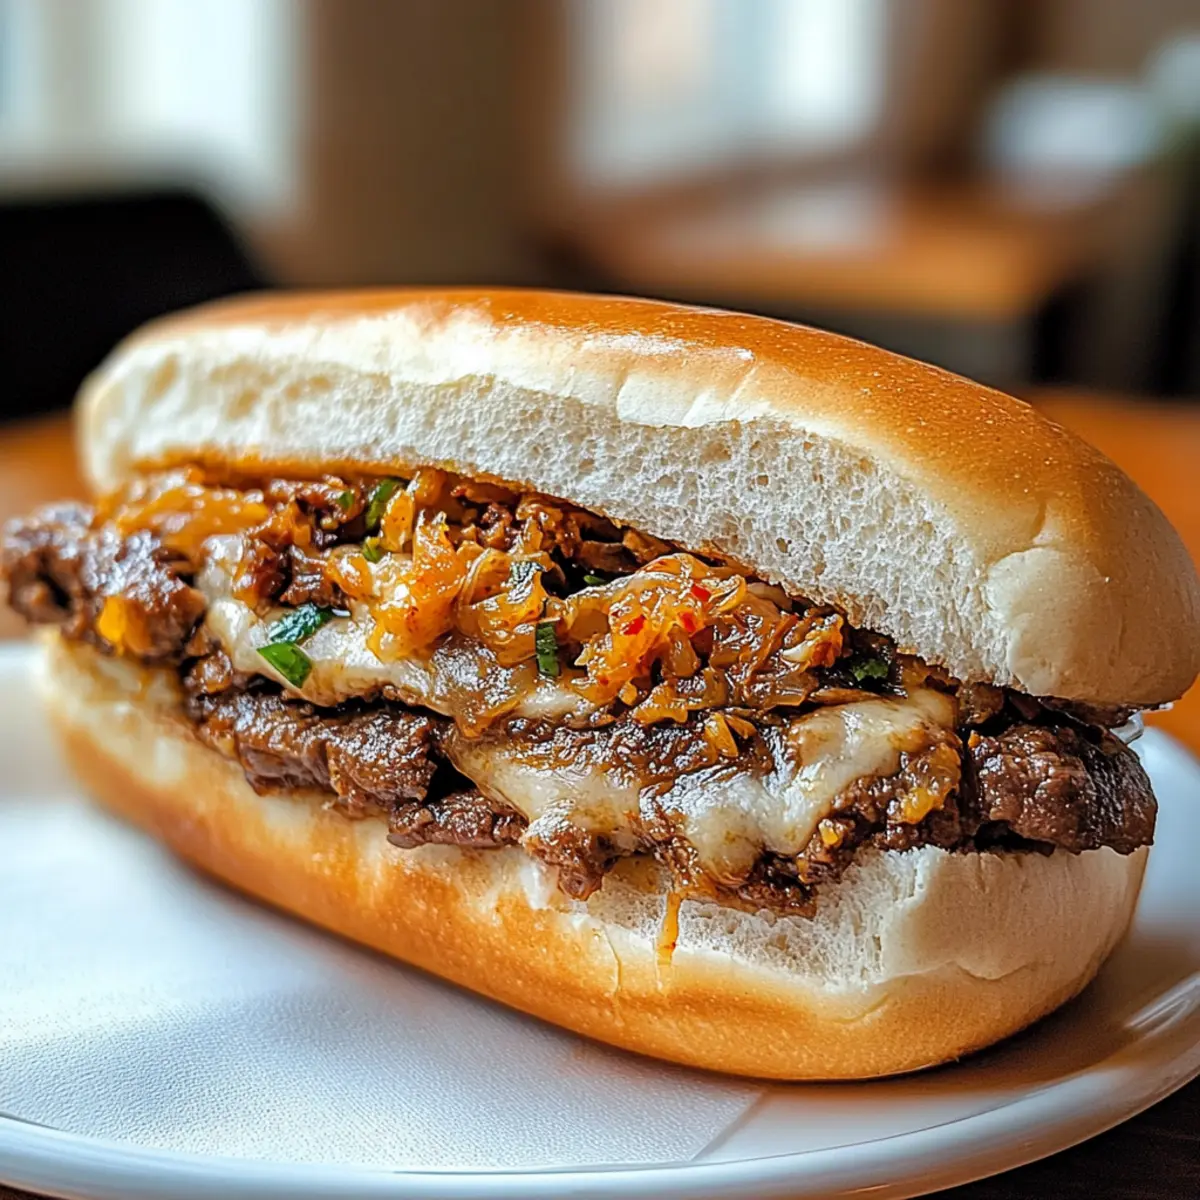
As I stood in my kitchen, the rich aroma of marinated beef filled the space, igniting memories of cozy dinners and culinary adventures. This is where the magic happens: I’m about to make my beloved Kimchi Bulgogi Cheesesteak. This dish is not just a fusion of flavors—it’s an experience that combines the savory warmth of Korean bulgogi with the comforting essence of a classic cheesesteak. With just a handful of ingredients, you can whip up a meal that’s both quick to prepare and highly customizable; swap in chicken or tofu as desired! Whether you’re hosting friends for game day or looking to impress at dinner, this recipe offers both satisfying taste and a touch of creativity. Have you ever tried combining unexpected ingredients to create something truly mouthwatering? Let’s dive into the details and make this unforgettable cheesesteak together!
Why is Kimchi Bulgogi Cheesesteak a Must-Try?
Flavor Explosion: This Kimchi Bulgogi Cheesesteak delivers a vibrant fusion of Korean and American flavors, with marinated beef and spicy kimchi dancing together in perfect harmony.
Quick & Easy: Preparing this dish is a breeze, making it ideal even for busy weeknights.
Endless Customization: Feel free to switch out the beef for chicken or tofu, catering to your taste and dietary needs.
Crowd-Pleaser: Perfect for gatherings, this recipe will leave your guests asking for seconds!
Texture Contrast: Enjoy a delightful play of crispy hoagie rolls, tender beef, and creamy melted cheese with every bite.
Memorable Meals: This dish is sure to be a cherished addition to your cooking repertoire, perfect for game days or any occasion.
Kimchi Bulgogi Cheesesteak Ingredients
For the Beef Marinade
- Beef Sirloin – The heart of this dish that offers a wonderful, juicy flavor; swap for chicken or tofu for a lighter option.
- Soy Sauce – Imparts a rich umami flavor essential to the marinade; use tamari for a gluten-free version.
- Sesame Oil – Adds a nutty aroma that elevates the overall taste; choose canola oil for a more neutral flavor if needed.
- Minced Garlic – A fundamental flavor booster in this recipe; garlic powder can substitute at a ratio of 1/4 tsp for each clove.
- Sugar – Helps balance the tanginess from the kimchi; honey or agave syrup can be a great natural sweetener alternative.
For the Vegetables
- Onion & Bell Peppers – Sautéed to bring out their sweetness and add texture; feel free to toss in jalapeños for an extra kick or any vegetables on hand.
- Kimchi – The star ingredient that contributes its signature spicy and fermented flavor; pickled veggies can provide a different yet tantalizing zing.
For Assembling
- Hoagie Rolls – Provide the structural base for this cheesesteak; opt for gluten-free bread or lettuce wraps for a low-carb option.
- Cheese (Provolone or American) – Adds a delightful creaminess that melds with the other flavors; mozzarella works for a milder taste, while Pepper Jack adds a spicy twist.
Let’s gather these ingredients and get ready to create this unforgettable Kimchi Bulgogi Cheesesteak that’s bursting with flavor!
Step‑by‑Step Instructions for Kimchi Bulgogi Cheesesteak
Step 1: Prepare Ingredients
Begin by thinly slicing the beef sirloin against the grain for tenderness, then chop the onion and bell peppers into bite-sized pieces. Organize your ingredients and gather a large mixing bowl for marinating the beef. This preparation step ensures everything is ready for a smooth cooking process and allows you to focus on the flavors of your delicious Kimchi Bulgogi Cheesesteak.
Step 2: Marinate Beef
In a large mixing bowl, combine soy sauce, sesame oil, minced garlic, and sugar, stirring until the sugar dissolves. Add the sliced beef sirloin, making sure it’s thoroughly coated in the marinade. Allow it to marinate for at least 15 minutes at room temperature to infuse the meat with rich flavors, enhancing the overall taste of your Kimchi Bulgogi Cheesesteak.
Step 3: Sauté Veggies
Heat a tablespoon of vegetable oil in a large skillet over medium-high heat. Once hot, add the chopped onion and bell peppers, stirring occasionally. Sauté for about 5 minutes, or until the vegetables are tender and slightly caramelized, turning a lovely golden color. This step adds a rich sweetness that complements the savory beef in your cheesesteak.
Step 4: Cook Beef
Add the marinated beef to the skillet with the sautéed vegetables once they are tender. Spread the beef in an even layer, cooking for about 5 minutes. Stir occasionally to ensure even browning and to allow the beef to soak up the flavors from the vegetables and the marinade, creating the delicious heart of your Kimchi Bulgogi Cheesesteak.
Step 5: Add Kimchi
After the beef is nicely browned, stir in the chopped kimchi, mixing well with the beef and veggies. Allow this mixture to cook for an additional 2 minutes, letting the kimchi heat through and its flavors meld together. This vital step infuses your Kimchi Bulgogi Cheesesteak with the signature spicy and tangy kick that makes it unforgettable.
Step 6: Assemble Cheesesteaks
Prepare your toasted hoagie rolls by laying them out on a baking sheet. Generously fill each roll with the bulgogi mixture, ensuring a hearty portion in each. Top each cheesesteak with slices of your desired cheese, allowing it to melt beautifully when broiled. This assembly brings everything together for the ultimate Kimchi Bulgogi Cheesesteak experience.
Step 7: Broil to Melt Cheese
Preheat your broiler to high. Place the loaded hoagie rolls under the broiler for about 2 minutes or until the cheese is melted and bubbly. Keep a close watch during this process to prevent burning. The melted cheese creates a gooey finish that enhances the delightful flavors of your Kimchi Bulgogi Cheesesteak.
Step 8: Serve
Once the cheese is beautifully melted, remove the cheesesteaks from the oven. Optionally, drizzle a bit of soy sauce over the top for extra flavor. Slice them in half for easy serving, and enjoy your homemade Kimchi Bulgogi Cheesesteak fresh and warm. Each bite will be a flavorful adventure you won’t forget!
Make Ahead Options
These Kimchi Bulgogi Cheesesteaks are perfect for busy weeknights and meal prep enthusiasts! You can marinate the beef sirloin up to 24 hours in advance, allowing the flavors to meld beautifully. Additionally, sauté the onion and bell peppers, letting them cool before refrigerating in an airtight container for up to 3 days. When you’re ready to serve, simply cook the marinated beef, mix in the kimchi, and assemble the cheesesteaks. Broil the assembled rolls for about 2 minutes until the cheese is melted and bubbly, bringing you effortless, delicious results with minimal effort!
Expert Tips for Kimchi Bulgogi Cheesesteak
-
Perfect Marinade: Marinate the beef for at least 15 minutes to achieve maximum flavor absorption and tenderness in your Kimchi Bulgogi Cheesesteak.
-
Use Quality Ingredients: Opt for a high-quality sesame oil for a richer, nuttier flavor, enhancing the overall taste profile of your dish.
-
Broil with Care: Keep a close eye while broiling to prevent burning the cheese; you want it perfectly gooey, not charred.
-
Don’t Rush Veggies: Sauté the onions and bell peppers until they are properly caramelized—they add an essential sweetness that balances the spiciness.
-
Customize Wisely: Feel free to mix up the cheeses or add extra ingredients like jalapeños, but be mindful of balancing flavors to maintain the dish’s integrity.
-
Fresh Kimchi Matters: Use good-quality kimchi; it’s the star of the dish, delivering that signature spicy kick and fermentation flavor to your Kimchi Bulgogi Cheesesteak.
Storage Tips for Kimchi Bulgogi Cheesesteak
-
Fridge: Store leftover Kimchi Bulgogi Cheesesteaks in an airtight container for up to 3 days. Ensure they are completely cooled before sealing to preserve freshness.
-
Freezer: For longer storage, wrap each cheesesteak tightly in foil or plastic wrap and freeze for up to 2 months. Thaw overnight in the fridge before reheating.
-
Reheating: To retain the cheesesteak’s crispy texture, reheat in a preheated oven at 350°F for about 10 minutes. Alternatively, use an air fryer for an even quicker method with optimal crispiness.
-
Serving: If you have any extra ingredients like kimchi or toppings, add them fresh after reheating for an even more vibrant flavor in each bite!
Kimchi Bulgogi Cheesesteak Variations
Feel free to play around with this recipe and make it your own, adding your favorite flavors and ingredients!
-
Chicken Option: Substitute beef with sliced chicken breast for a lighter, leaner dish. It’s just as delicious and perfect for a healthy twist.
-
Tofu Delight: For a vegetarian version, swap beef for firm tofu. Marinate and sauté it the same way to get a delightful texture!
-
Extra Heat: Add jalapeños or serrano peppers to the sauté for an extra kick. This will bring an exciting layer of spice to your cheesesteak!
-
Creamy Avocado: Top your cheesesteak with fresh avocado slices. Their creamy texture will add richness to the spicy and savory filling, creating a delectable balance.
-
Cheese Variety: Experiment with different cheeses like smoky gouda or sharp cheddar. Each brings its unique flavor profile that can change the whole dish!
-
Veggie Boost: Toss in some sautéed mushrooms or zucchini along with the onions and bell peppers. These veggies add wonderful earthiness and additional textures to your cheesesteak.
-
Fruity Twist: Consider adding pineapple chunks in the last couple of minutes of cooking. The sweet and tangy notes will beautifully contrast with the savory savory flavors.
-
Saucy Finish: Drizzle with sriracha mayo or a spicy garlic sauce before serving. This little addition can elevate the flavor explosion to new heights!
Customize your Kimchi Bulgogi Cheesesteak with these ideas, and if you’re looking for more versatile recipes, you might also like to check out my Sweet and Spicy Korean Chicken or indulge in an easy Tofu Stir-Fry. Enjoy the beautiful adventure of exploring flavors!
What to Serve with Korean-Inspired Kimchi Bulgogi Cheesesteak
Elevate your dining experience with delightful sides that complement every savory bite of your cheesesteak.
-
Crispy Sweet Potato Fries: The natural sweetness and crunchiness of sweet potato fries offer a wonderful contrast to the savory flavors of the cheesesteak.
-
Light Cucumber Salad: This refreshing salad adds a cool, bright element that balances the spicy heat from the kimchi, perfect for cleansing your palate.
-
Pickled Vegetables: A delightful condiment, pickled veggies provide acidity and flavor that enhance the overall experience of your Kimchi Bulgogi Cheesesteak.
-
Creamy Coleslaw: The creamy texture and tangy flavor of coleslaw beautifully complement the tender beef, adding another layer of flavor and crunch.
-
Korean Rice Cakes: Soft and chewy, these rice cakes absorb sauces beautifully and provide a delightful textural contrast to the cheesesteak.
-
Craft Beer: Pair your meal with a crisp craft beer that echoes the umami flavors in the cheesesteak, making for a refreshing and satisfying drink choice.
Encourage your friends and family to mix and match these sides for a memorable meal that brings everyone to the table!
Kimchi Bulgogi Cheesesteak Recipe FAQs
What type of beef should I use for the Kimchi Bulgogi Cheesesteak?
Absolutely! I recommend using beef sirloin for its tenderness and savory flavor. If you’re looking for alternatives, chicken or tofu works beautifully, especially if you’re catering to different dietary preferences.
How should I store leftover Kimchi Bulgogi Cheesesteaks?
You can store your leftover cheesesteaks in an airtight container in the fridge for up to 3 days. Just make sure they’ve cooled down completely before putting them away to retain freshness.
Can I freeze Kimchi Bulgogi Cheesesteaks?
Yes, you can! Wrap each cheesesteak tightly in foil or plastic wrap and freeze them to preserve the flavors for up to 2 months. When you’re ready to enjoy, thaw overnight in the fridge and reheat in the oven at 350°F for about 10 minutes for best results.
What if my beef is tough after cooking?
If your beef doesn’t turn out as tender as expected, it could be due to under-marination or not slicing against the grain. For next time, ensure the beef is sliced thinly and marinated adequately—aiming for at least 15 minutes is key to achieving that melt-in-your-mouth texture.
Are there any allergy considerations I should be aware of with this recipe?
Definitely! This Kimchi Bulgogi Cheesesteak contains soy and sesame, which are common allergens. If you’re cooking for someone with allergies, consider using tamari instead of soy sauce for a gluten-free option, and substitute sesame oil with a different oil like canola for a neutral choice.
How can I customize my Kimchi Bulgogi Cheesesteak?
The more the merrier! Feel free to swap out beef for chicken or tofu, add jalapeños for a spicy kick, or try different cheeses like cheddar or gouda for a unique twist. Just remember to balance the flavors for the best experience!
Savor the Flavor: Easy Kimchi Bulgogi Cheesesteak Recipe
Ingredients
Equipment
Method
- Begin by thinly slicing the beef sirloin against the grain for tenderness, then chop the onion and bell peppers into bite-sized pieces.
- Organize your ingredients and gather a large mixing bowl for marinating the beef.
- In a large mixing bowl, combine soy sauce, sesame oil, minced garlic, and sugar, stirring until dissolved.
- Add the sliced beef sirloin, thoroughly coating it in the marinade.
- Allow to marinate for at least 15 minutes.
- Heat a tablespoon of vegetable oil in a large skillet over medium-high heat.
- Add the chopped onion and bell peppers, stirring occasionally for about 5 minutes.
- Add the marinated beef to the skillet and cook for about 5 minutes, stirring occasionally.
- Stir in the chopped kimchi and cook for an additional 2 minutes.
- Prepare toasted hoagie rolls on a baking sheet and fill each with the bulgogi mixture.
- Top each cheesesteak with slices of cheese.
- Preheat the broiler to high and place the loaded rolls under for about 2 minutes until cheese is melted.
- Remove from the oven, optionally drizzle with soy sauce, slice in half, and serve.
Leave a Reply